
Re-Sim Function
Re-Sim function has 2 major features as follows:
Record the Simulation process as a JSON file.
Play the recorded file just like you play the video.
This section explains how to record a simulation instance as a Re-Sim file (JSON), play the recorded file, and use related features.
File Format and the File Directory
Currently, we only support scenarios in JSON.
(OpenSCENARIO format will be supported shortly.)
Re-Sim is located under the Scenario File in the MORAI Simulator, with the Scenario File's situation serving as the starting environment for Re-Sim.
To activate the Re-Sim function, there should be more than 1 scenario file and replay file.
The Re-Sim Replay File is saved in the below directory and the file format is (.dat).
\MoraiLauncher_Win_Data\SaveFile/Scenario/{Map Name}/
GUI Overview: Re-Sim Manager
To run the Re-Sim, go to Edit > Scenario > Re-Sim Manager.
Re-Sim Manager button is not activated in the menu bar if the sensor is already spawned on the vehicle.
If the Re-Sim Manager button is not activated,
Press
F3key to access the Sensor window and check if there is any sensor spawned on the vehicle.If the sensor confirmed on the vehicle, delete it and go to Edit > Scenario > Re-Sim Manager again.
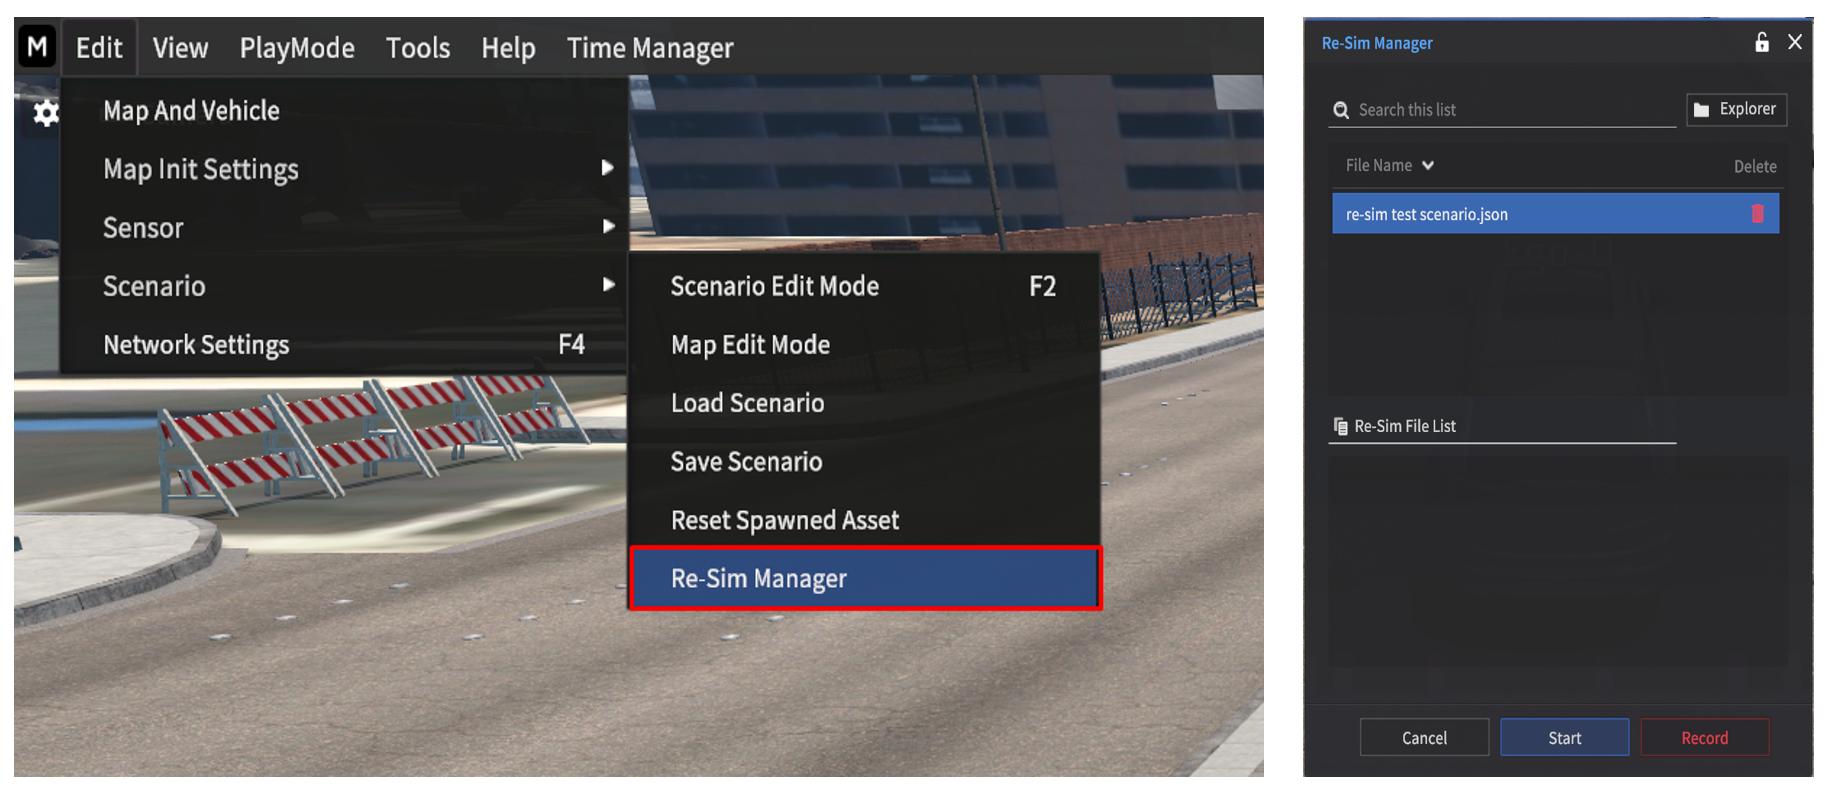
Record
For recording the Re-Sim File, select the Scenario File (JSON) and click the Record button.
When clicked Record button, Re-Sim Record window appears.
Click Build Scenario to get information about how to spawn and save the scenarios.
Start
Select the Re-Sim File you want to play, and click Start to load the selected Re-Sim File.
You can overlay the multiple Re-Sim Files at once.
If you want to overlay the multiple Re-Sim Files at once, Re-Sim Files should be created in the same Scenario File.
You can overlay up to 10 Replay Files (.dat).
Cancel
Close the Re-Sim Manager.
Record Simulation
Since the Re-Sim file (.dat) is located under the Scenario File (.json) in the MORAI Simulator, the Scenario File must be prepared in advance to save the Re-Sim file.
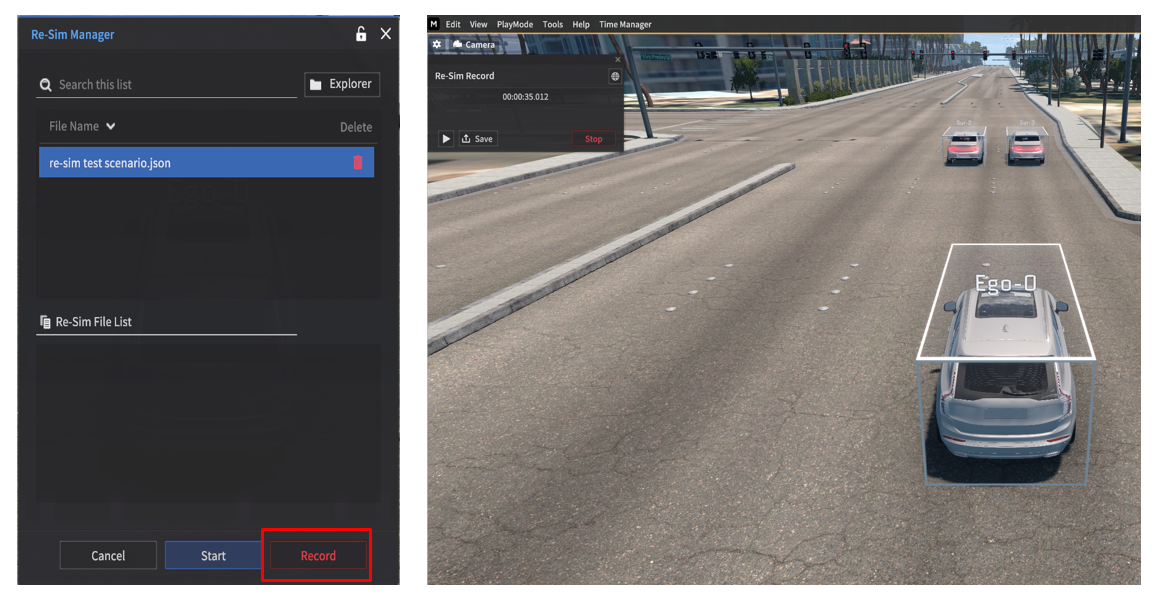
Select the Scenario File and click Record button in the Re-Sim Manager.
Scenario File is Loaded, and the Re-Sim Record window appears on the top left of the simulator.
At the moment, the simulator is in the Pause mode.
Click ▶ button to start the Re-Sim Record.
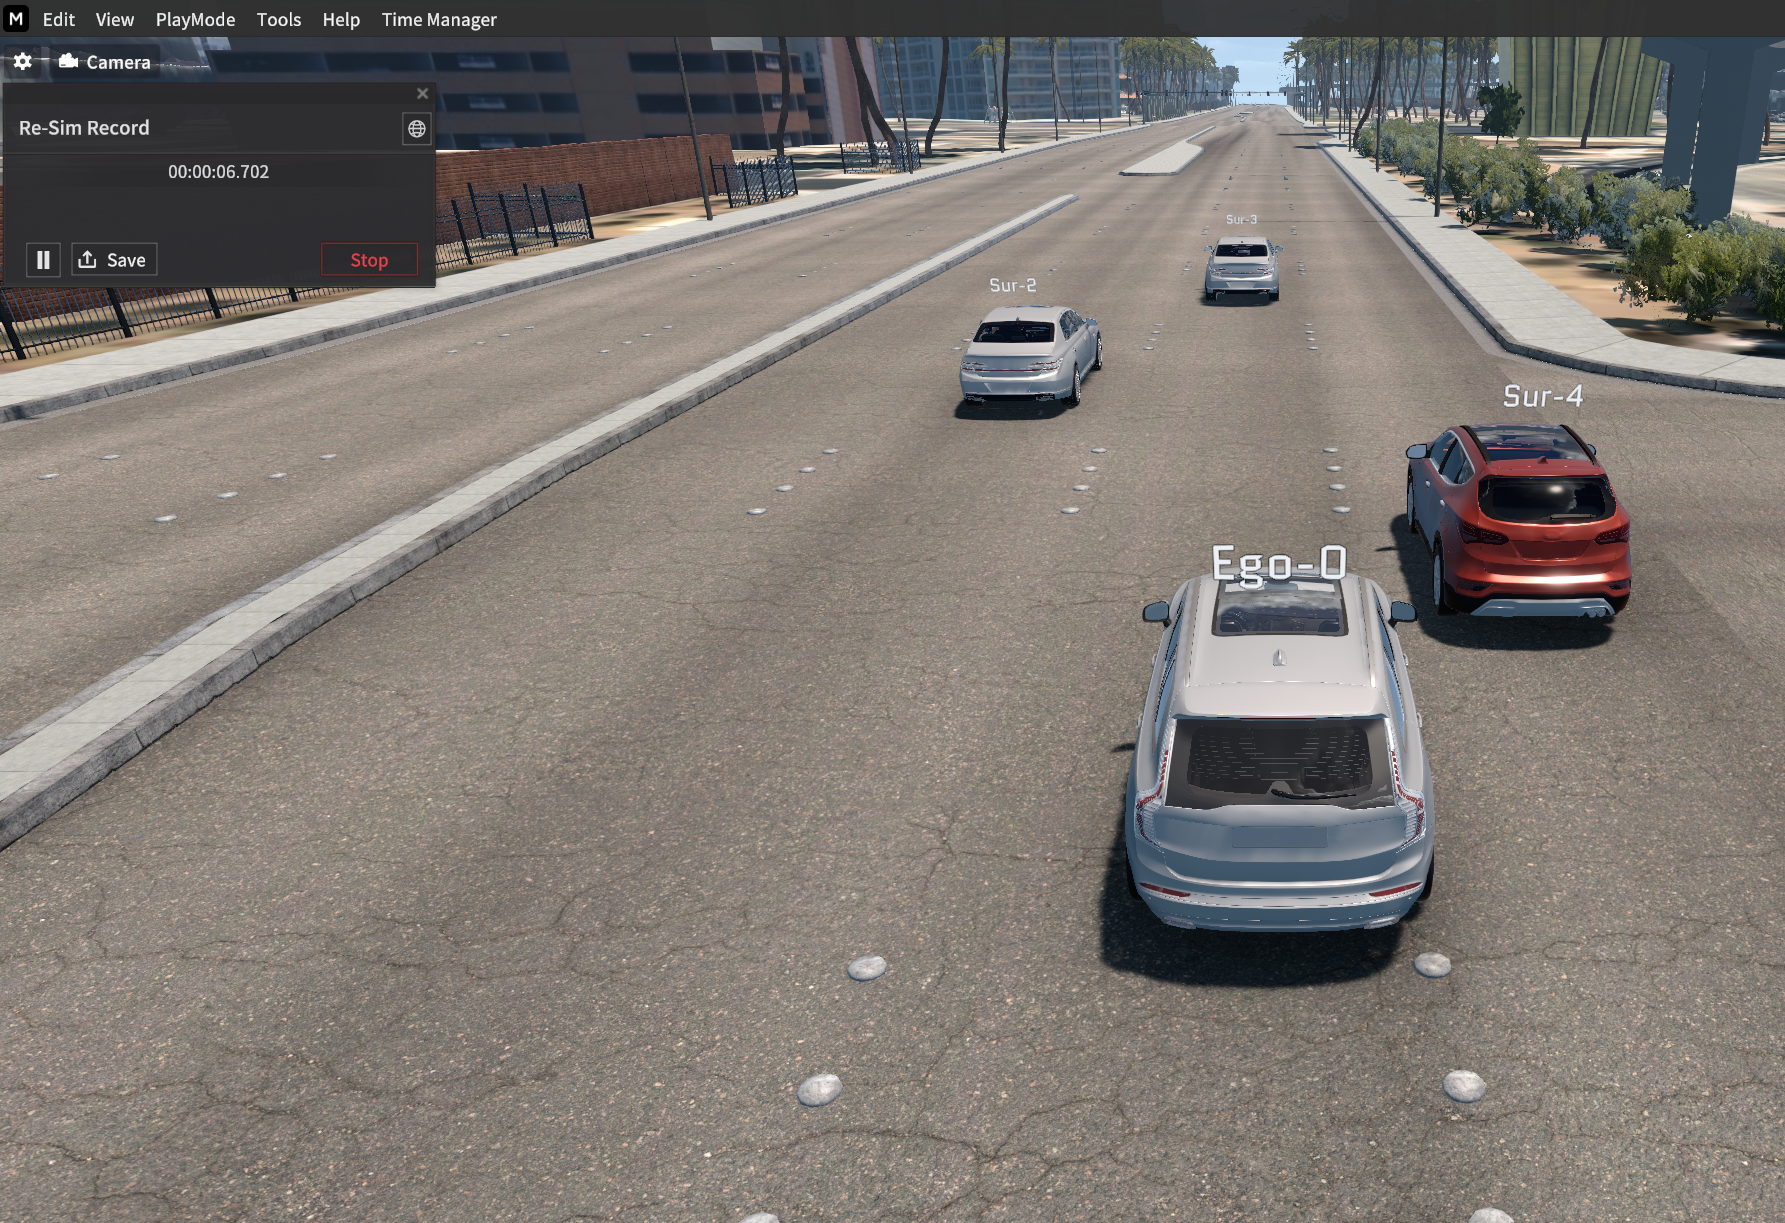
Clicking the ⏸ button stops the recording and puts the simulator into Pause mode.
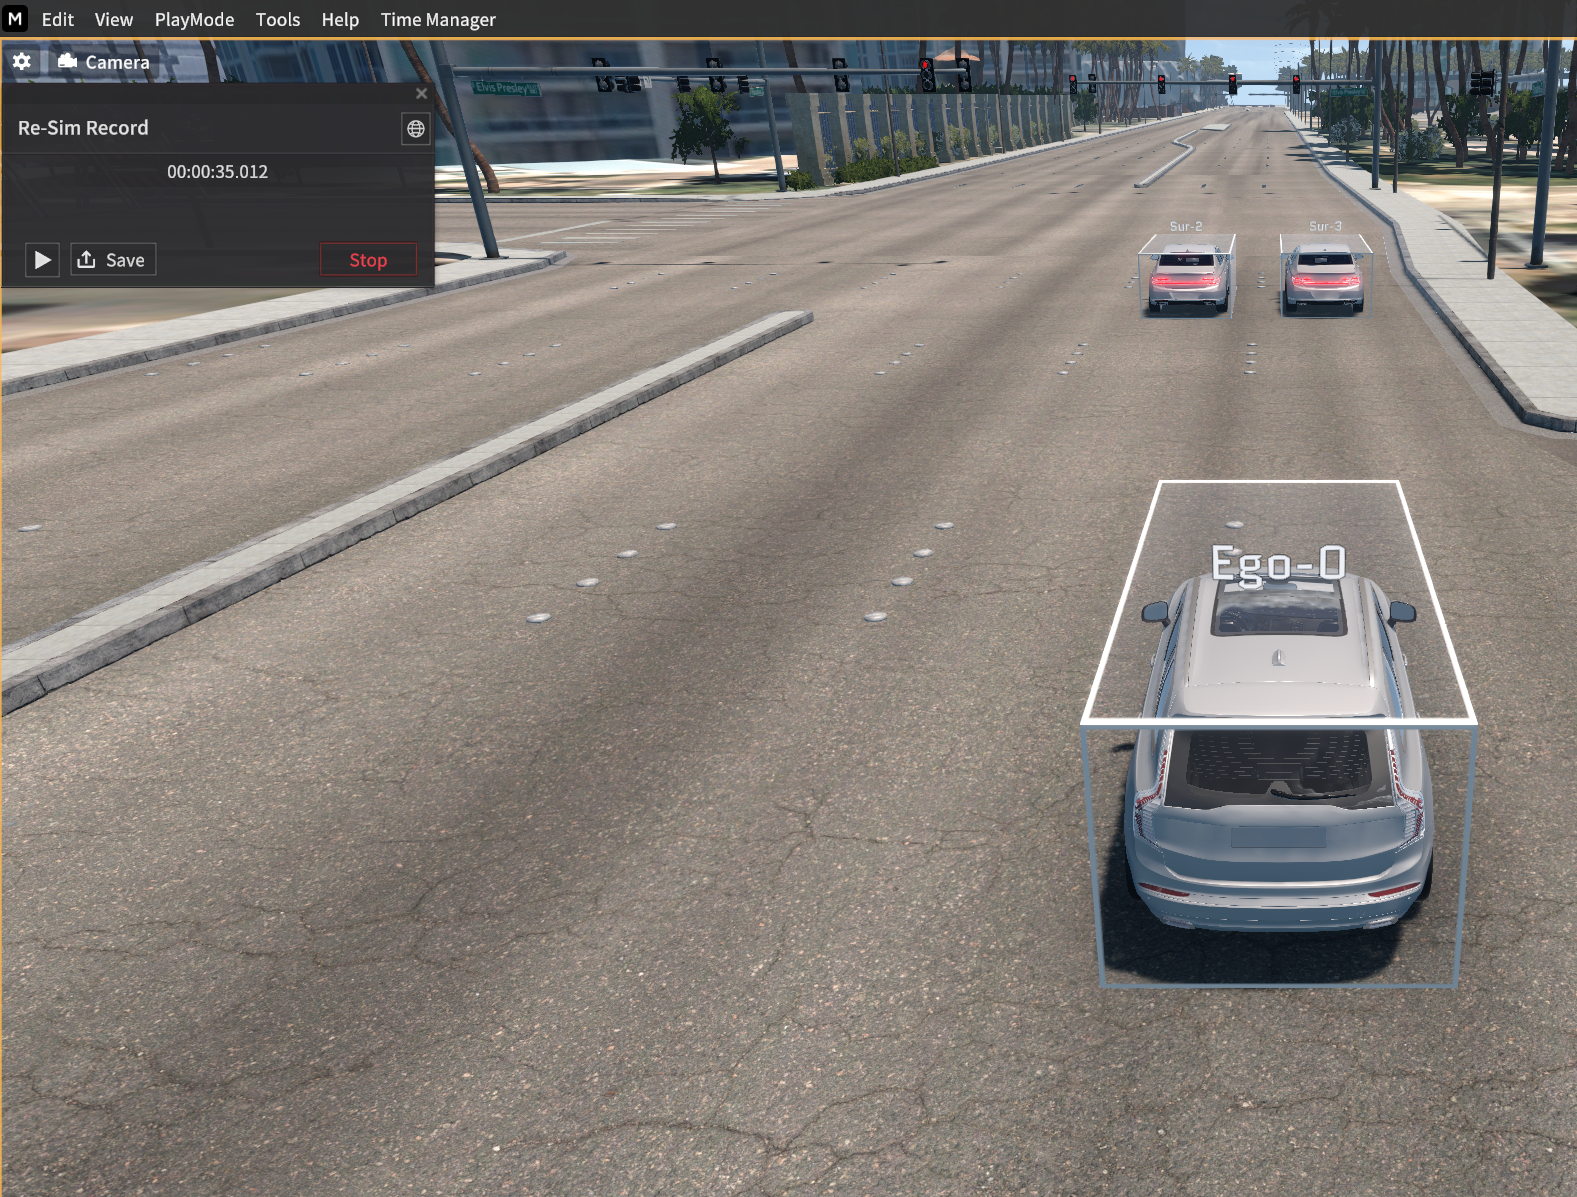
Clicking the Save button saves the Re-Sim File (.dat).
Clicking the Stop button cancels saving the Re-Sim file.
Play the recorded Simulation
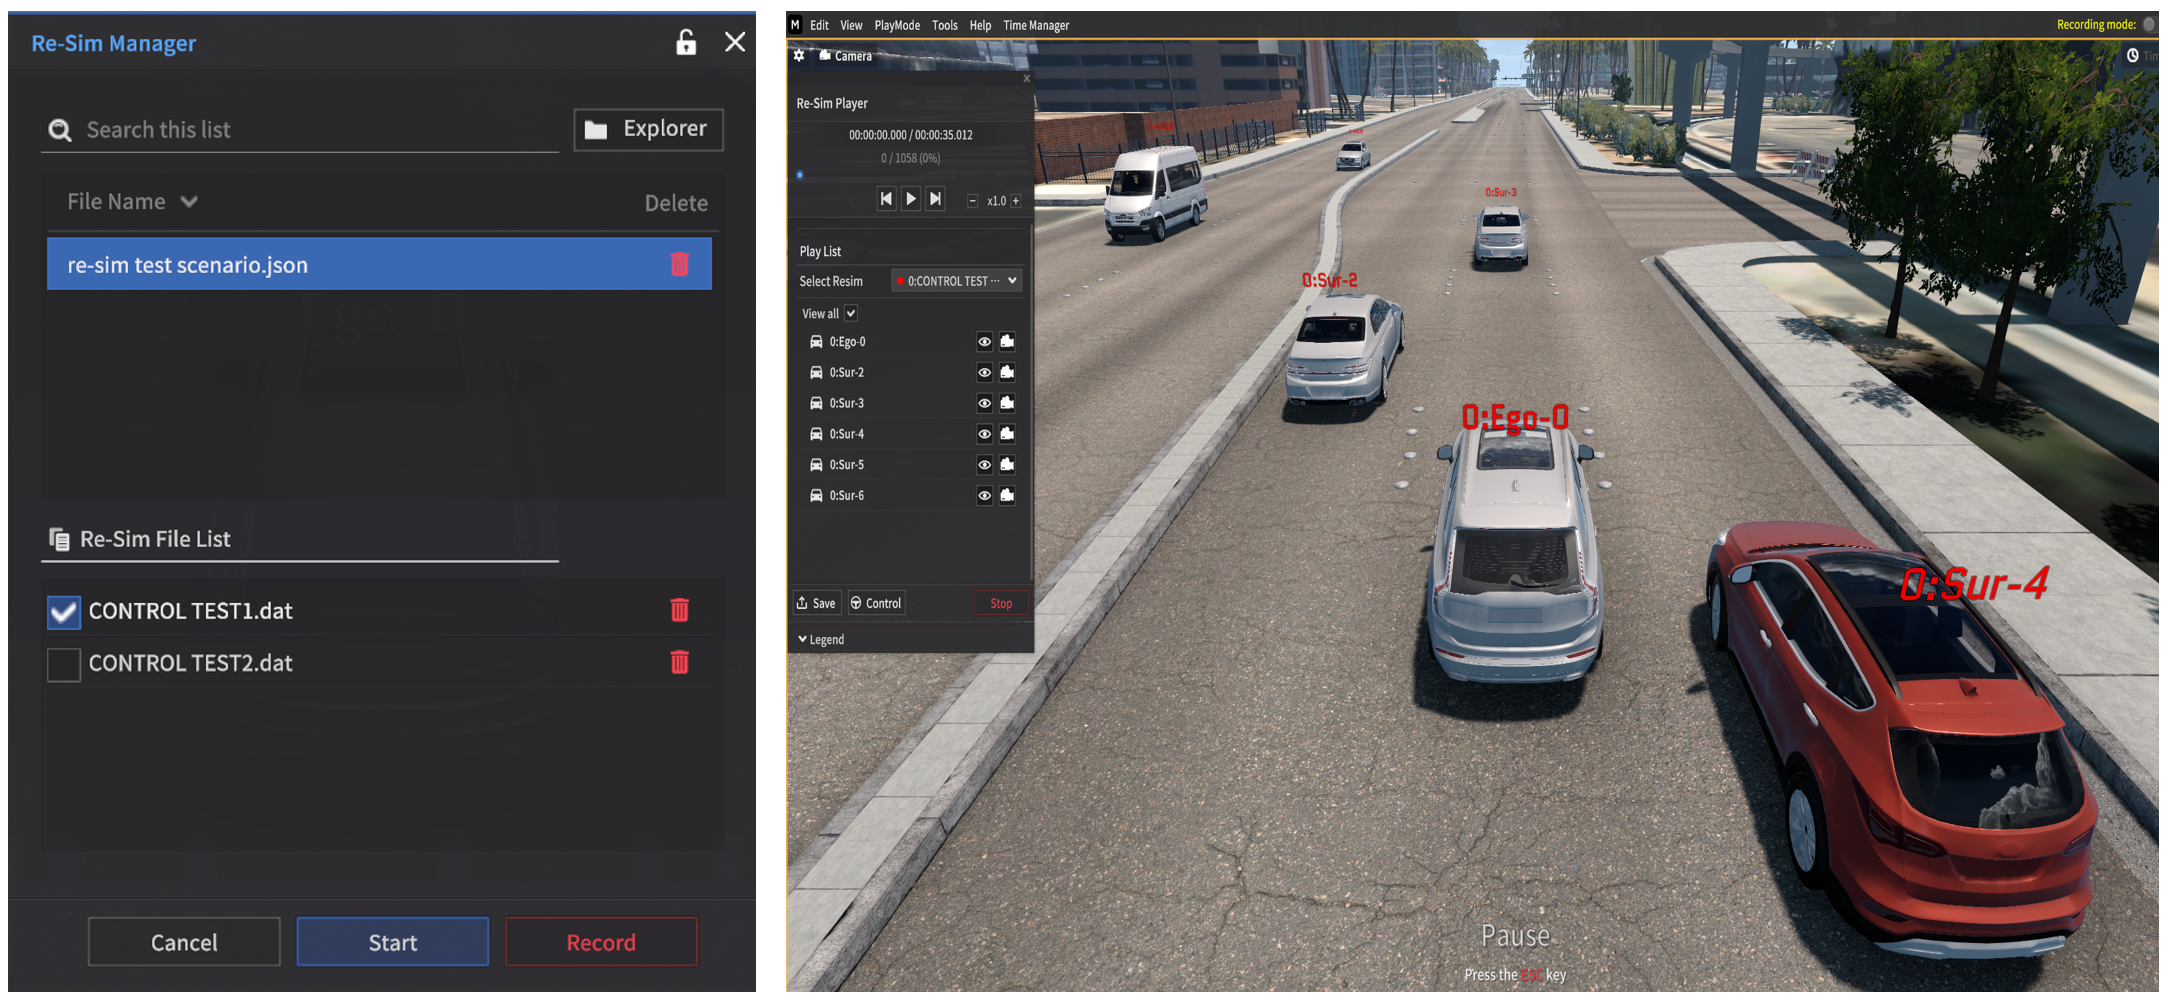
Select the Replay file and click Start button in the Re-Sim Manager.
Replay File is loaded, and the Re-Sim Player window appears on the top left of the simulator.
At the moment, the simulator is in the Pause mode.
Re-Sim Player Panel

Above the ▶ button : Unix timestamp in Replay file, number of saved msgs (Play mode)
Displays the timestamp:
hh:mm:ss.ss(ex. 00:00:00.00 / 00:01:30.30 (Playback time / Total time))Displays the Frame.
Playback slider :
lets you check where you left off the last time you watched a Re-Sim play.
can control its slider via mouse dragging.
Rewind or fast forward via Rewind & Fast Forward button
 (1 Frame unit)
Pause/ Play
xN.0 speed : Press this button to adjust the playback speed of Replay file.
Stop button
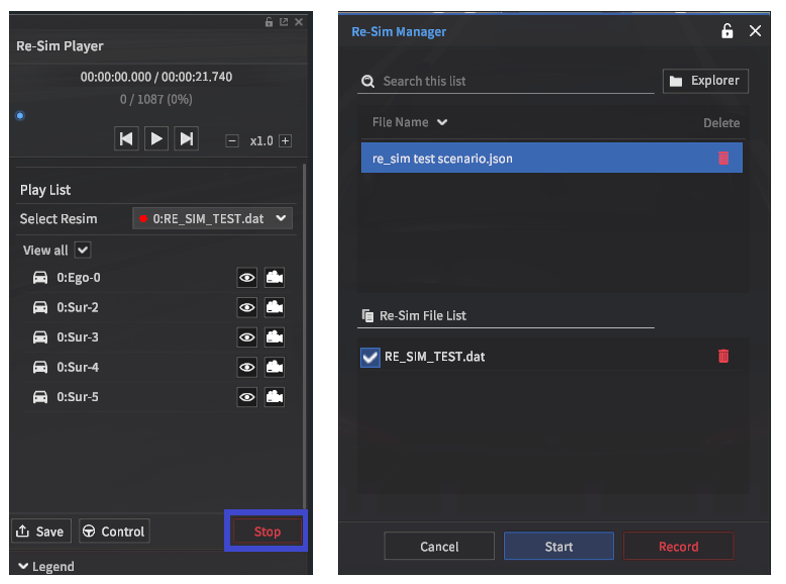
Stop the Re-Sim mode and back to Re-Sim Manager.
(The checkbox for the previously selected Re-Sim file remains checked.)
Save button
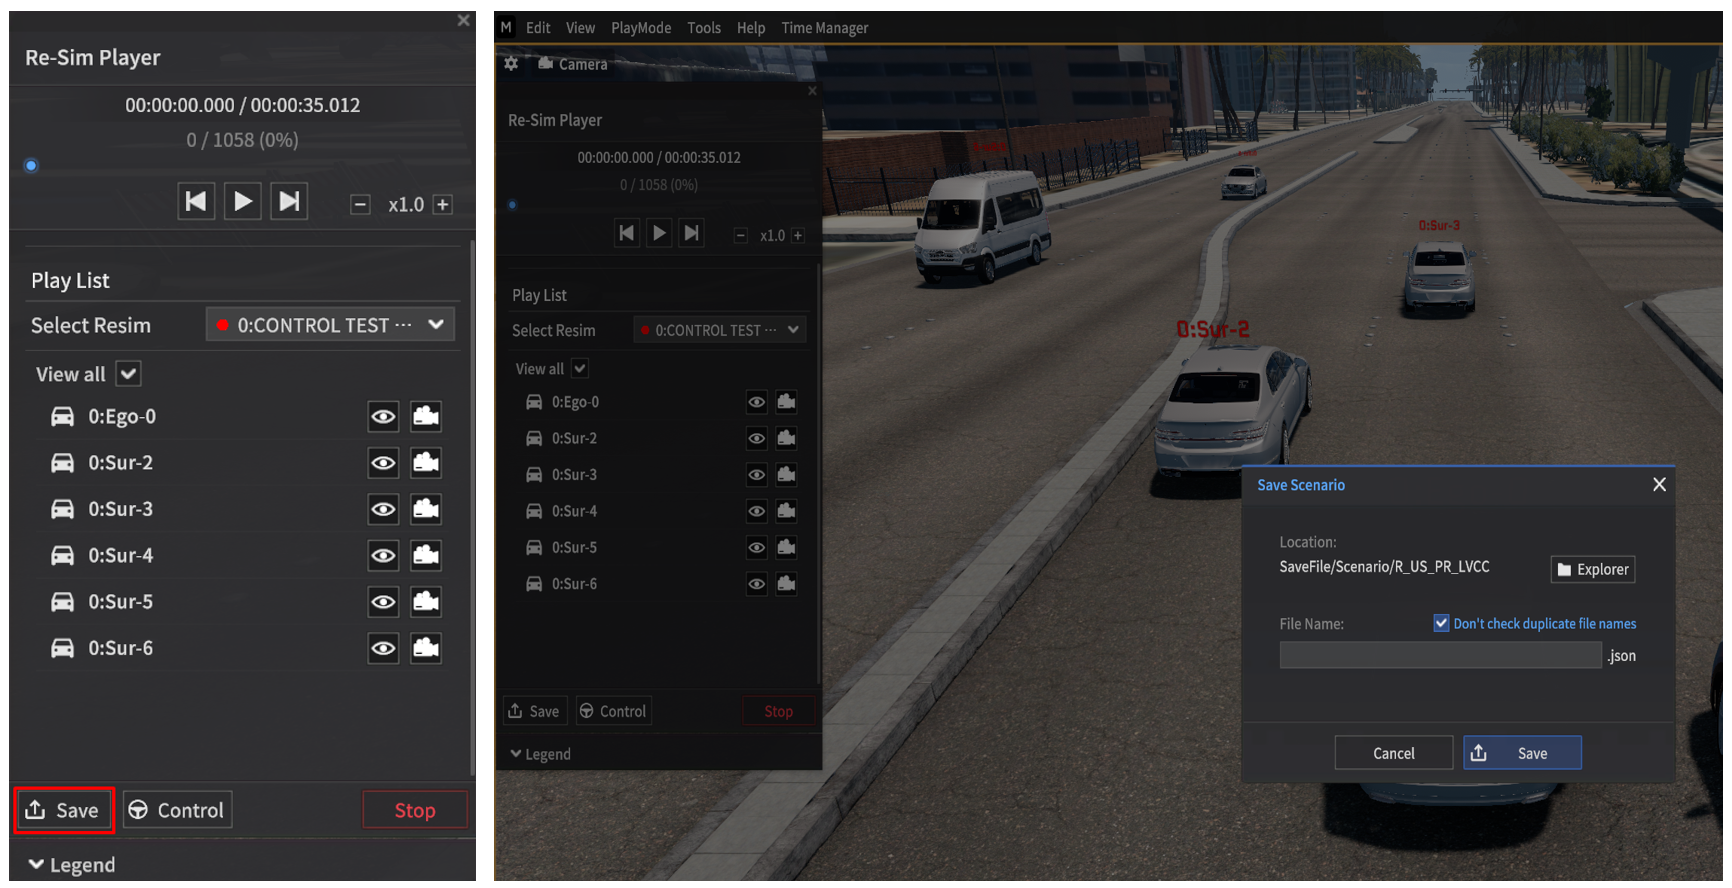
Takes a snapshot of the specific period and creates the Scenario file.
Control button
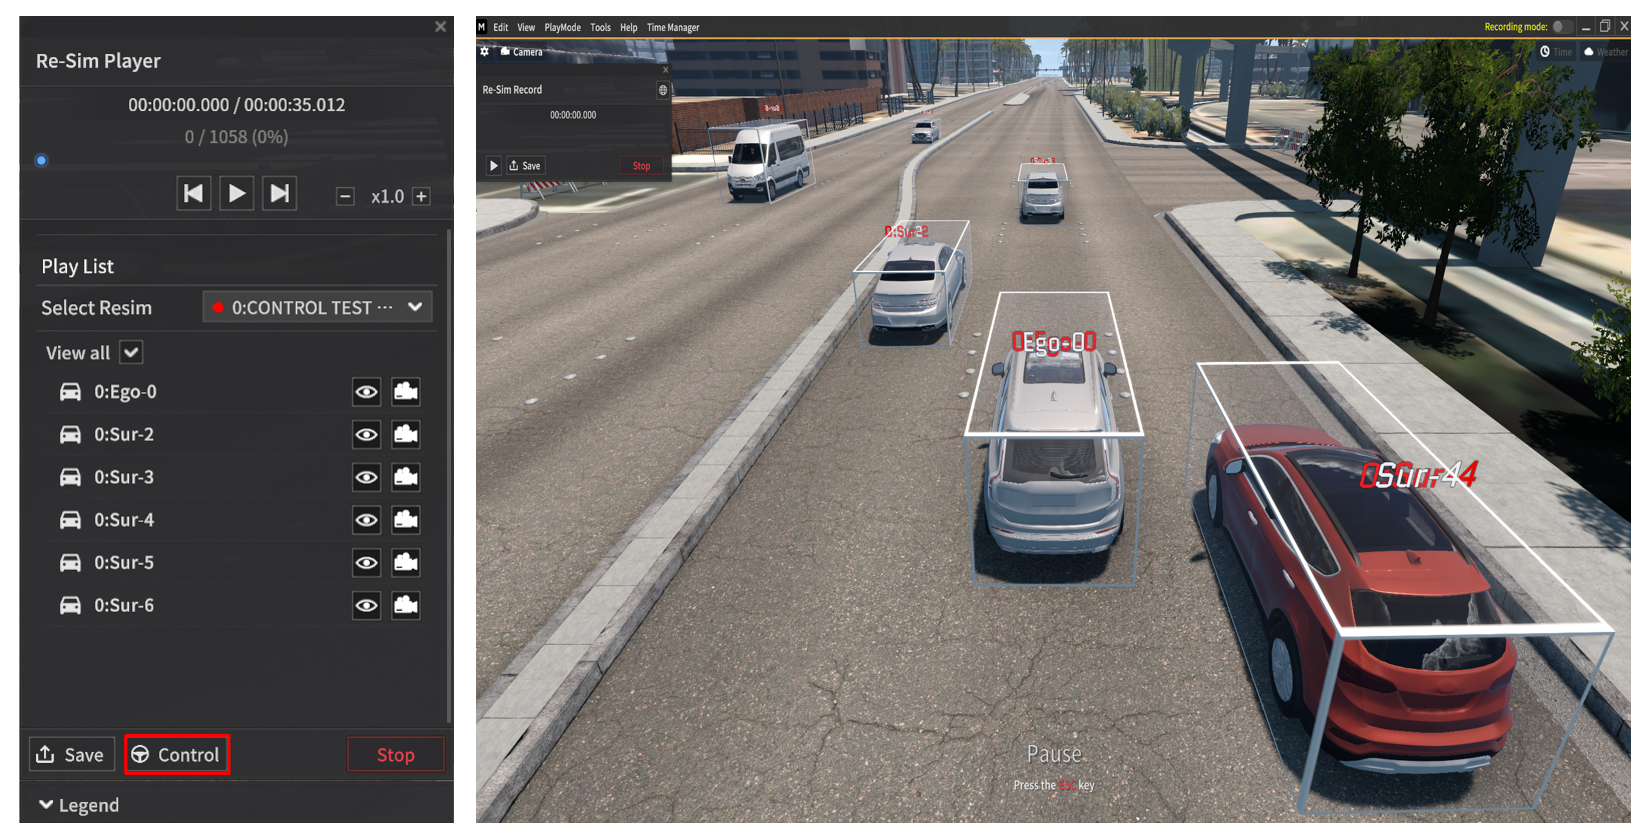
This button allows you to restart the simulation from a specific point.
(You can both Replay + Simulation and Record Simulation)Clicking Control button switches you to the Re-Sim Record.
When clicked ▶ button, Replay file is created under the Scenario File.
Newly spawned replay vehicles are displayed in white boxes, and vehicles with the same-colored labels interact with each other, including physical collisions.
Play list
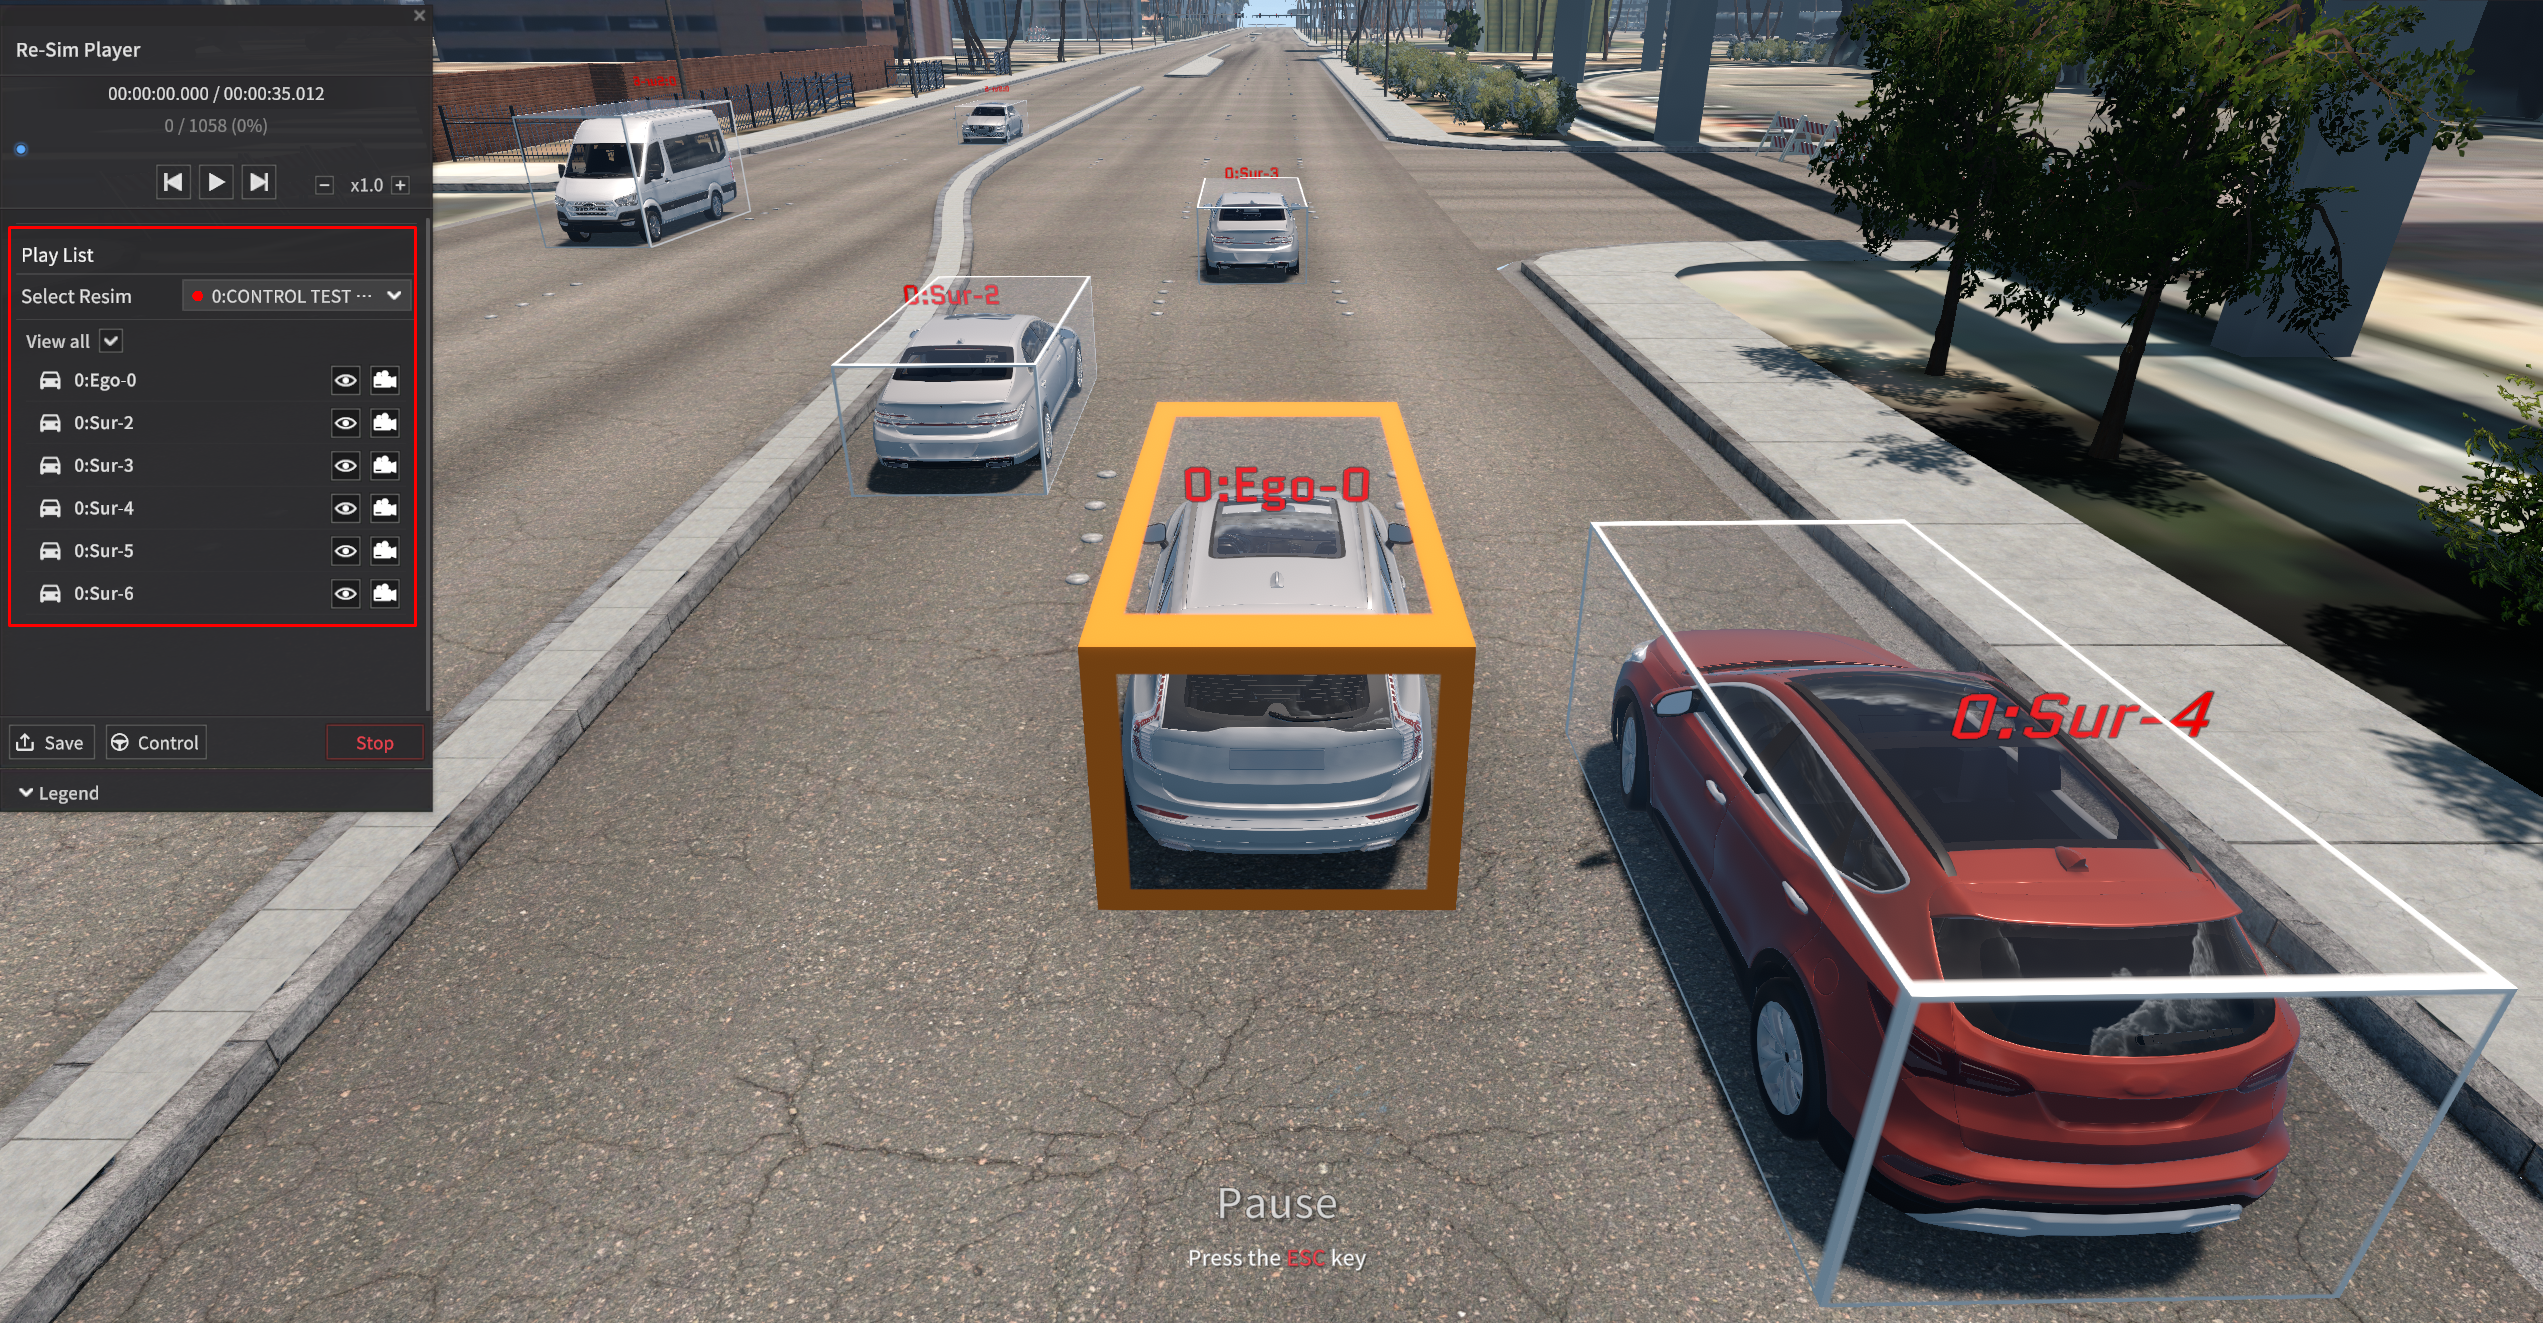
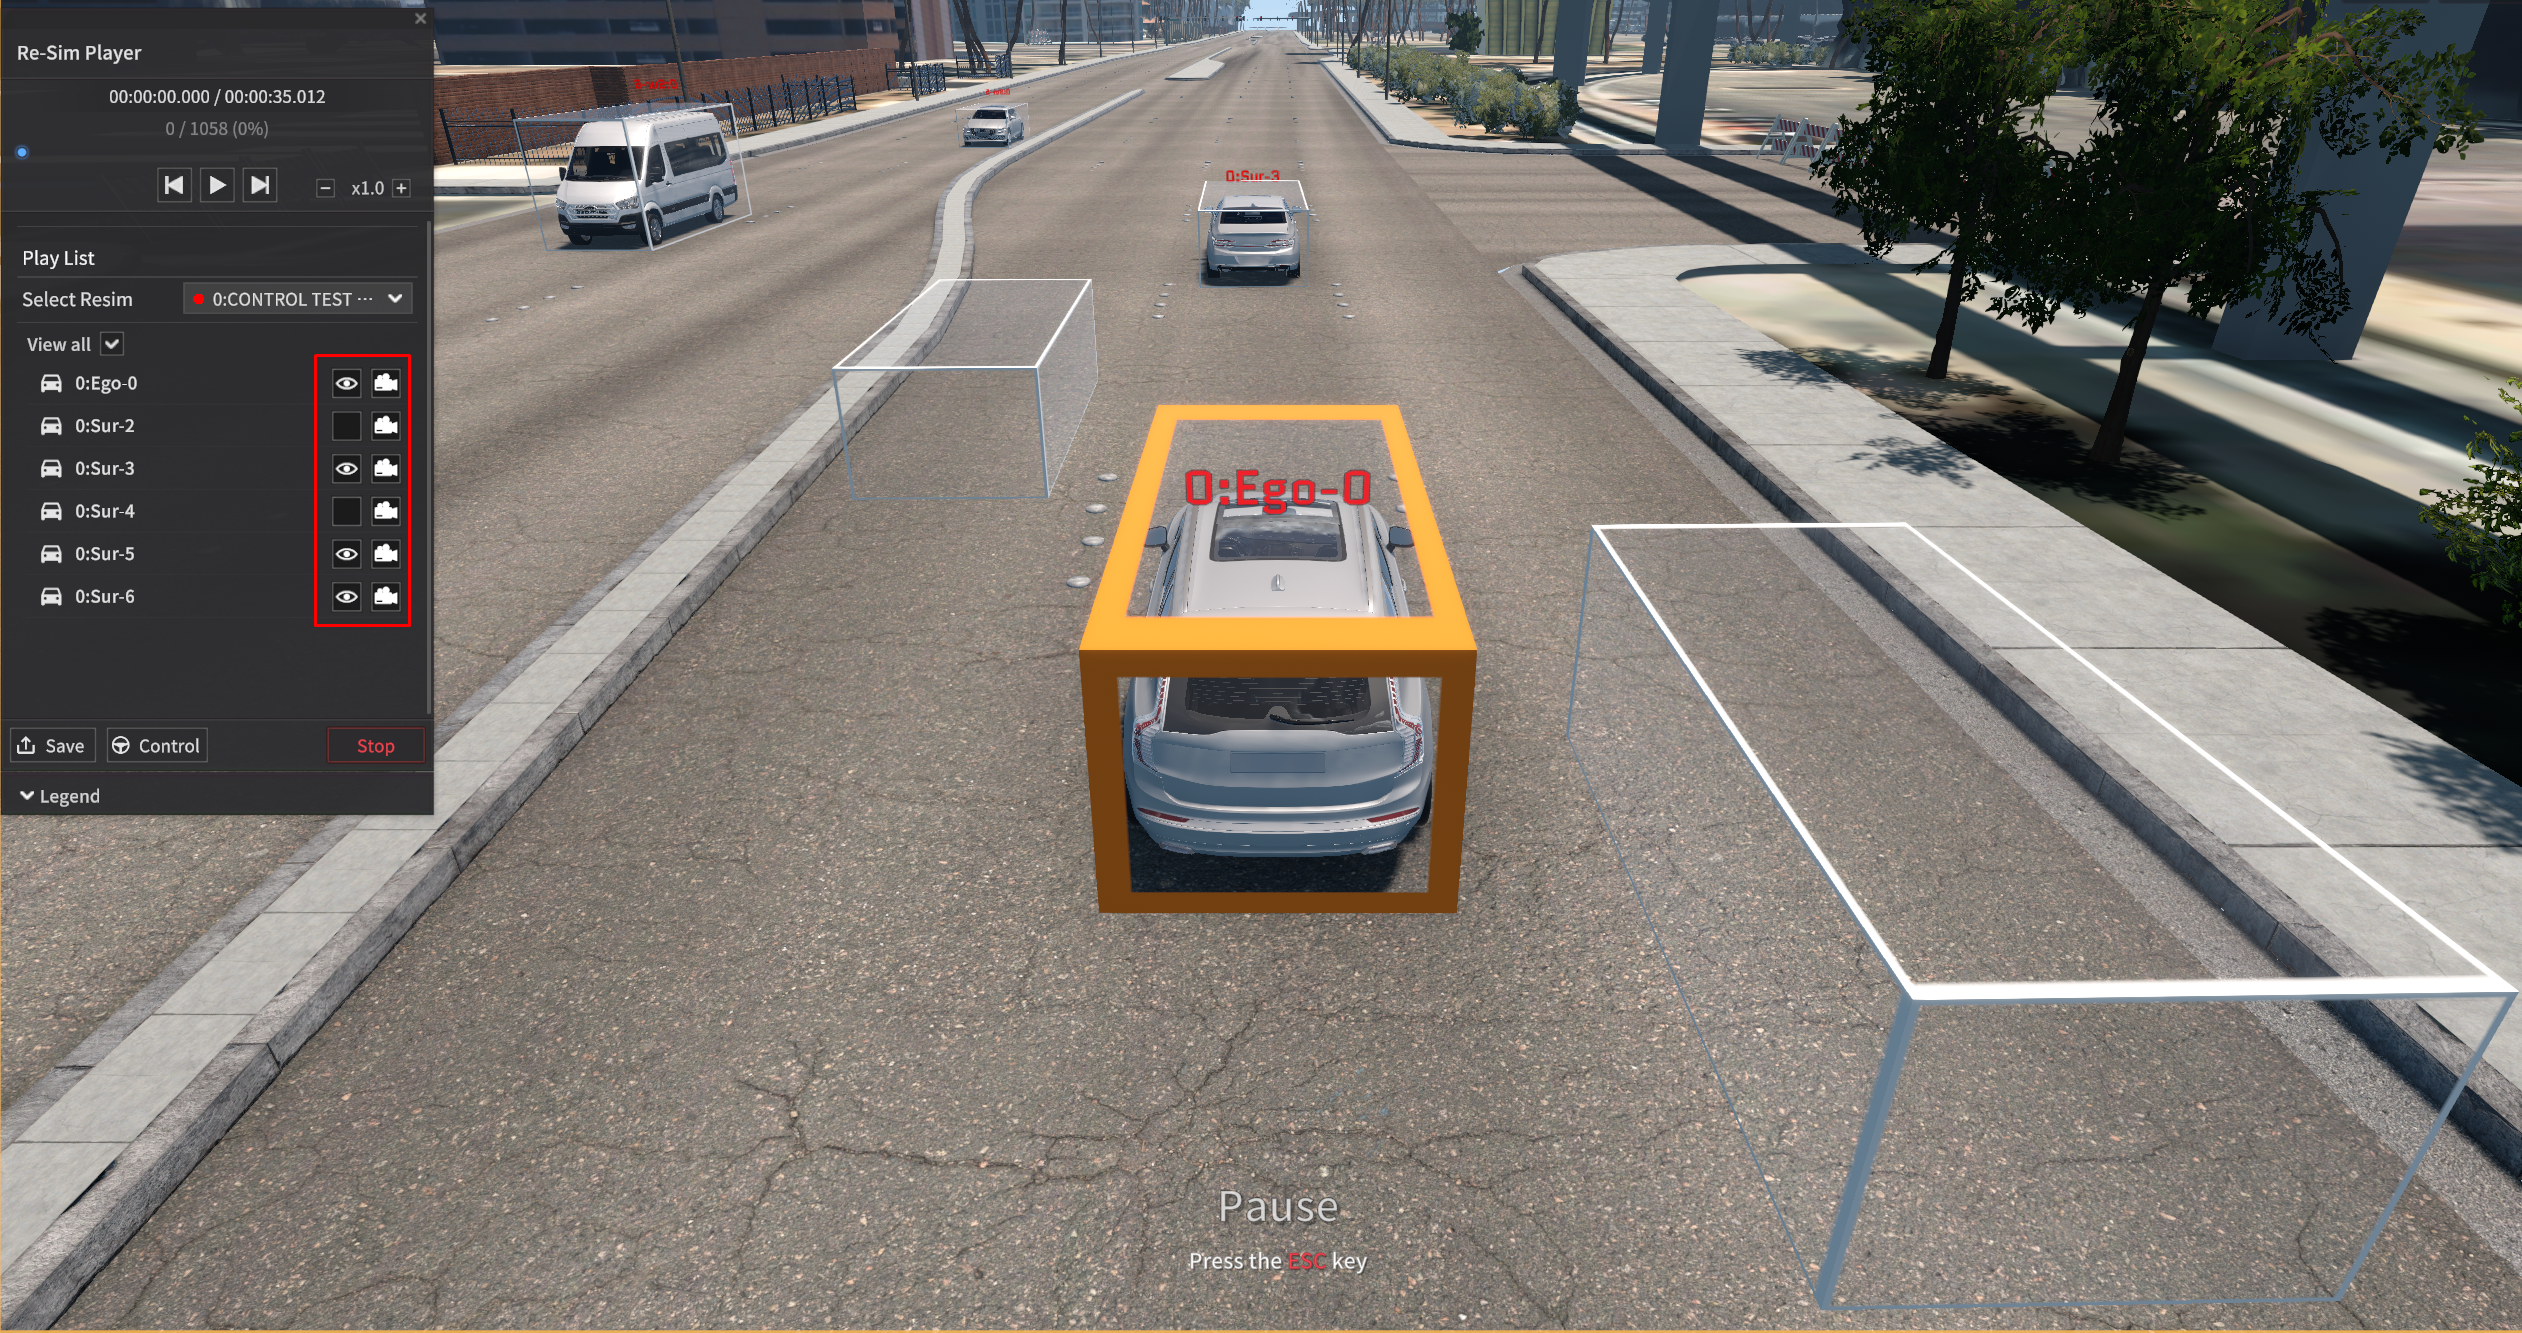
You can set the listed Re-Sim files and objects.
Clicking
 button next to the vehicle label lets you choose whether the vehicle is visible or hidden in the simulator.
Click the
 button to switch the current view to the selected vehicle’s view.
Also can overlay multiple Re-Sim files together.
Overlay Function: Play the multiple recorded simulation file
This is a function which you can play multiple Replay files together.
Each Replay files are classified as the Ego vehicle label.
You can overlay up to 10 Replay files at once.
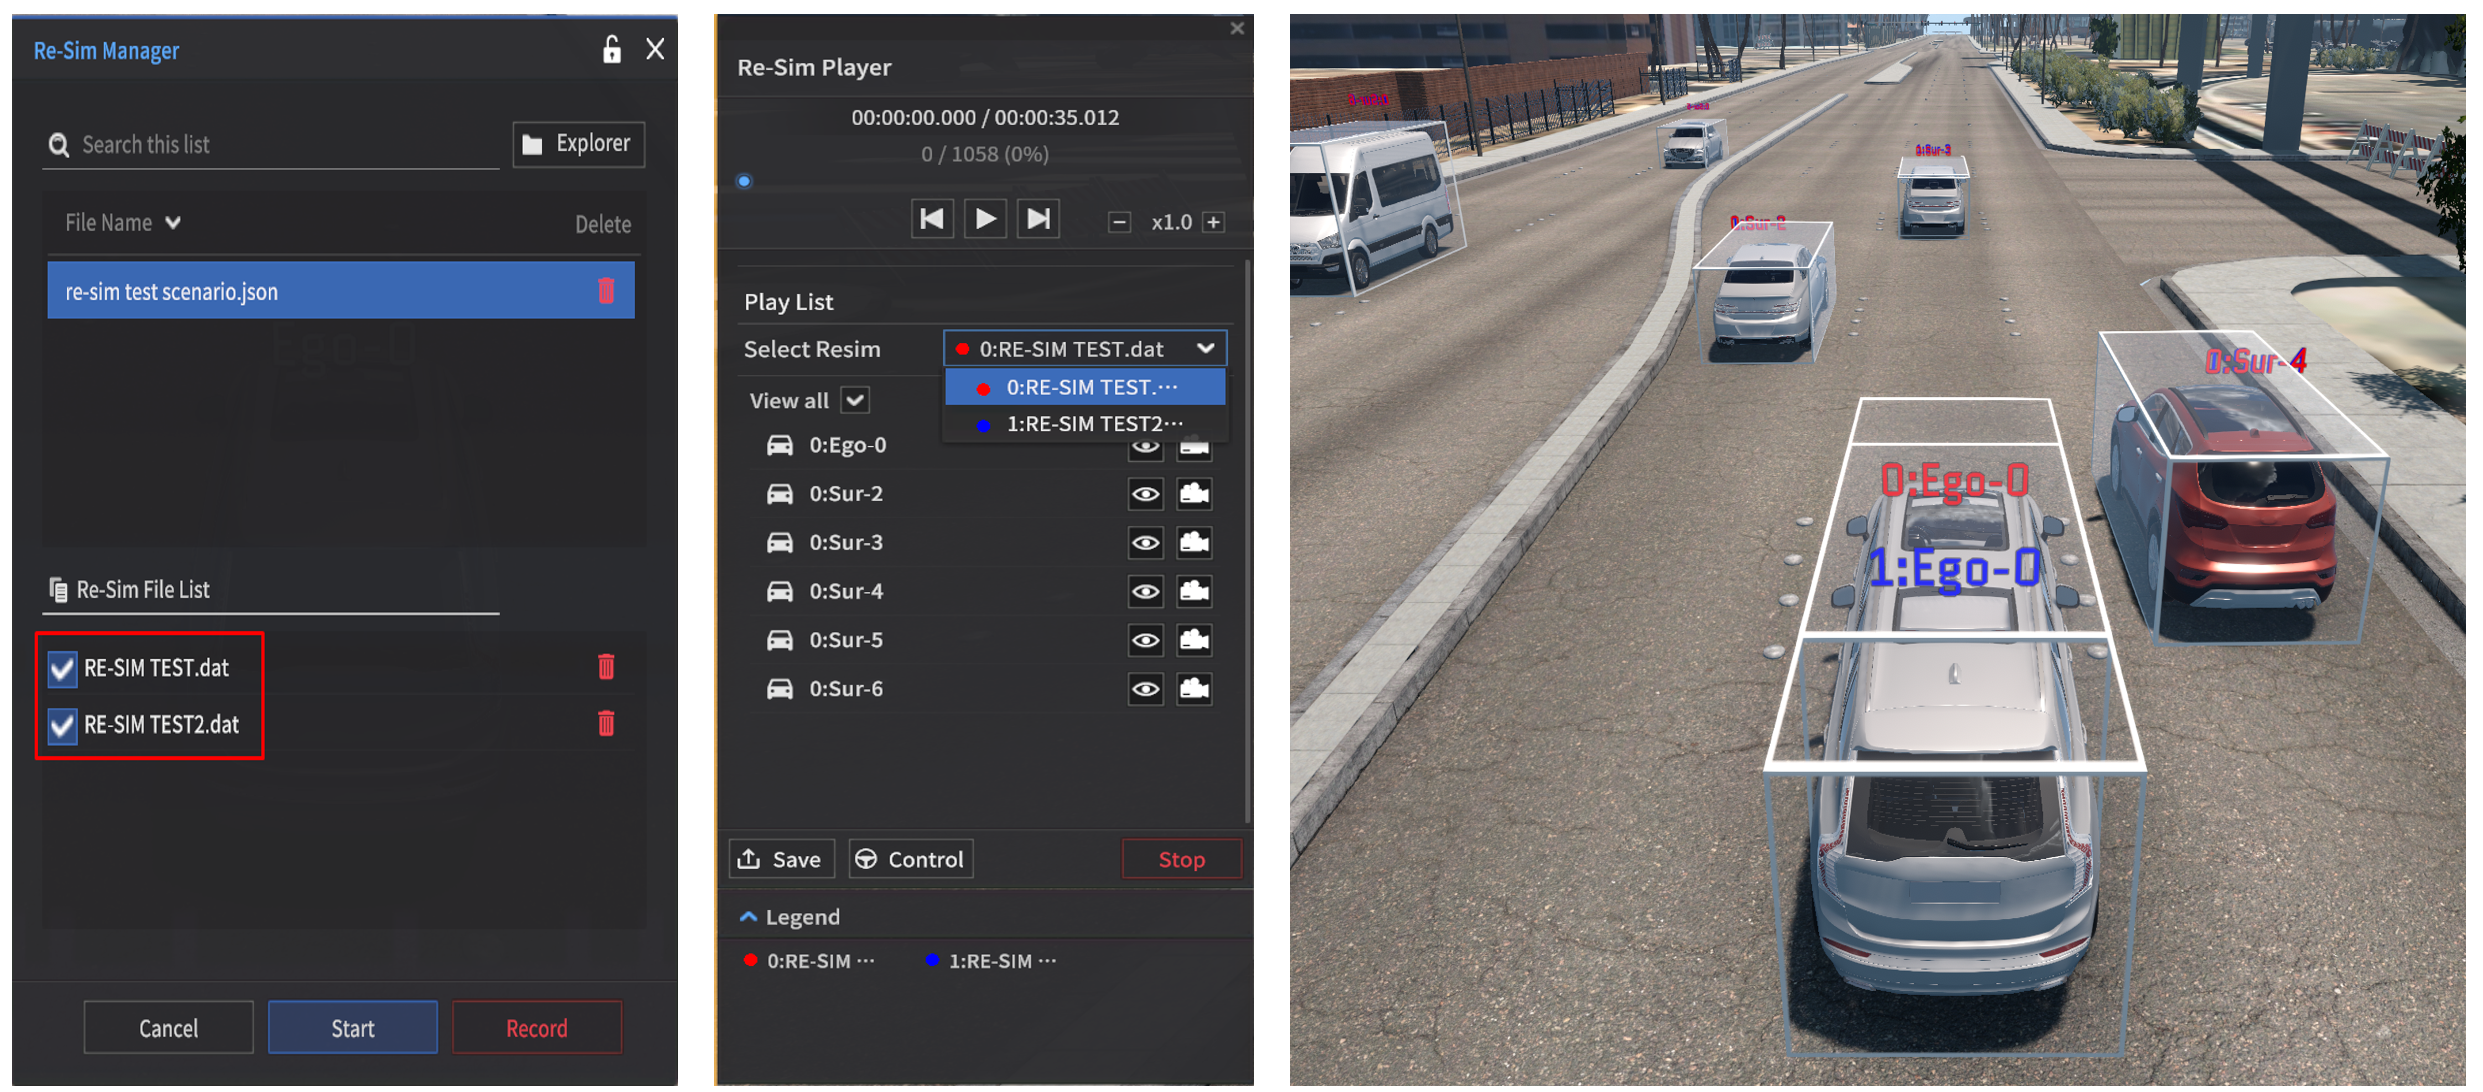
Select multiple Re-Sim files and click Start button in Re-Sim Manager.
In the Play List > Select Re-Sim / Legend, you can check that the each Re-Sim file label is color-coded.
When the View all is ticked in the checkbox, all vehicles are displayed in the Simulator.