
Quick Start Guide for ROS
This section explains how to set up a ROS communication environment using an Ubuntu virtual server and how to communicate with the simulator.
1. Install ROS and System dependencies
Install the ROS Bridge server and required system dependencies for the ROS communication environment on the Ubuntu virtual server using the following command:
ROS Release Version: Refer to the melodic/Installation - ROS Wiki.
# Add the ROS repository to ros-latest.list
$ sudo sh -c 'echo "deb http://packages.ros.org/ros/ubuntu $(lsb_release -sc ) main" > /etc/apt/sources.list.d/ros-latest.list’
$ sudo apt-get install curl
# Add the public key to download packages from the ROS repository
$ curl -s https://raw.githubusercontent.com/ros/rosdistro/master/ros.asc | sudo apt-key add –
$ sudo apt-get update
$ sudo apt-get upgrade
# Install the desktop ROS package and rqt package
$ sudo apt install ros-melodic-desktop-full
$ sudo apt-get install ros-melodic-rqt*
$ sudo apt-get install ros-melodic-velodyne
# Install other tools and required packages
$ sudo apt-get install git
$ sudo apt-get install net-tools
$ sudo apt-get install python-pip
$ pip install scikit-learn
The example code provided in this guide can be downloaded via Git.
Suppose you are installing Git on the Ubuntu virtual server for the first time.
In that case, you must register user information on the server system using the git config --global command and create and register an SSH public key for user authentication.
This guide does not cover the installation and configuration of Git, so for detailed information, please refer to Git - Git Initial Setup and Git - Creating an SSH Public Key.
2. ROS Environment Setup
2-1. Load the environment setup file for using the installed ROS.
$ source /opt/ros/melodic/setup.bash
2-2. To avoid the hassle of running the environment setup file each time, add it to the bash profile.
$ echo "source /opt/ros/melodic/setup.bash" >> ~/.bashrc
$ source ~/.bashrc
2-3. Install and initialize the dependency packages required for building ROS packages.
$ sudo apt install python-rosdep python-rosinstall python-rosinstall-generator python-wstool build-essential
# rosdep init
$ sudo apt install python-rosdep
$ sudo rosdep init
$ rosdep update
3. ROS Workspace Configuration
3-1. Create a folder named catkin_ws as the ROS workspace.
$ mkdir -p ~/catkin_ws/src
$ cd ~/catkin_ws/src
$ catkin_init_workspace
$ cd ~/catkin_ws/
$ catkin_make
3-2. Add the environment setup file of the ROS workspace to the bash configuration to automate its execution.
$ echo "source ~/catkin_ws/devel/setup.bash" >> ~/.bashrc
$ source ~/.bashrc
3-3. Download and run the autonomous driving example code (.py) and message files necessary for ROS testing into the created workspace.
$ cd ~/catkin_ws src
# Download MORAI ROS communication example code and message files
$ git clone https://github.com/MORAI-Autonomous/MORAI-DriveExample_ROS.git
$ git clone https://github.com/MORAI-Autonomous/MORAI-ROS_morai_msgs
# Download sensor data parsing and visualization example files
$ git clone https://github.com/MORAI-Autonomous/MORAI-SensorExample.git
# Build packages and messages
$ cd ..
$ catkin_make
# Declare catkin environment variables
$ source ~/catkin_ws devel setup.bash
# Rebuild catkin packages
$ rospack profile
If a permission error occurs when executing the downloaded example files, grant the necessary permissions to resolve it.
$ cd ~/catkin_ws/src/gen_ros/
$ chmod -R a+x scripts/\
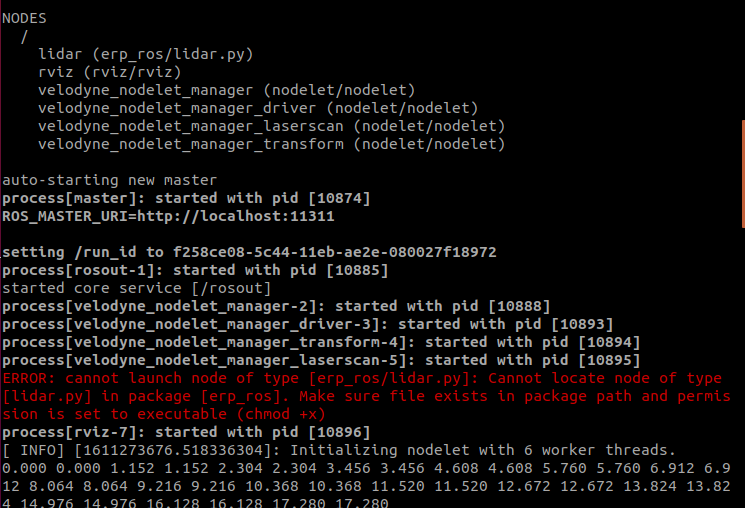
4. ROS Bridge Operation Verification
4-1. Once the ROS communication environment is configured on the virtual server, run the ROS Bridge server as described below to verify its normal operation.
$ roslaunch rosbridge_server rosbridge_websocket.launch
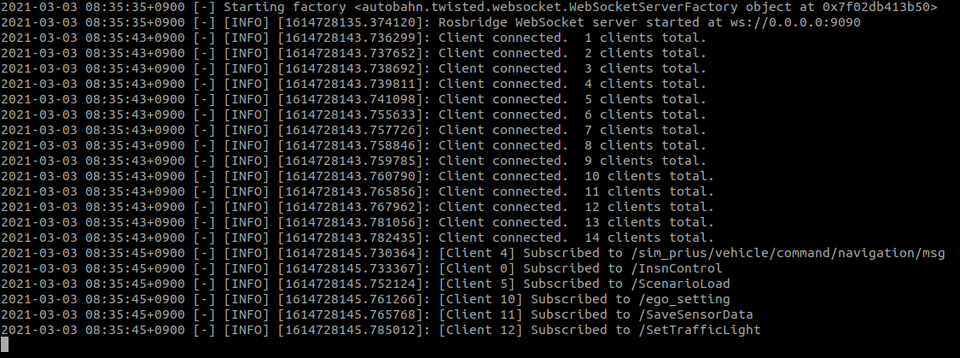
4-2. After configuring the IP settings for ROS communication in network settings, click Connect. You will see a "Client Connect" message displayed in the terminal of the virtual server running the ROS bridge.
Refer to the Network Settings for the ROS communication configuration in the simulator network, and proceed as described below.
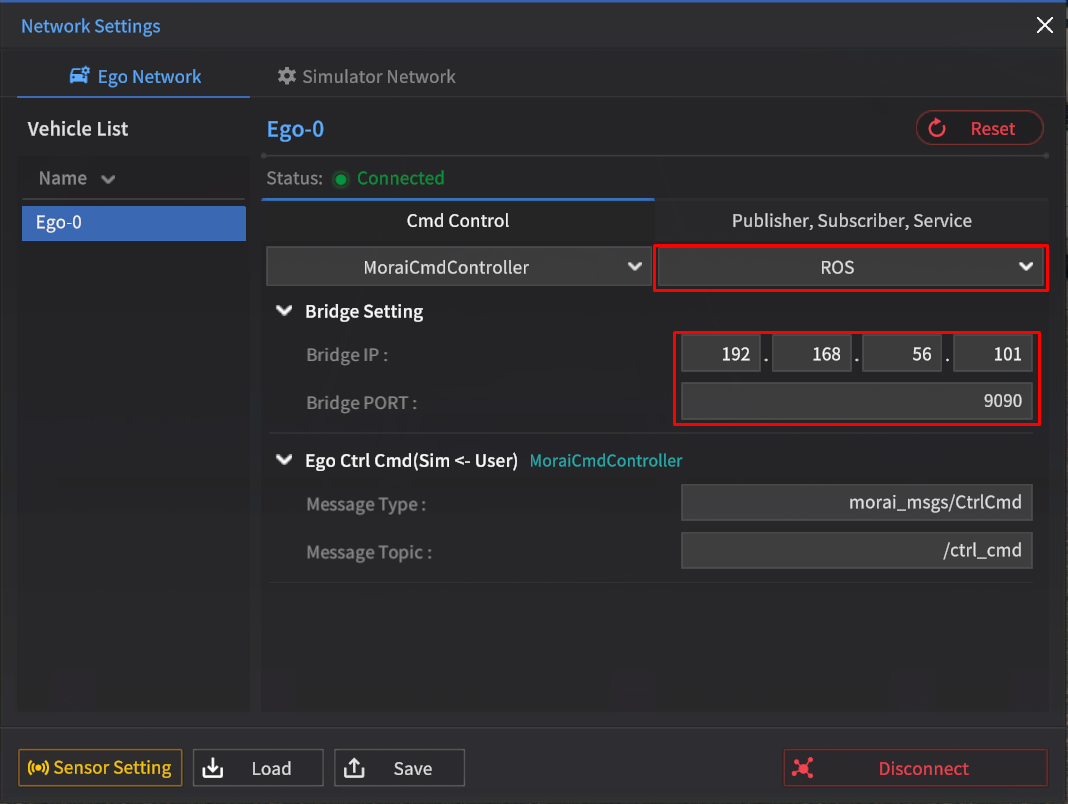
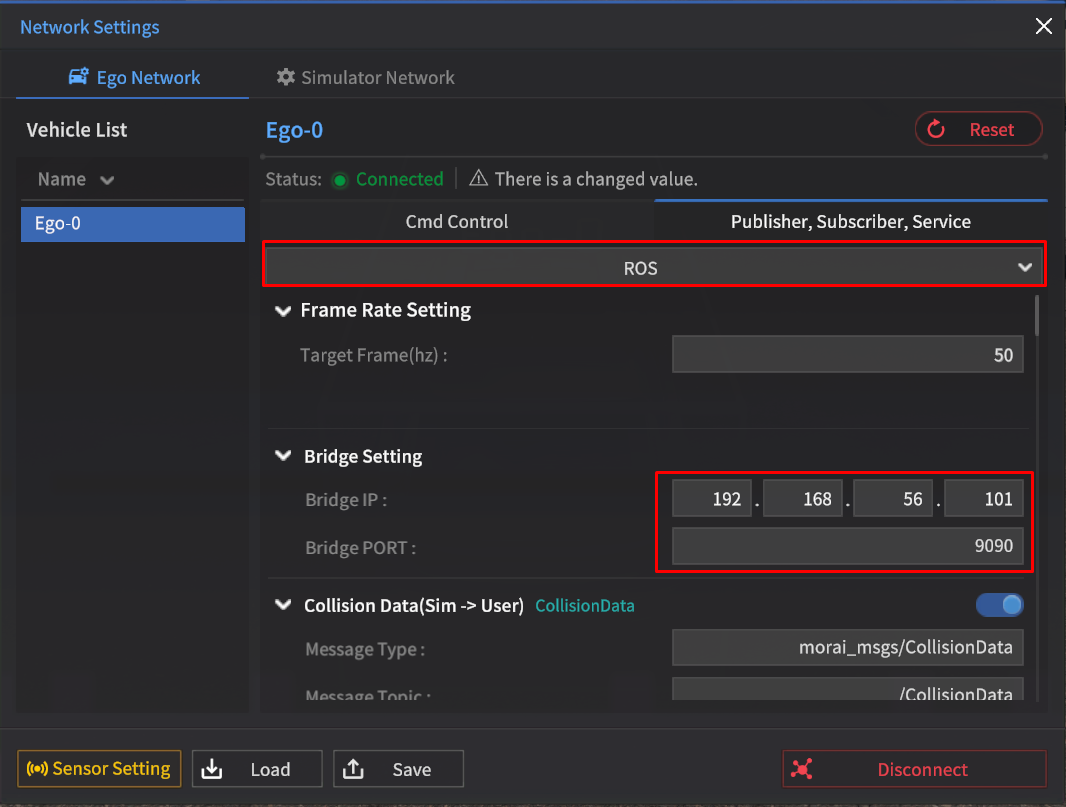
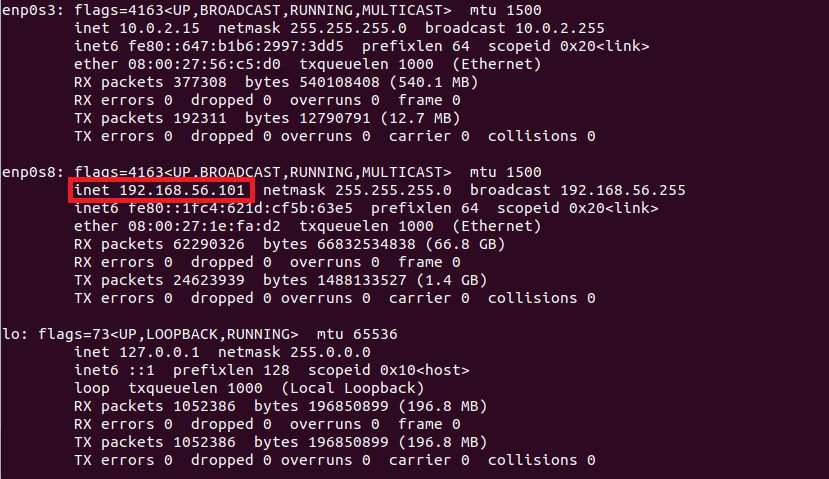
The Bridge IP to be entered can be confirmed using terminal commands within the virtual server.
$ ifconfigRefer to the outputted IP information from the virtual server, specifically “192.168.56.101”. (The IP address may vary depending on the user's environment.)
In the ROS communication environment, the rqt tool can be used to intuitively verify the ROS message information being sent to the simulator.

For detailed information about the ROS message, refer to the Communication Protocols.