Network Settings
This section explains the network settings UI and the configuration methods for each communication protocol supported by the MORAI simulator.
Network Settings
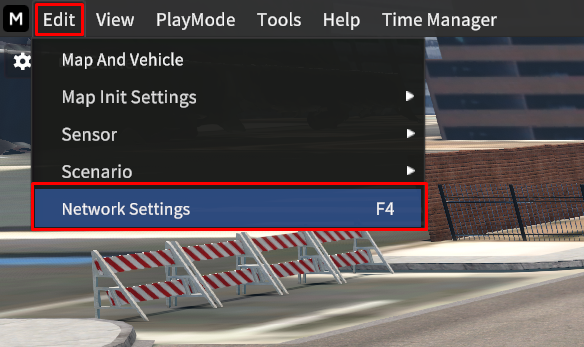
To configure the Network Communication in the simulator, go to Edit > Network Settings at the top menu bar.
Or press the F4 key to open the Network Settings.
The Network Settings are divided into Ego Network and Simulator Network configurations.
Each menu allows you to set communication parameters such as IP, Port, and Frame Rate according to the supported communication targets and types.
After all settings done, click Connect on the bottom right of the Network Settings.
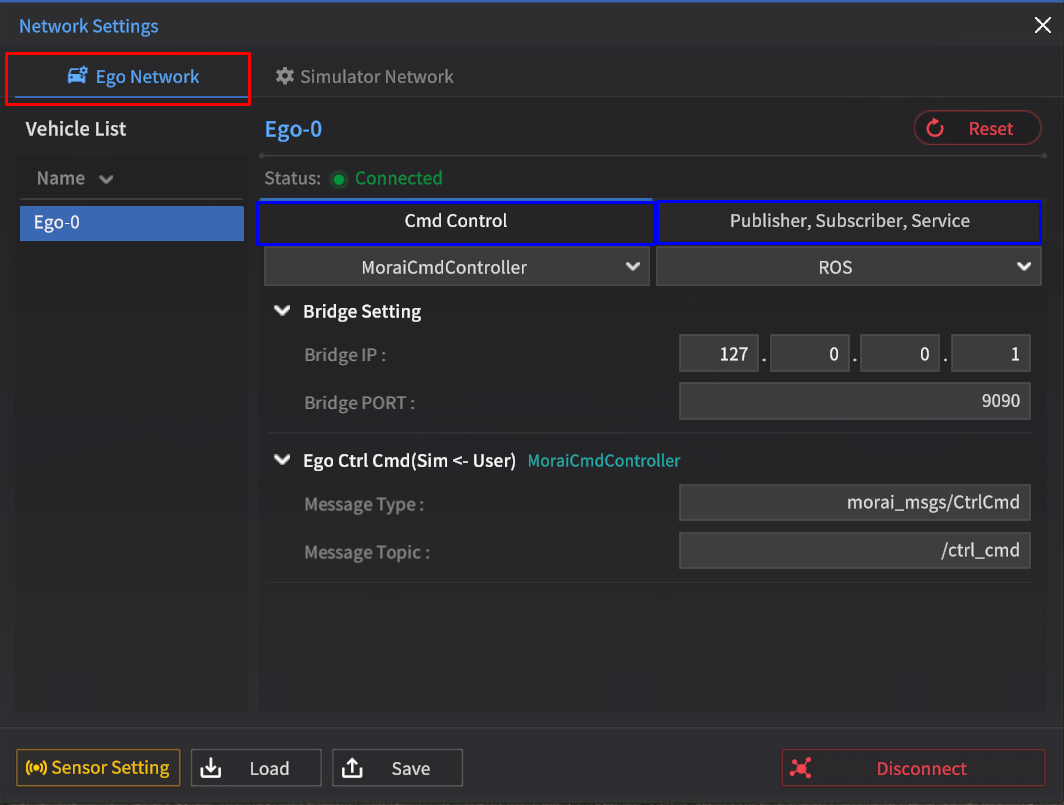
Ego Network
In Network Settings, the Ego Network is the network which dependent on the Ego-vehicle.
Cmd Control
Publish, Subscriber, Service
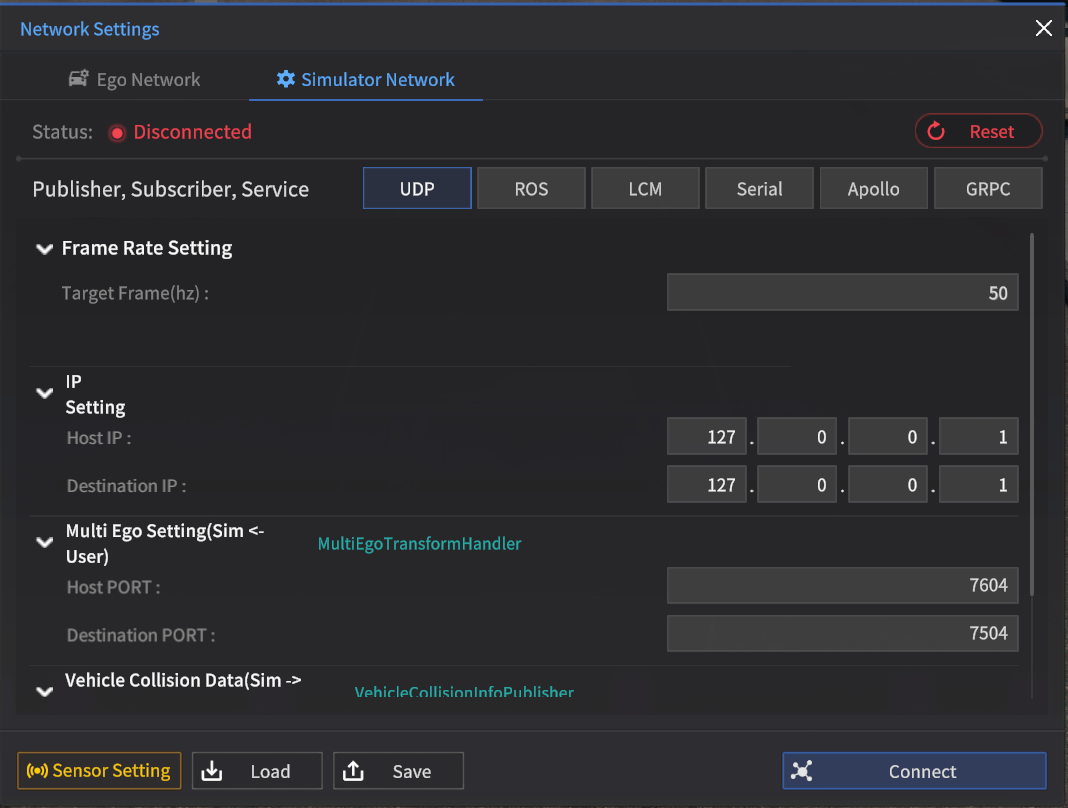
Simulator Network
In Network Settings, the Simulator Network is a network that connects to the simulator itself.
Save & Load Network
You can save the network settings information using Save Network.
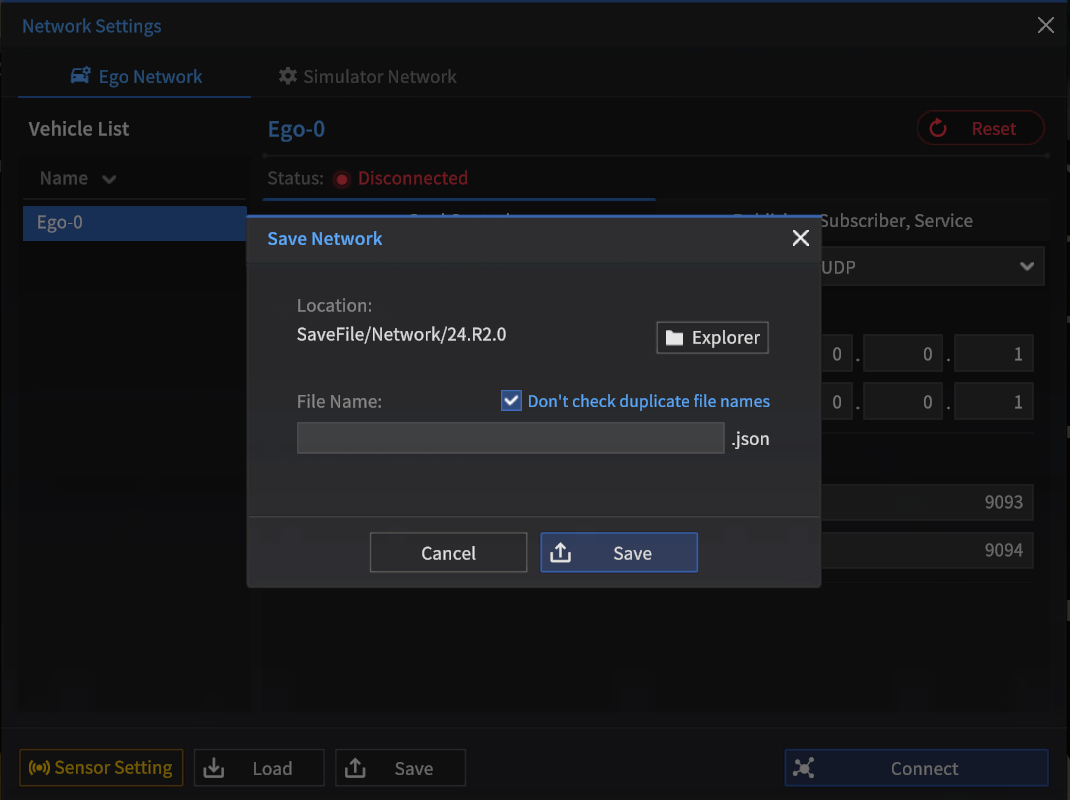
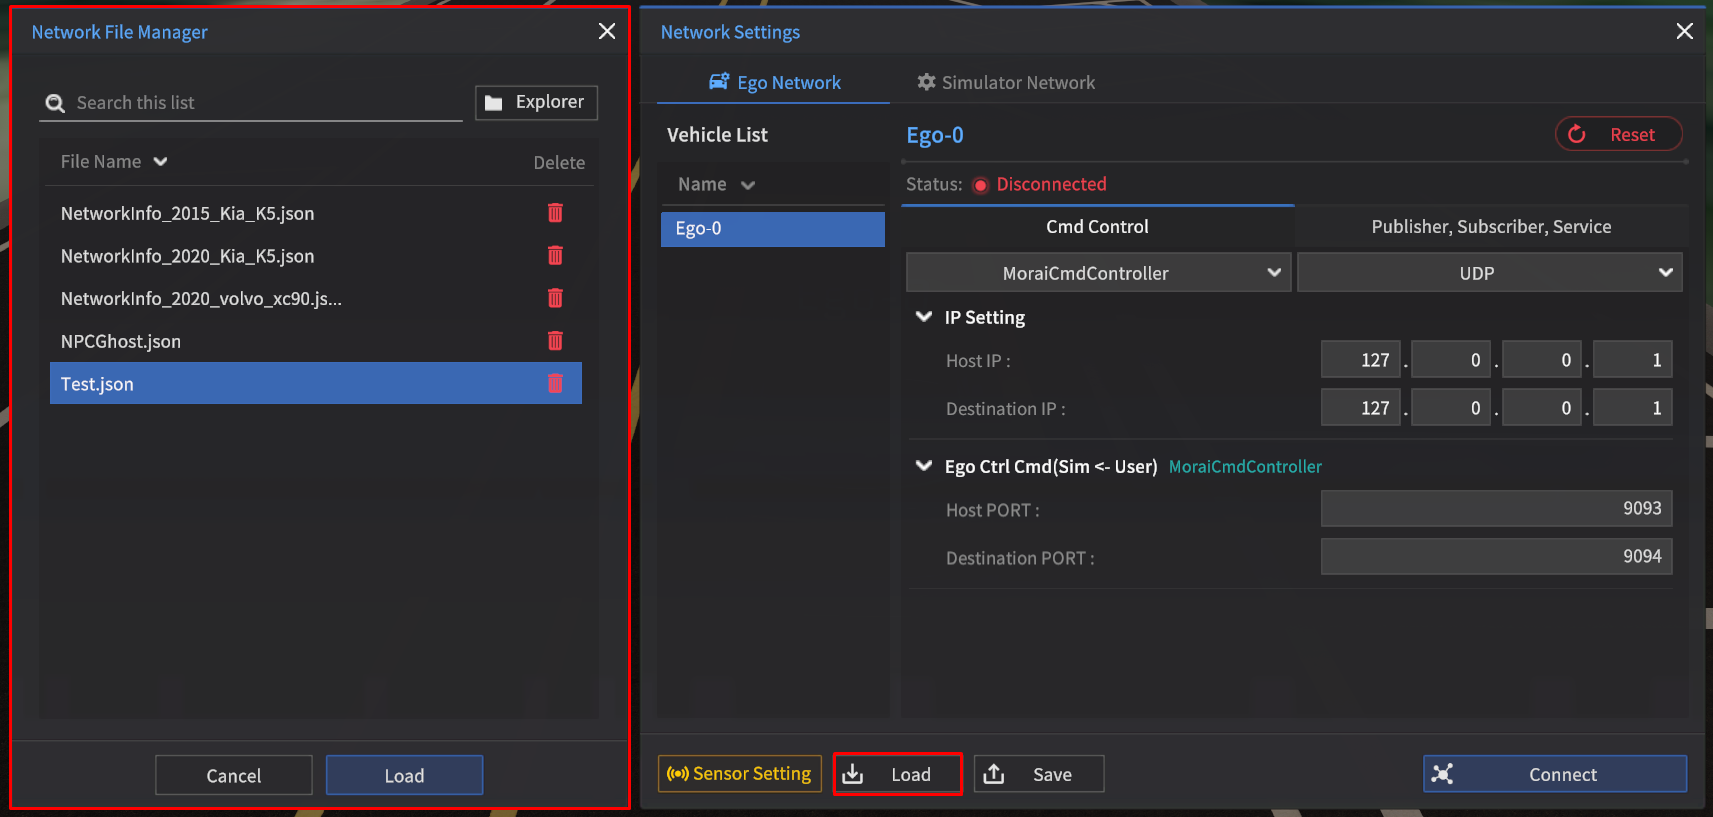
The saved network settings information is displayed in the Network File Manager.
Click Load to load the saved settings information, and click the trash bin icon to delete it.
Network Settings for each Communication Protocol
In here you will learn how to manage the settings based on the communication supported by Network Settings.
ROS
Download the ROS Message File
We provide the GitHub link below for downloading the ROS Message file.
$ git clone https://github.com/MORAI-Autonomous/MORAI-ROS_morai_msgs.git
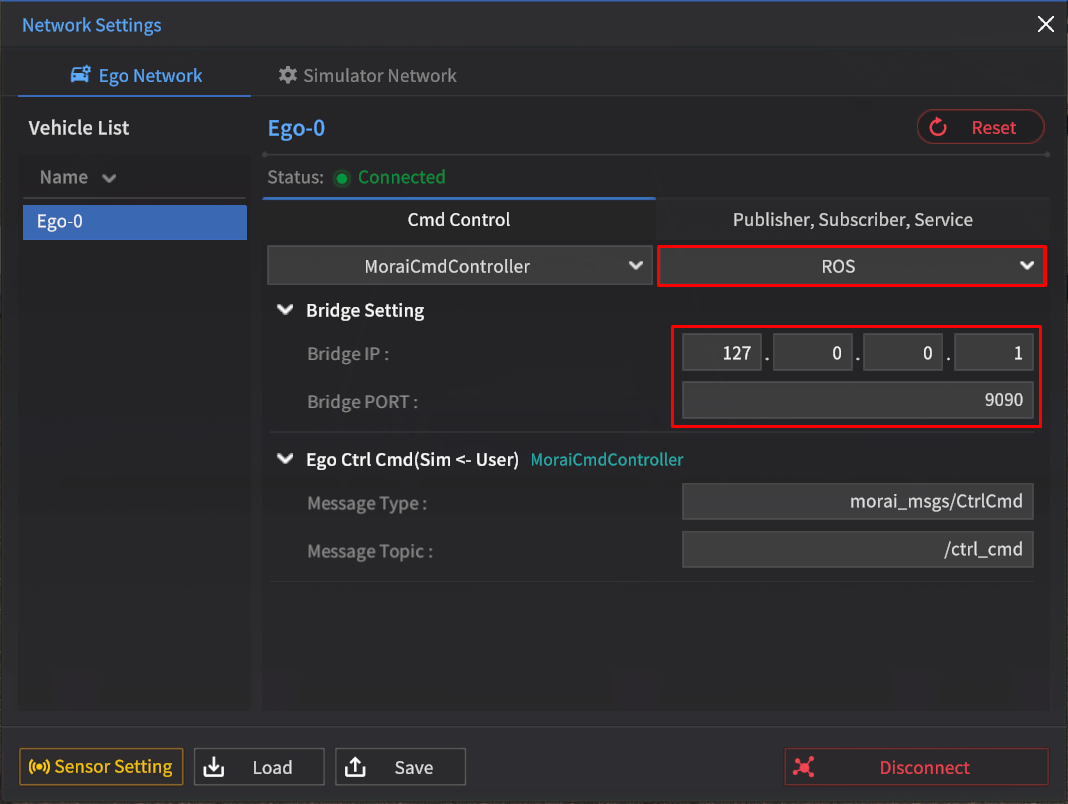
ROS Network Settings
Enter the key information for communication, such as the ROS communication cycle and the ROS Bridge server.
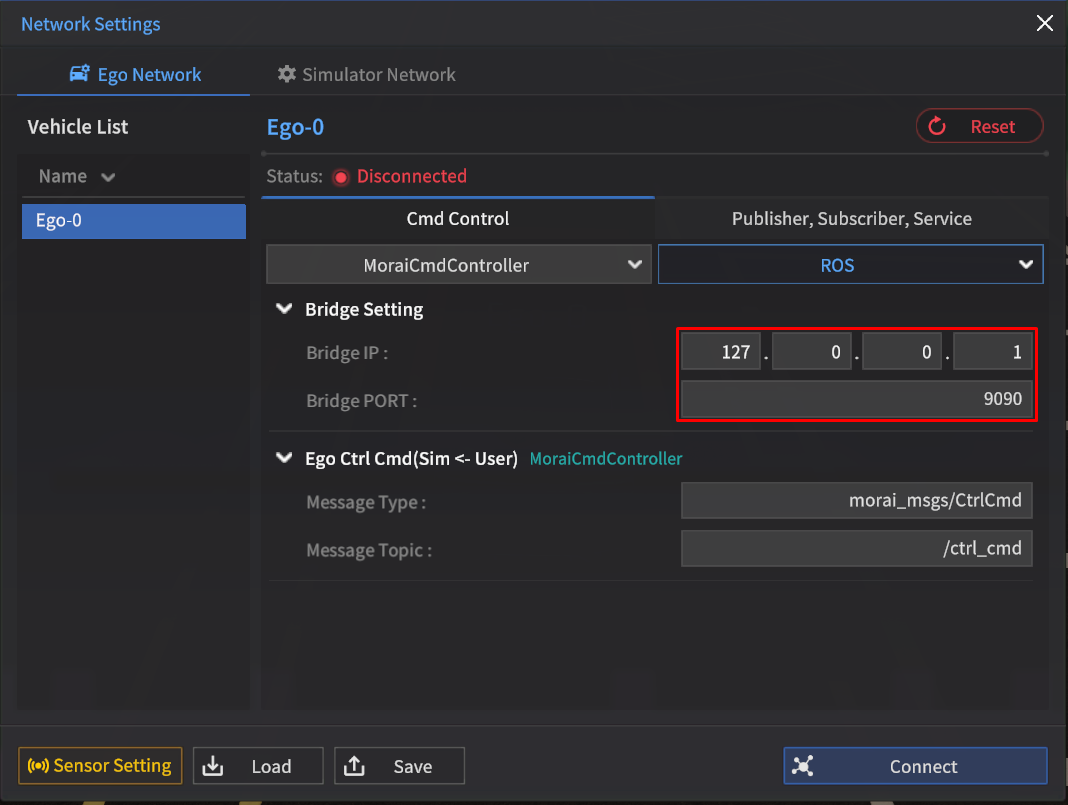
Bridge Setting
Enter the IP and Port address in the ROS Bridge.
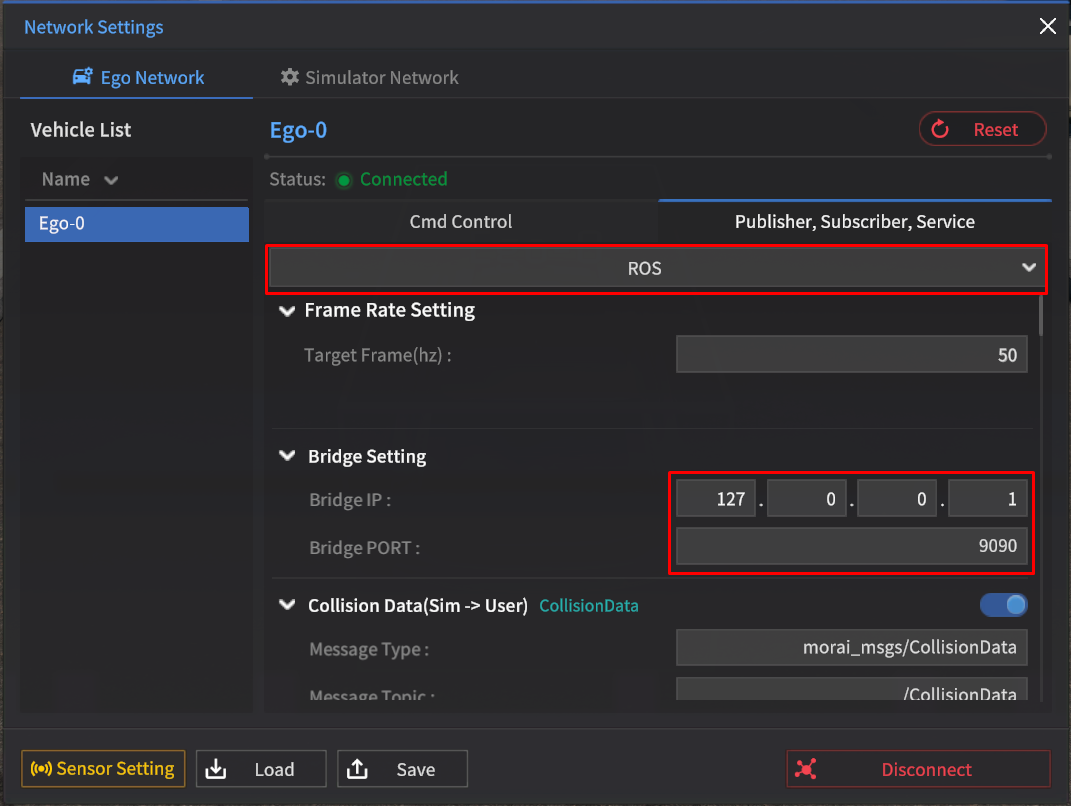
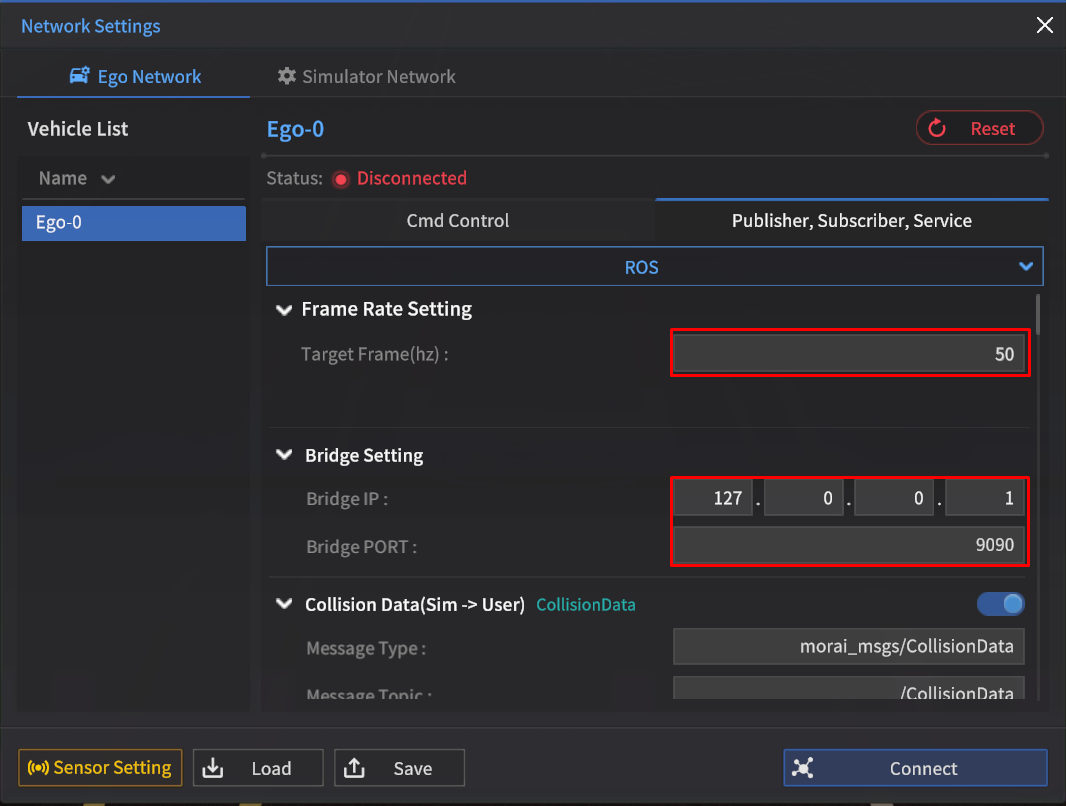
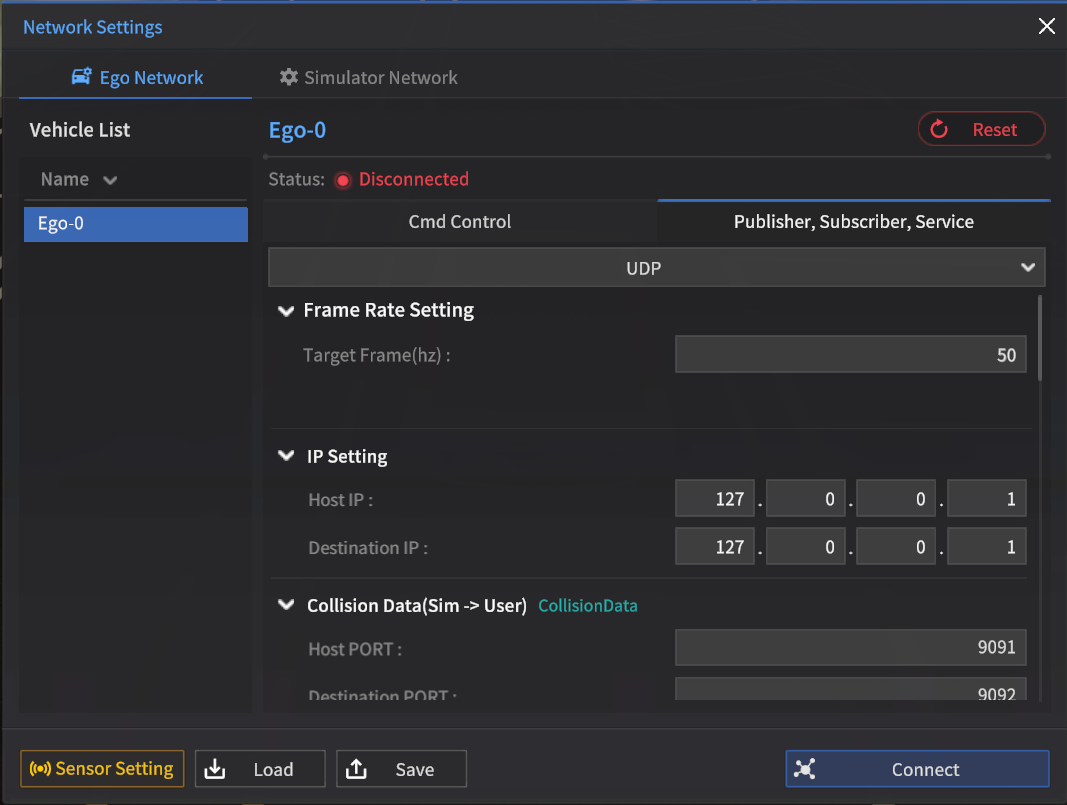
Frame Rate Setting
Specify the Frame Hz in the ROS output message. (Max. 120 Hz)
It may be lower than the targeted FPS, depending on the FPS of the simulator.
ROS Message Setting
Configure the message types and topics exchanged between the Ego Network and the Simulator Network.
Ego Network Message Setting for ROS
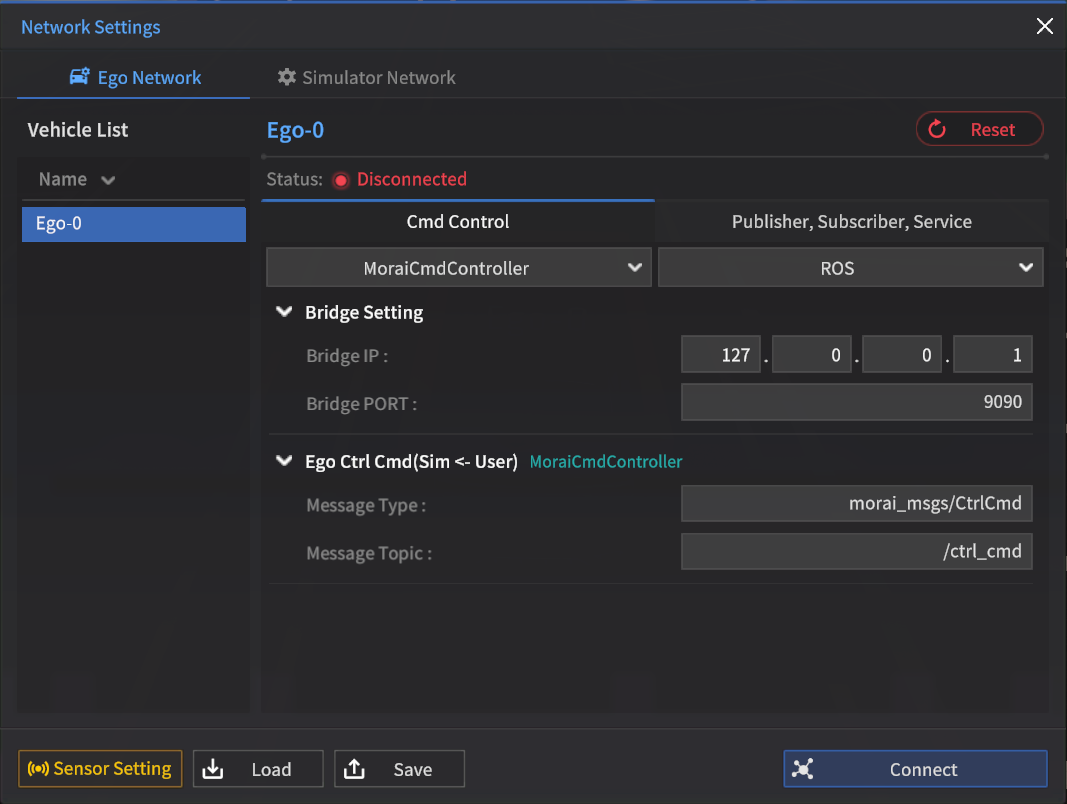
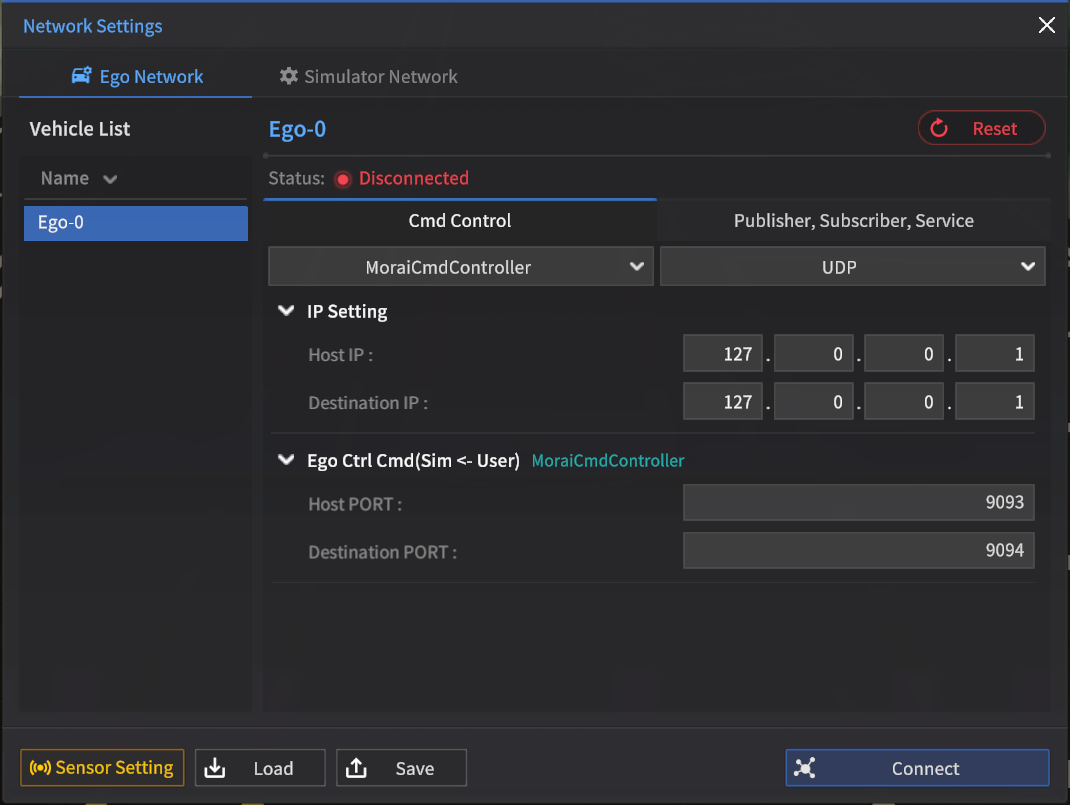
Cmd Control
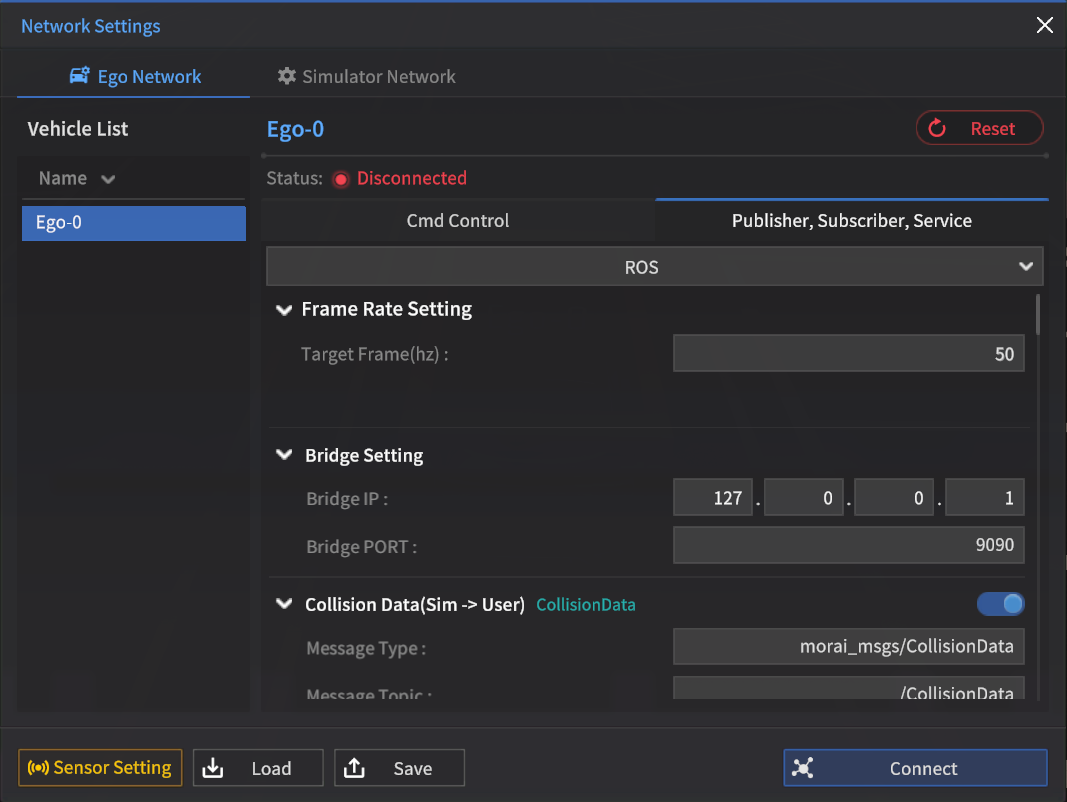
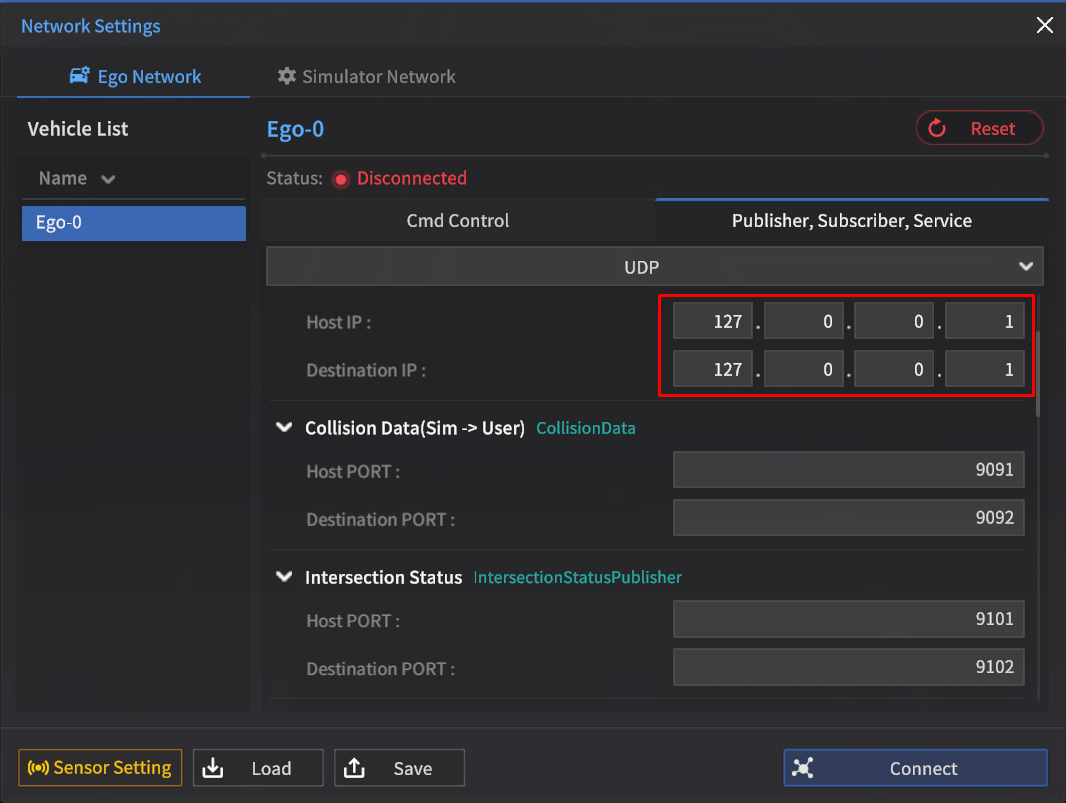
Publisher, Subscriber, Service
UDP
IP Setting
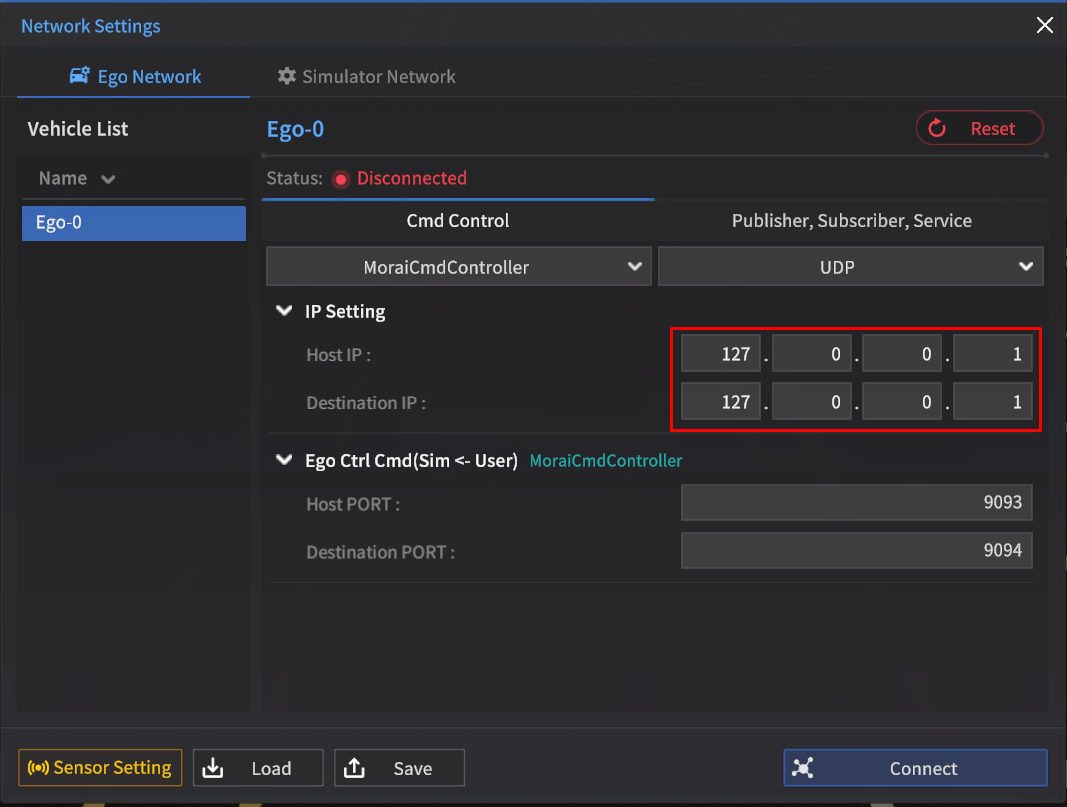
IP Setting
Enter the Host IP on the Simulator PC, and enter the Destination IP on the user algorithm PC.
Enter the Host IP/ Destination IP as 127.0.0.1 if you use both in a single PC, as above figure.
Enter the port to use (be cautious of port conflicts).
UDP Message Setting
Configure the Host/Destination PORT for each UDP message exchanged between the Ego Network and the Simulator Network.
Ego Network Message Setting for UDP
Cmd Control
Publisher, Subscriber, Service
gRPC
In the Network Settings > Simulator Network, configure the connection status and port for the gRPC server.
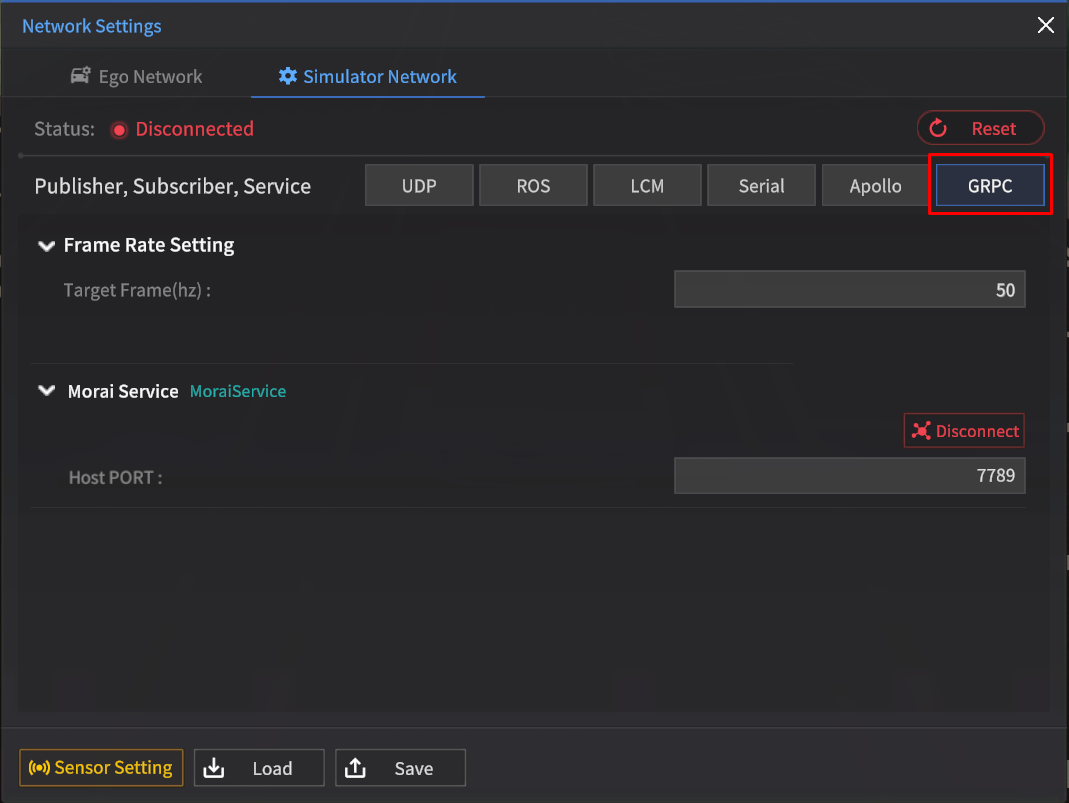
Frame Rate Setting
N/A
MORAI Service
The MORAI Service serves as the basic gRPC server for integration with MORAI SIM, and its default port value is 7789.
You can modify the setting after you disconnect it.
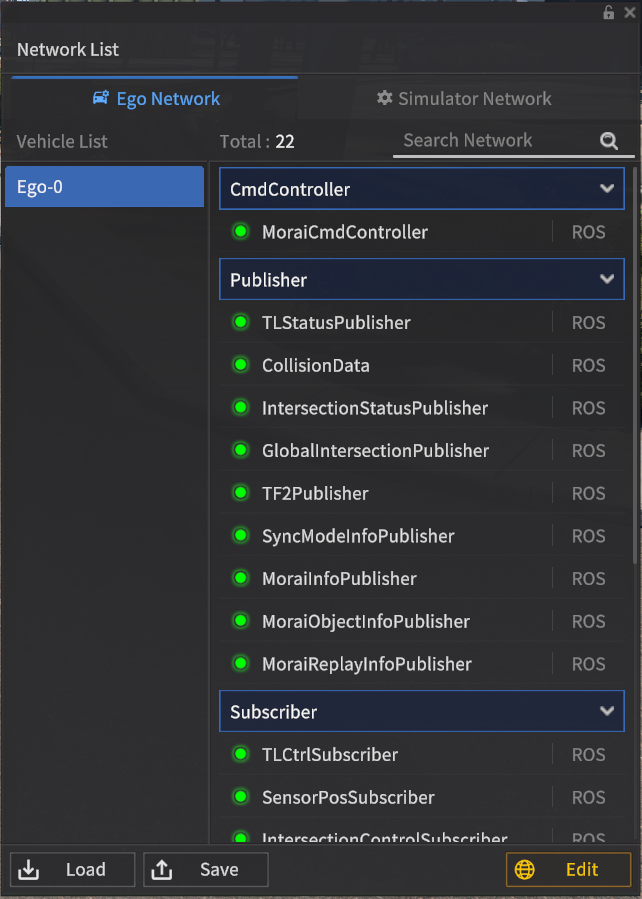
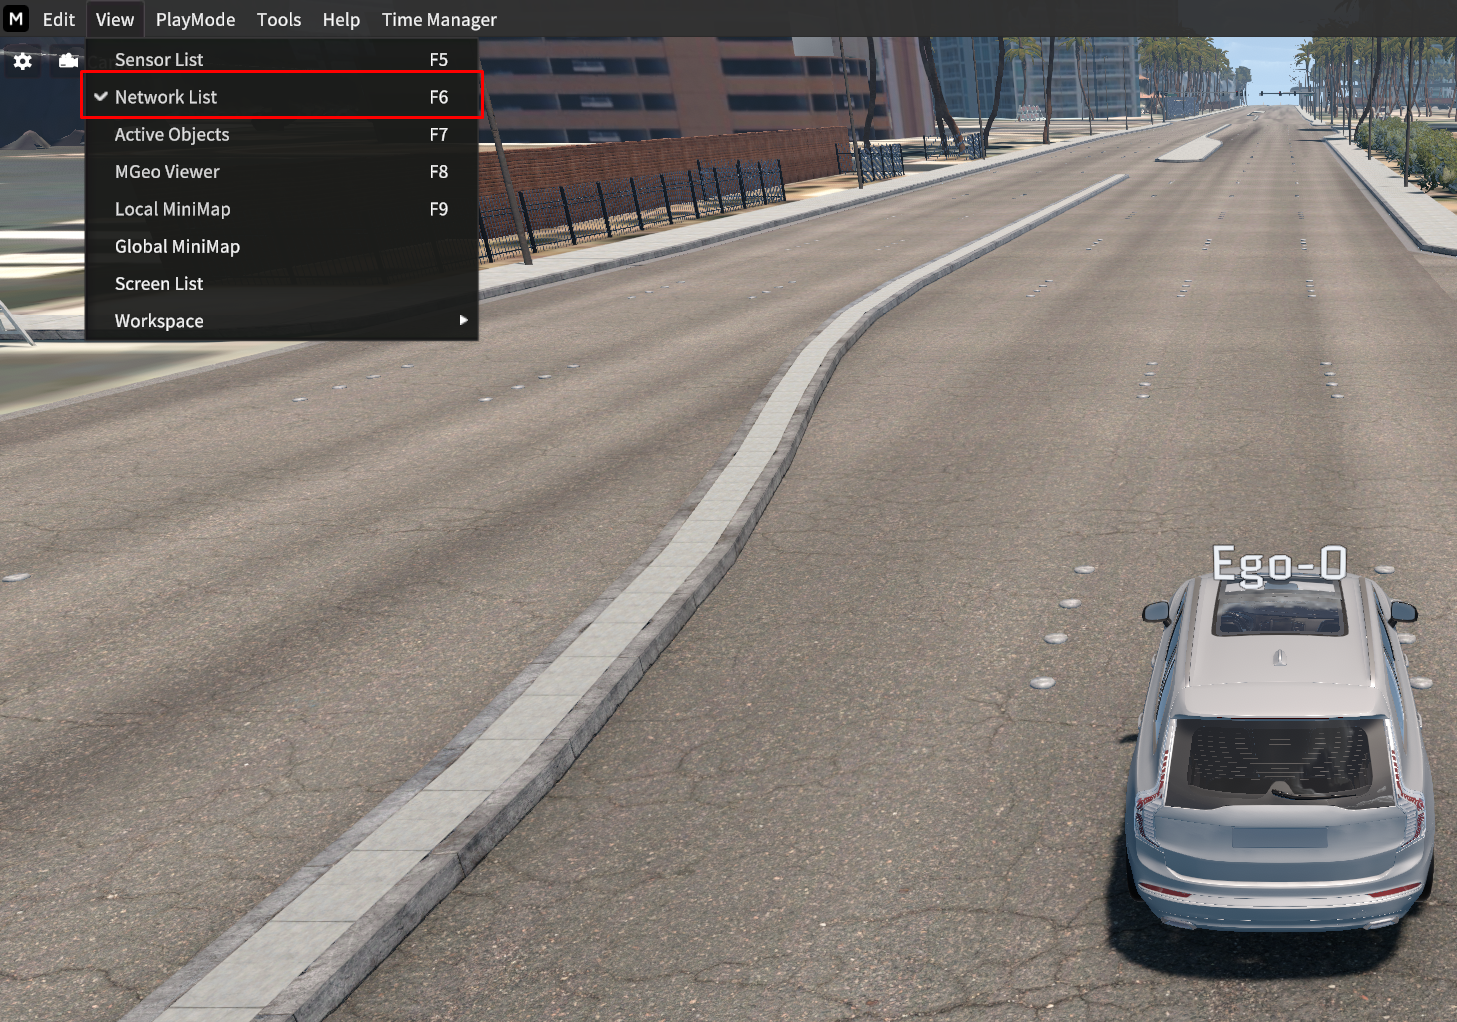
Network List
This section describes how to view the Network status currently connected to the simulator in the Network List.
To view the current Network List, go to View > Network List.
View Network List :
Ego Network
Includes Cmd Controller, Publisher, Subscriber, Service, and Sensor.
Cmd Controller : Displays the Ego-ehicle's control message Network.
Publish(Sim → User) : The simulator displays the network connection information for published messages.
Subscriber(User → Sim) : The simulator displays the network connection information for subscribed messages.
Service : Displays the network connection information for the service messages.
Sensor : Displays the network connection information for the spawned sensors.
Simulator Network
Includes Publisher, Subscriber, and Provider.
You can confirm the number of networks spawned via Total in the Network List.
You can find the Network you want via Search.
How to connect the Network : The process is the same as others.