Tips
This section describes some useful tips for running the MORAI SIM: Drive.
An error occurred due to certain input devices?
What is <RI.Hid> Error?

This error is related to the Human Interface Device (HID) protocol and can occur when using certain input devices (such as a gaming keyboard or mouse) or when those devices are connected to the PC.
Avoid using or connecting the following input devices to your PC, as they may cause <RI.Hid> errors, potentially overloading the simulator.
If <RI.Hid> occurs and the MORAI simulator is overloaded, the screen frames may drop or the simulator may freeze.
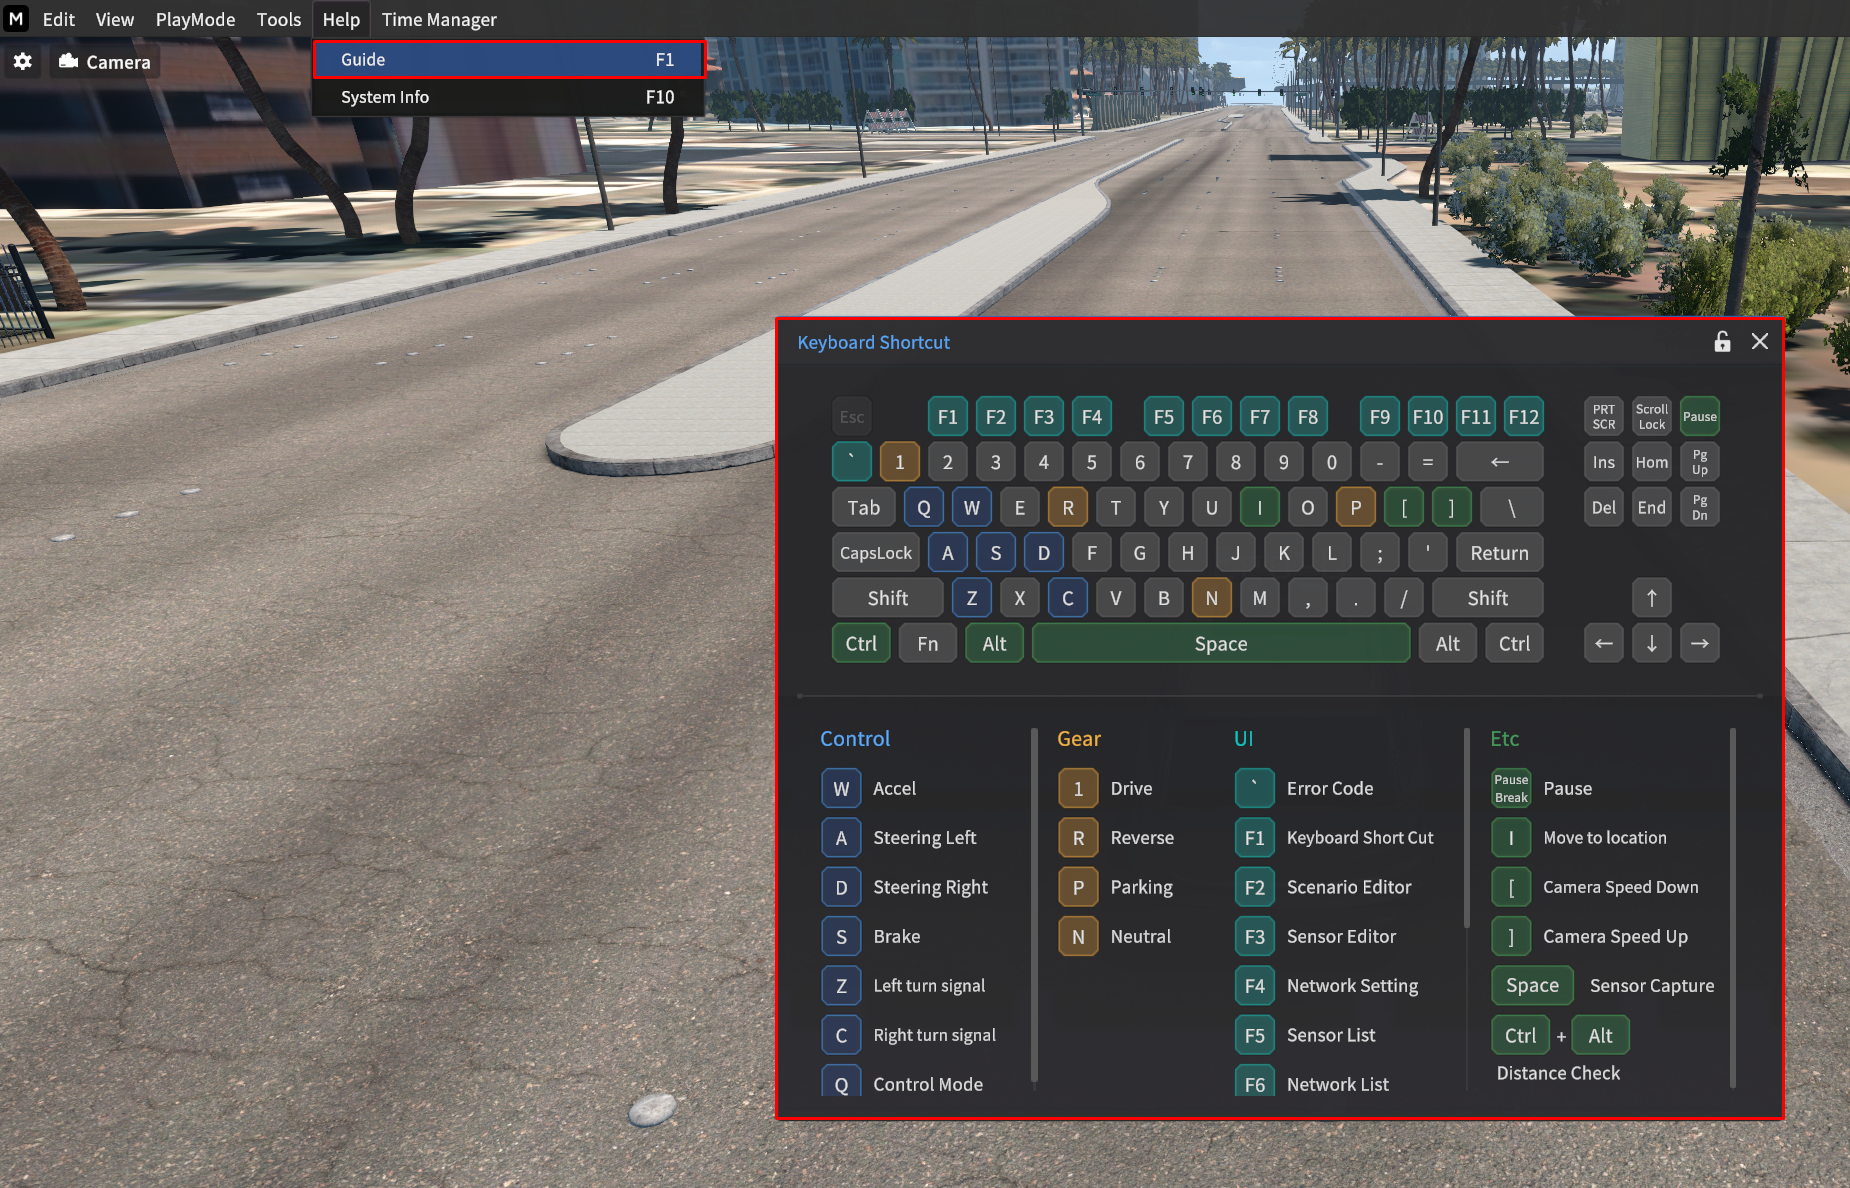
Help Window
Press F1 key to open the Help window and view keyboard shortcuts for operating the simulator.
Empty Vehicle Mode
When access to the Select Map and Vehicle page, you can run the simulator with the Empty Vehicle mode.
Select the Map you want to access, and Select Empty_Vehicle in the vehicle field.
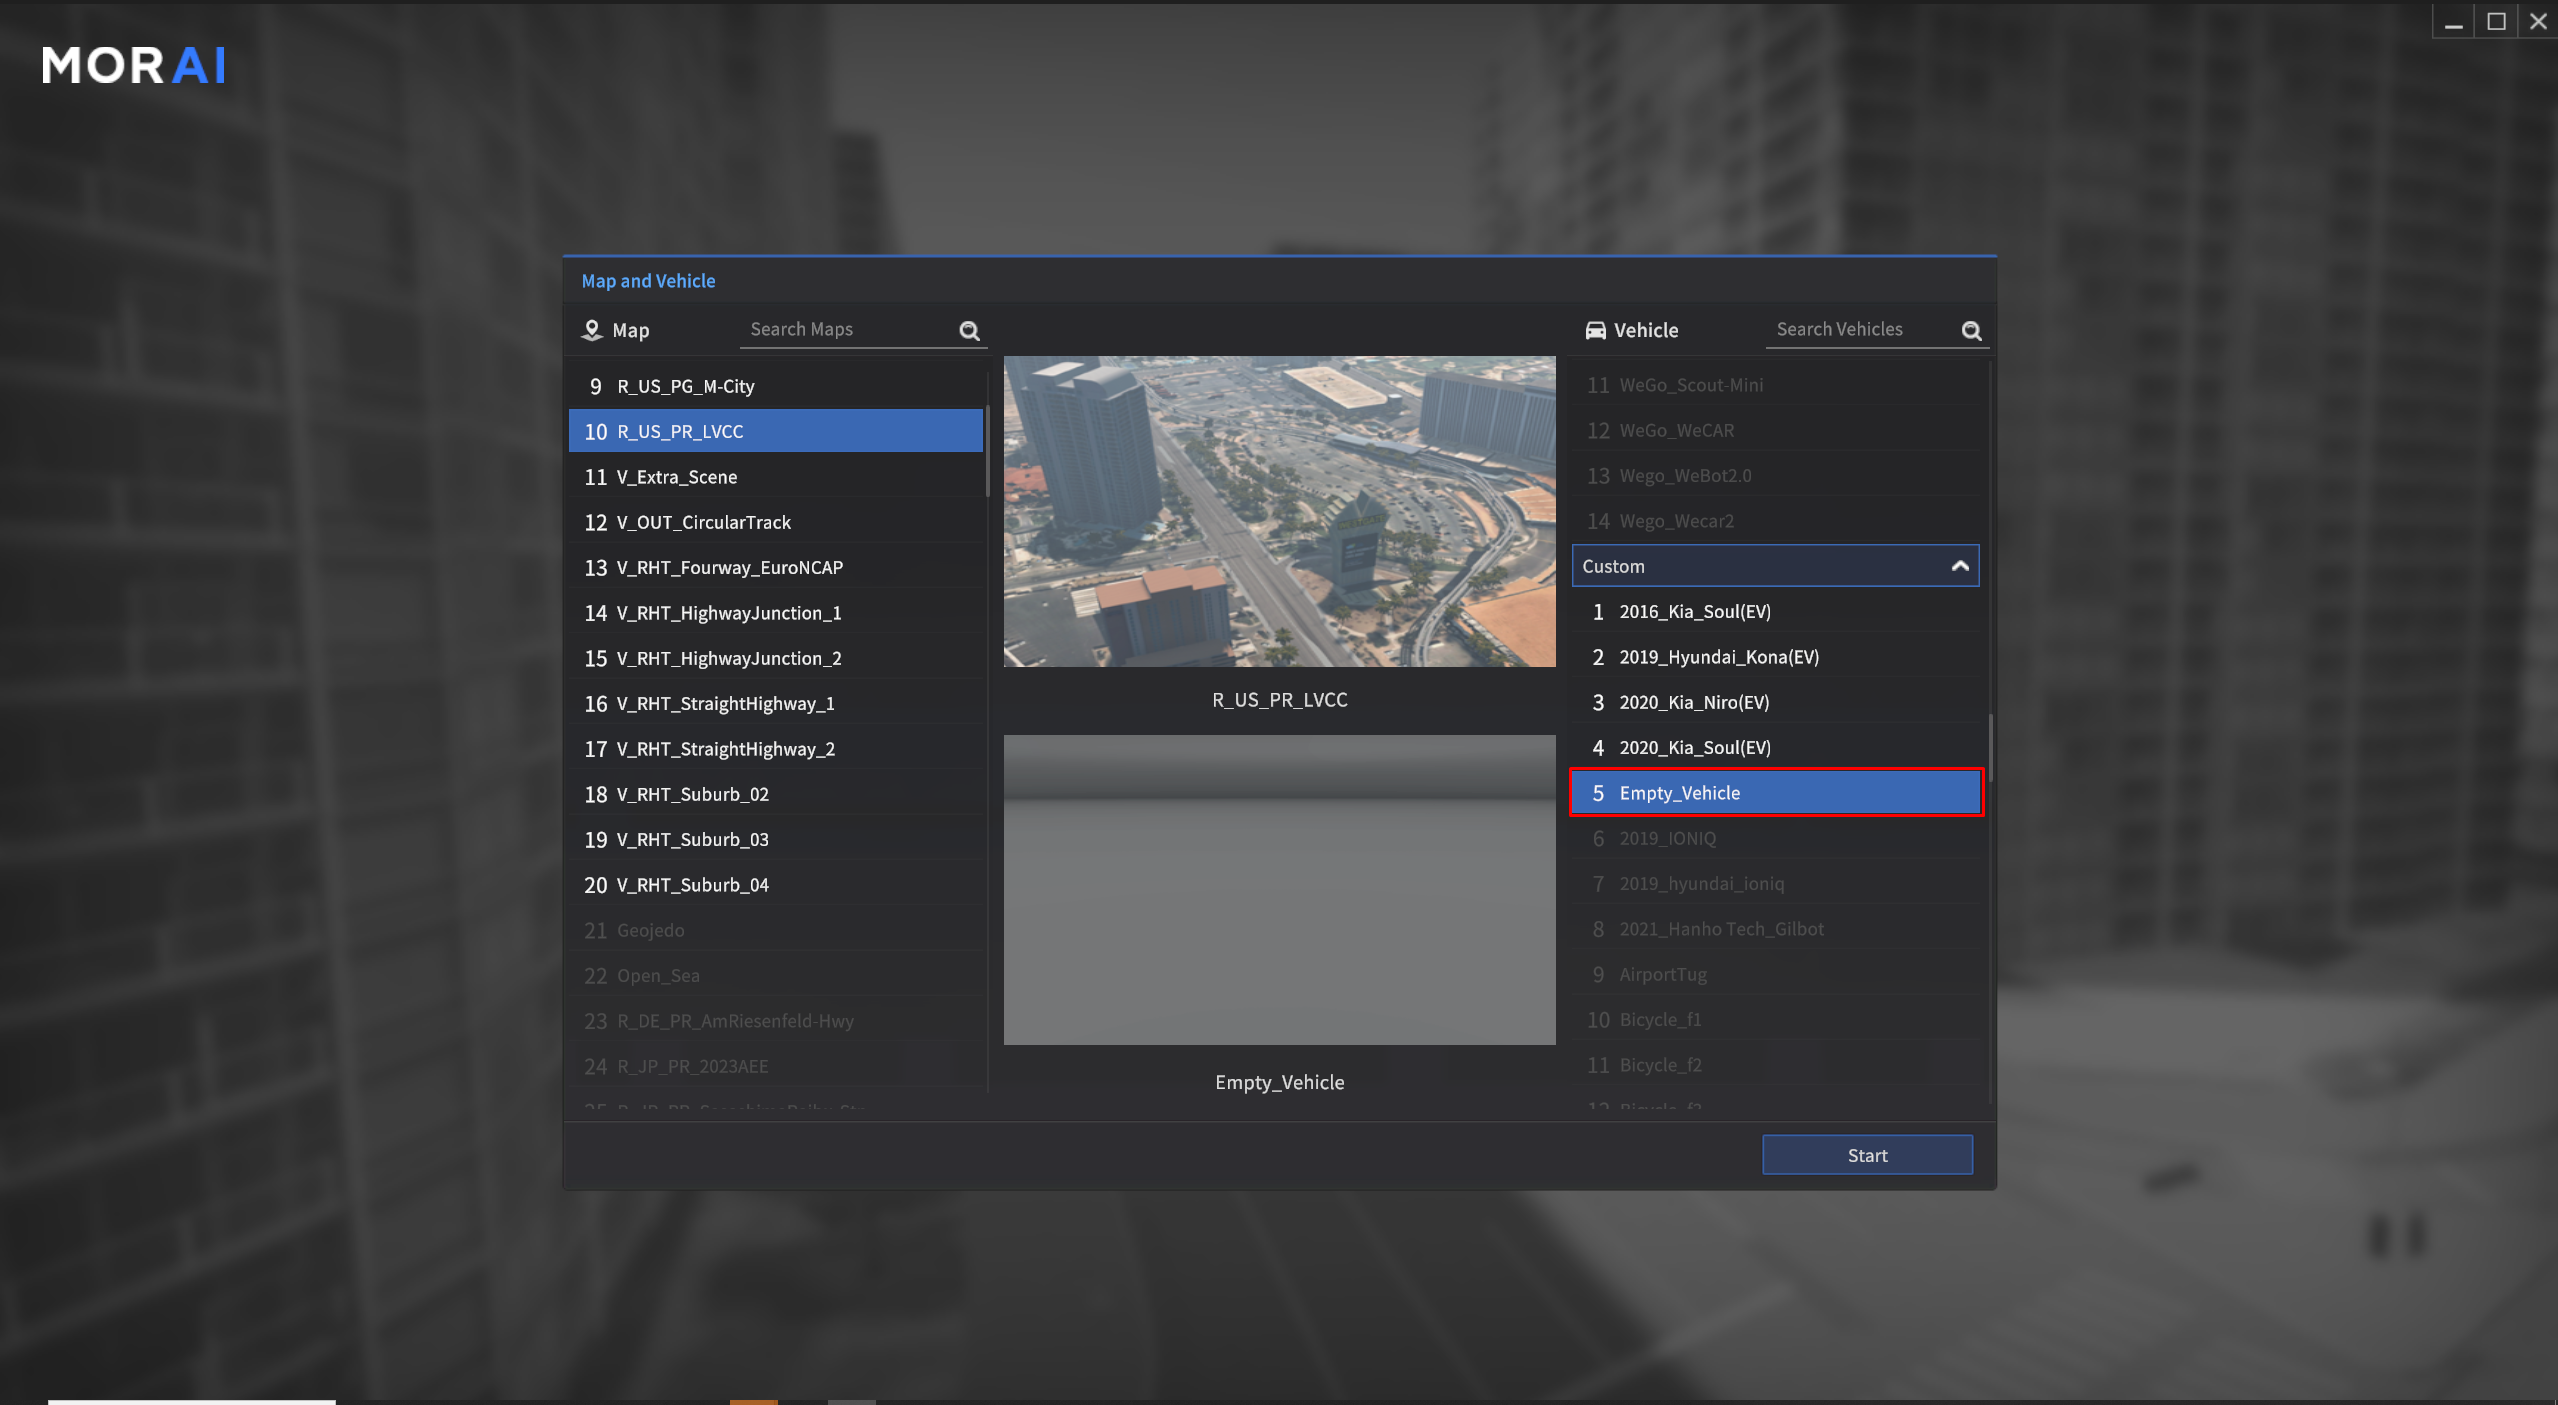
When Empty_Vehicle selected
After accessing the simulator, you can move the Empty_Vehicle view via below shortcuts.
W,S: Forward, BackwardA,D: Left, RightZ,C: Up, Down
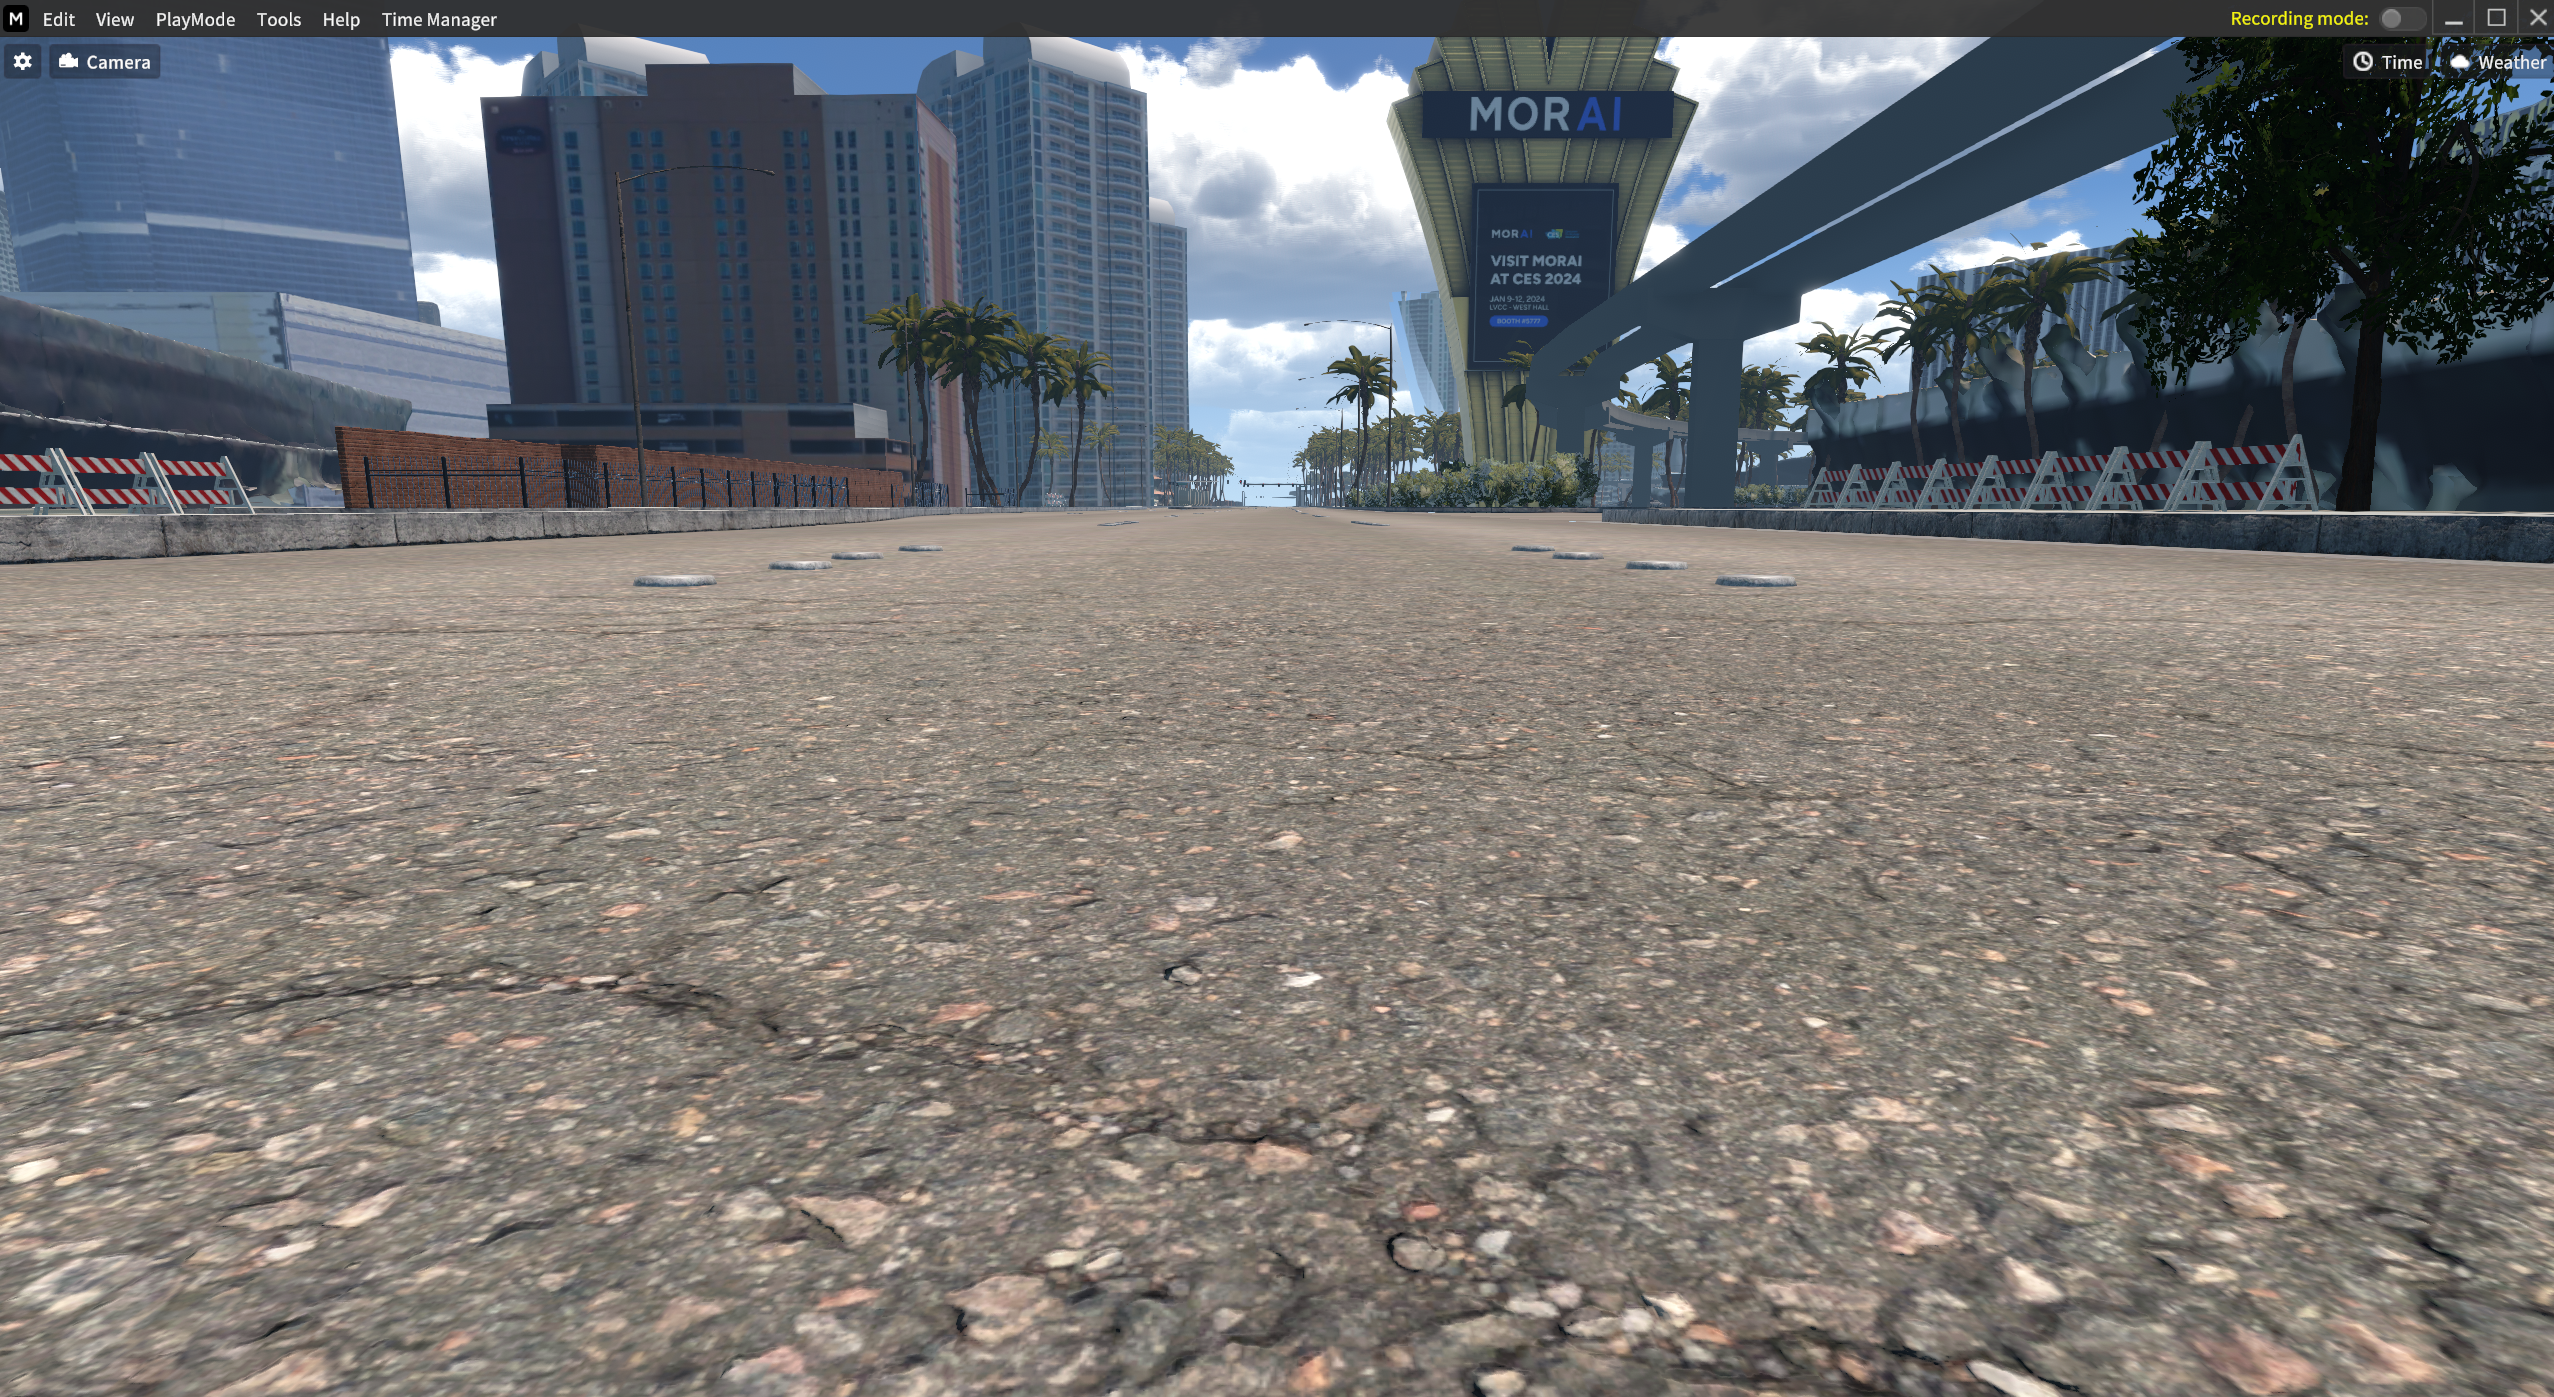
When accessed in LVCC Map with Empty Vehicle Mode
System
Go to Tools > Option.
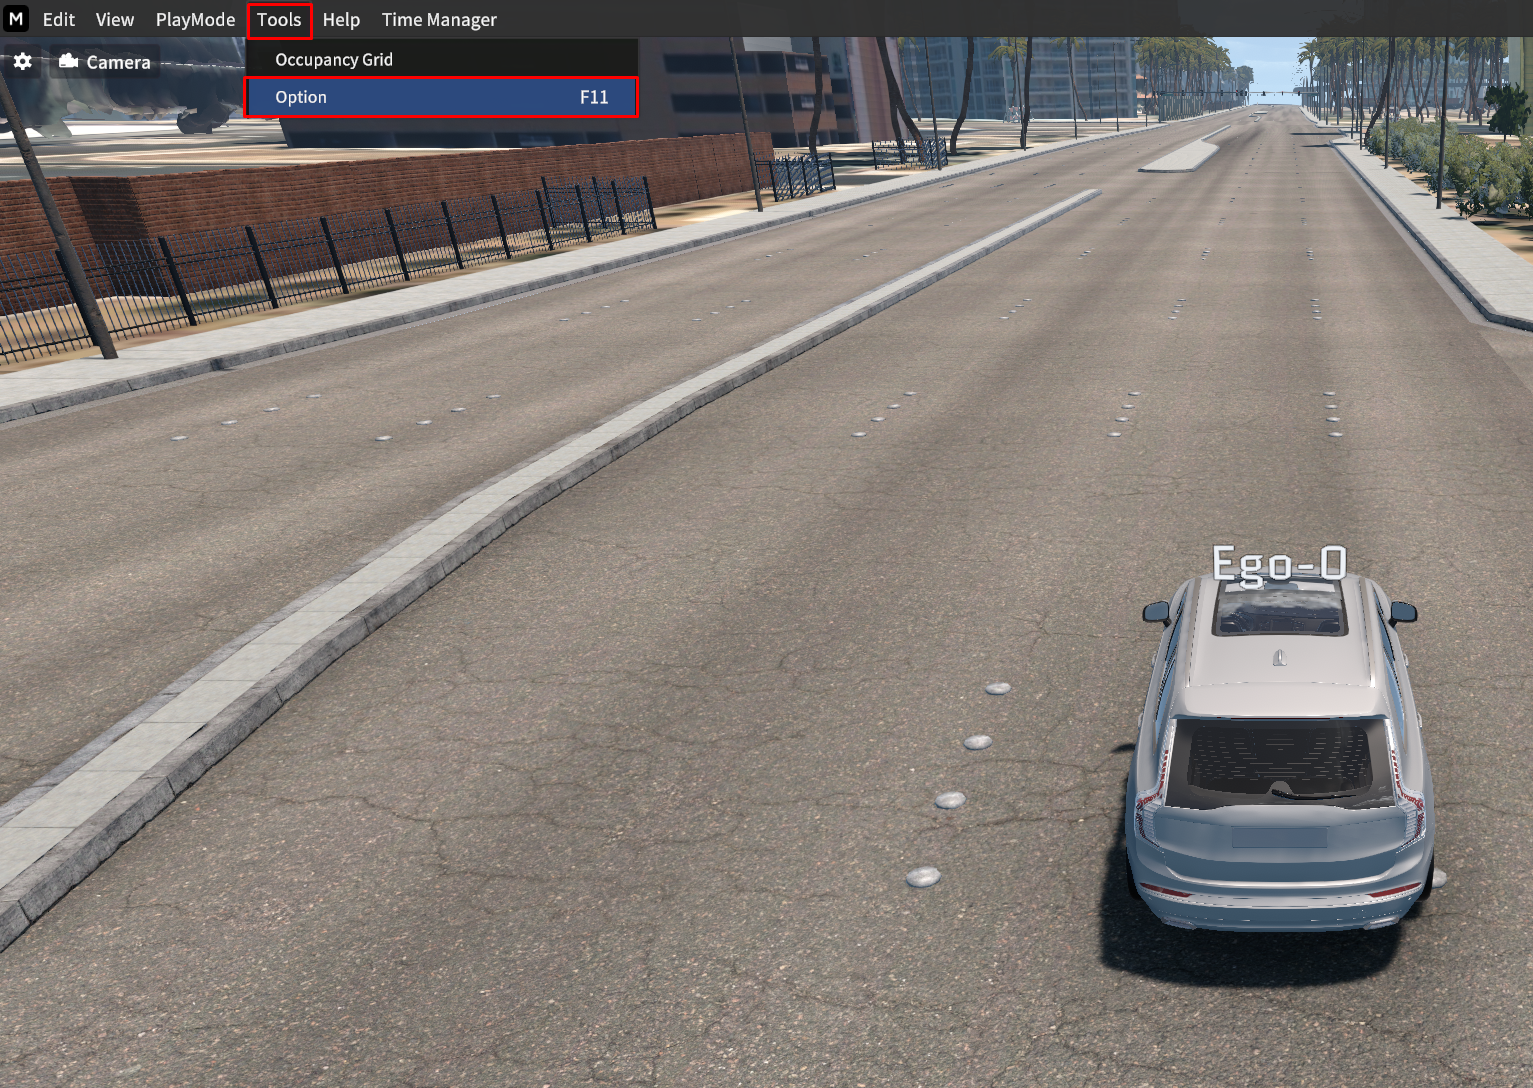
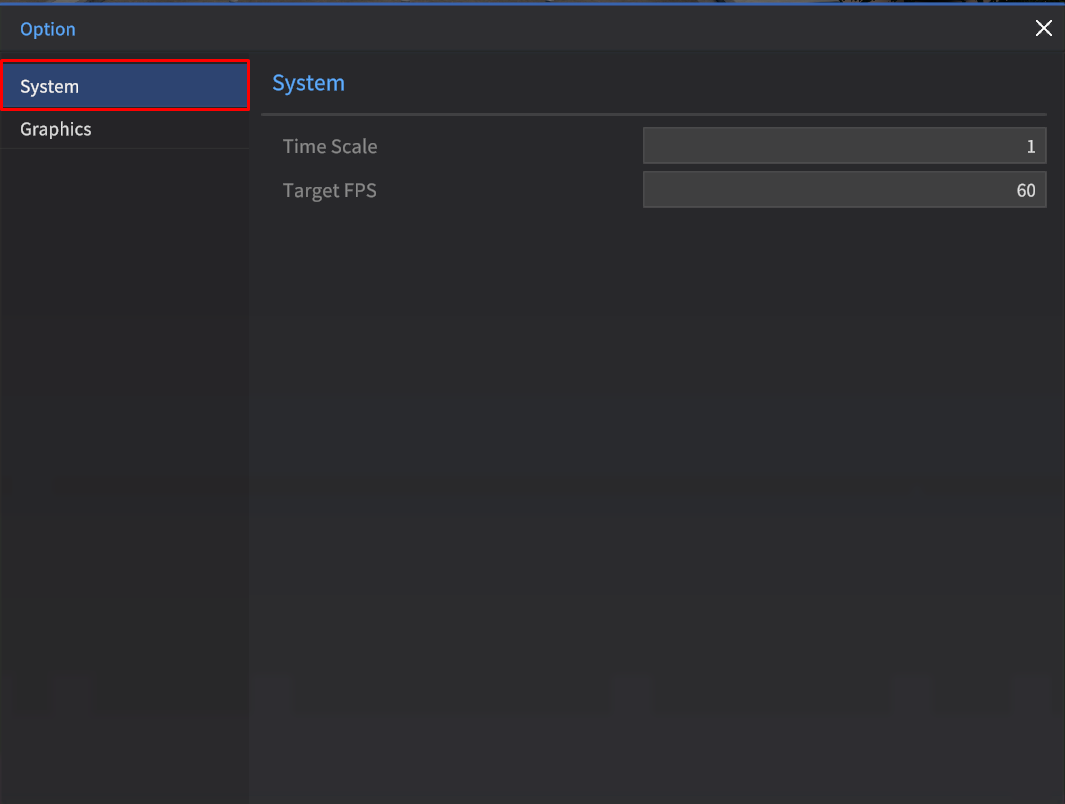
Click System.
Time Scale : In here you can adjust the simulator speed by entering the field (The range value: 0~2).
Target FPS: The default value is set to “60”, but it can be adjusted.
Graphics
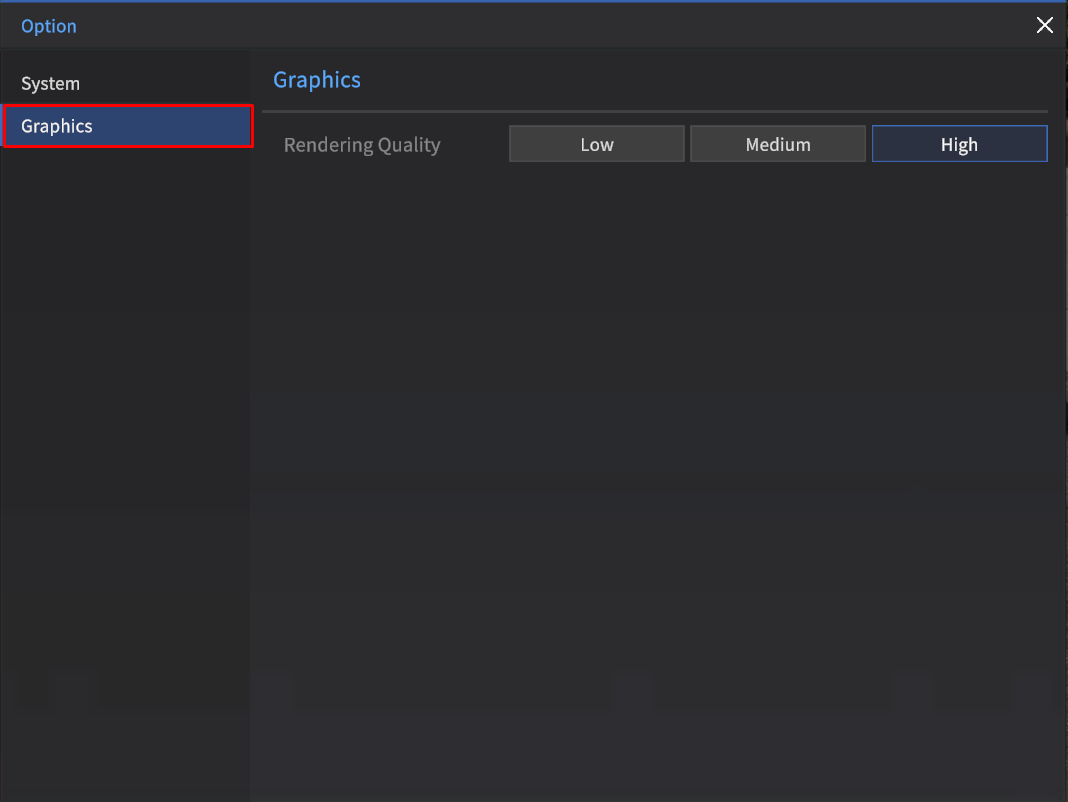
Click Graphics.
Rendering Quality: You can select among Low, Medium, and High.
Environment Settings
The Environment settings allow you to configure Time and Weather of day, determining the simulator's background and lighting.
The Weather feature includes sound effects that change based on the weather conditions.
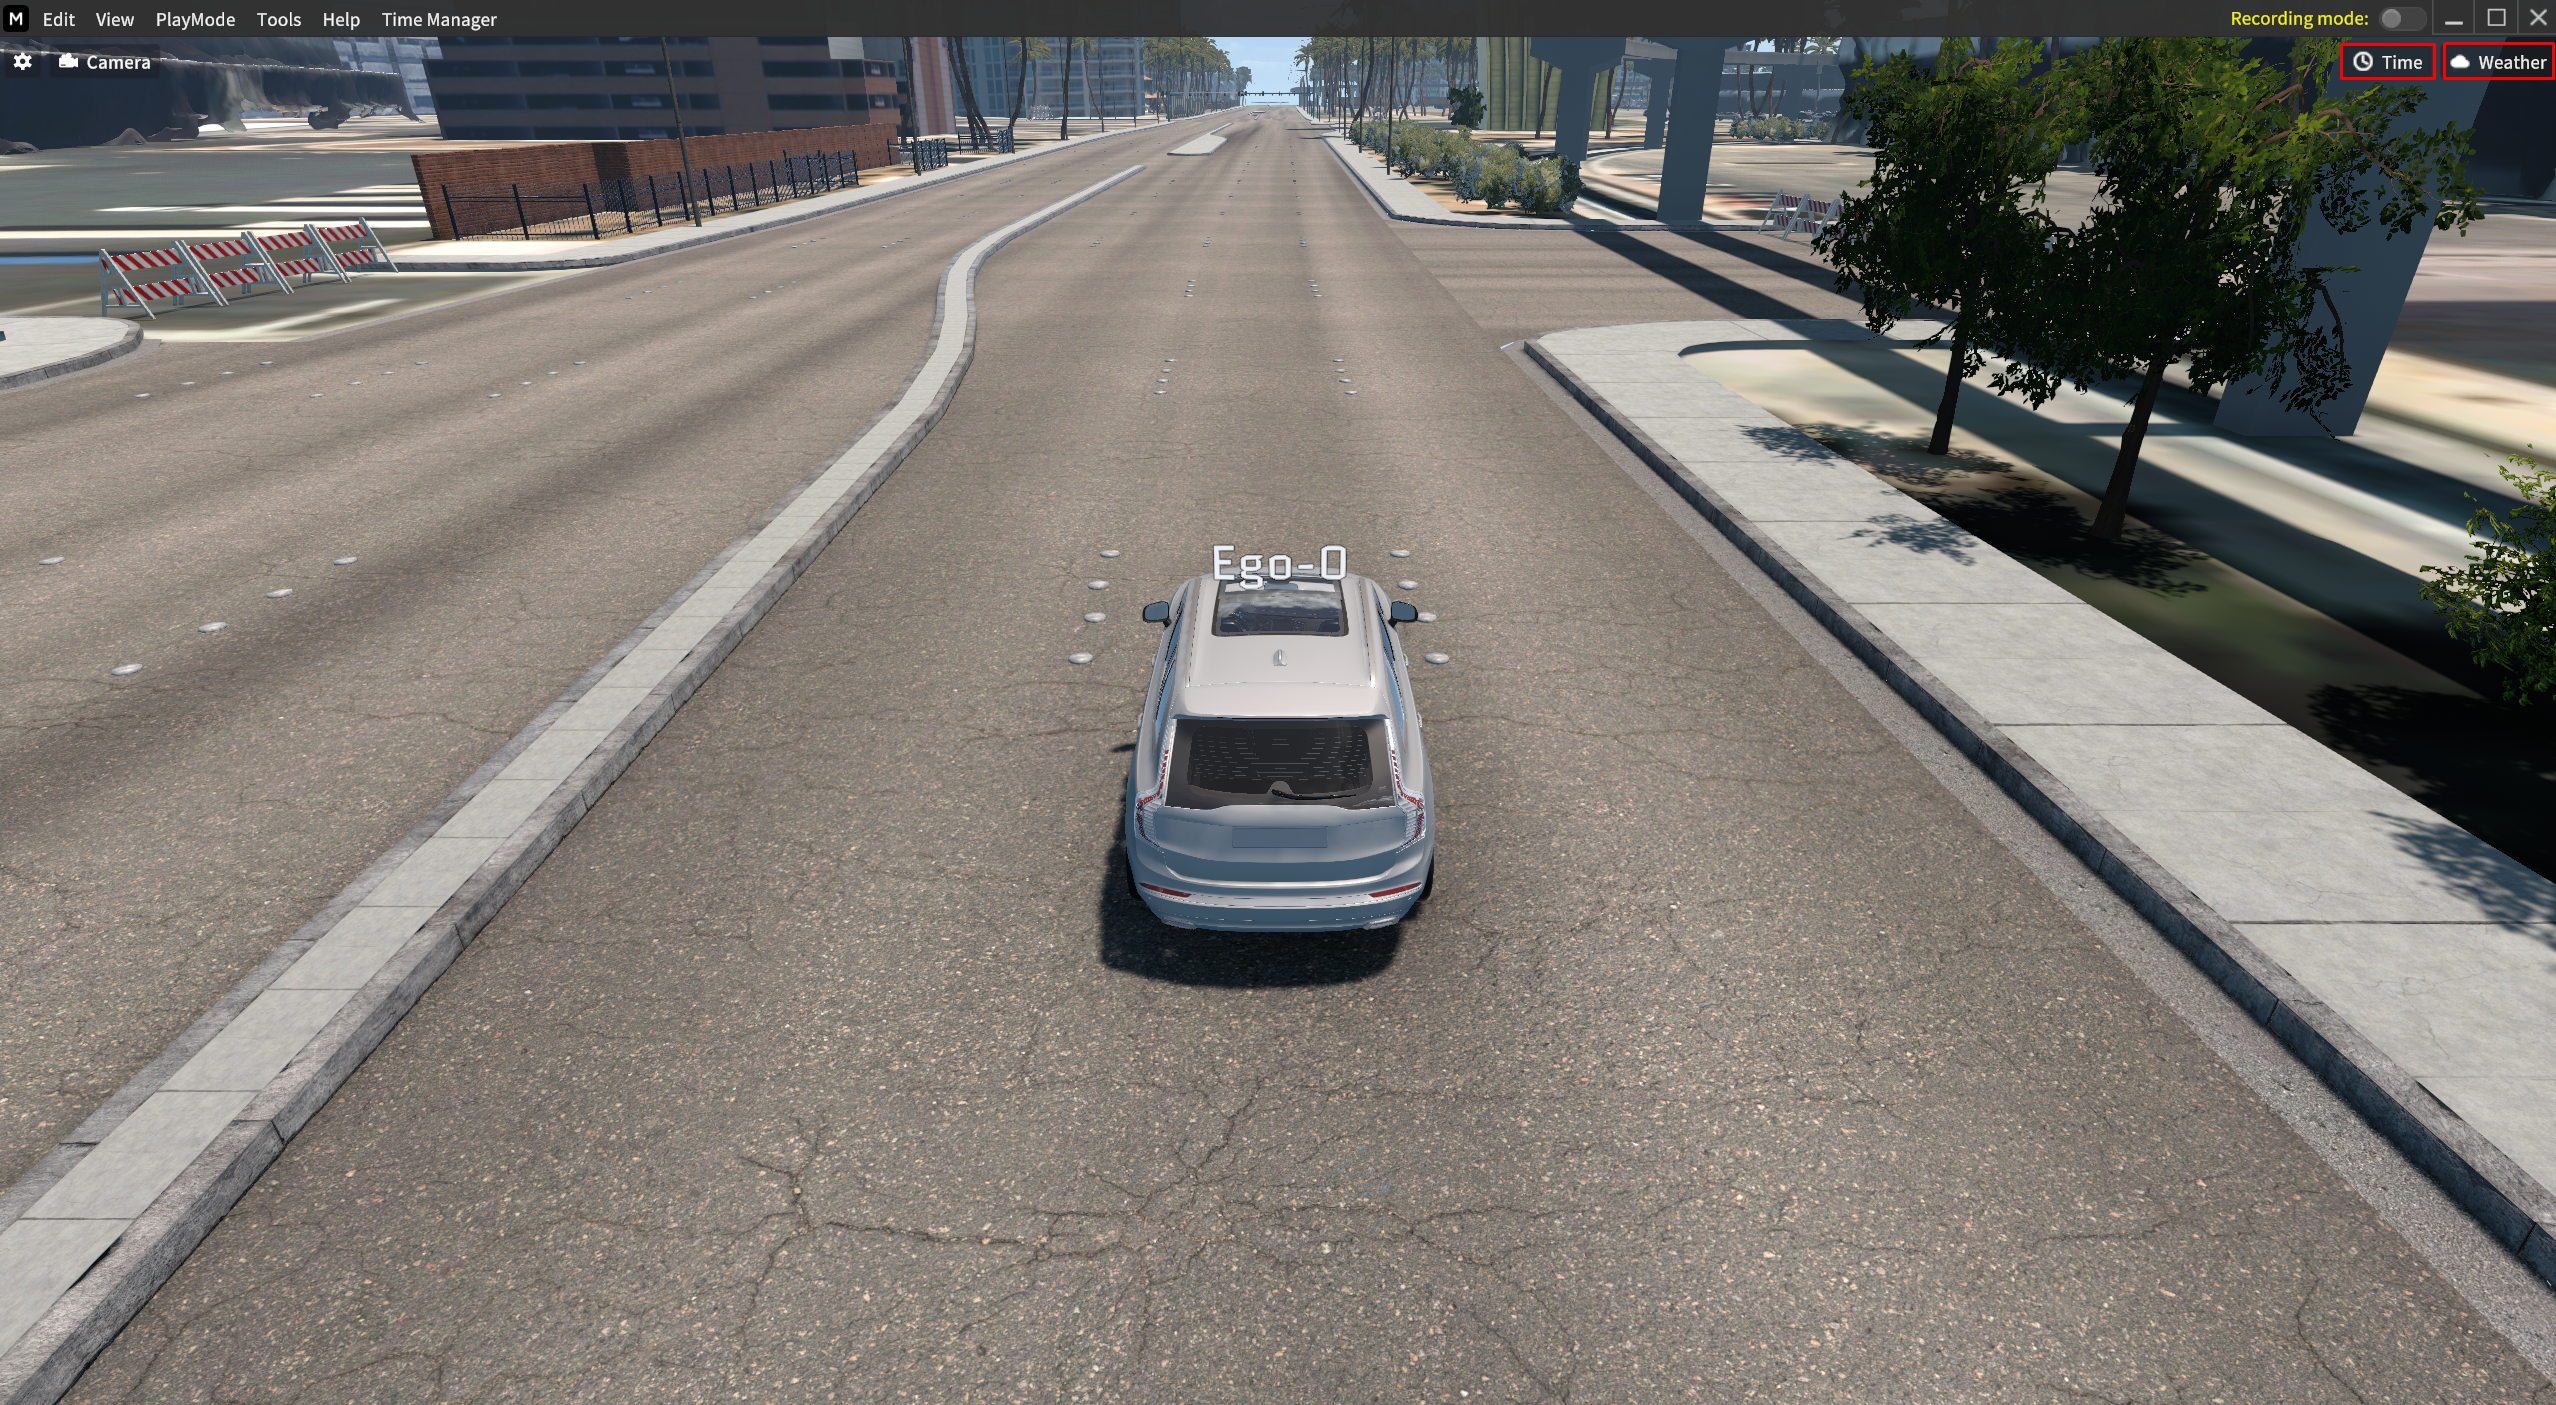
1] Time
Click 🕓 Time icon on the top-right of the simulator.
As you select different time zones, you can adjust the light level of your simulator background.
“13:00 PM” is set as a default.
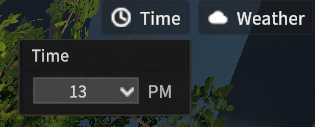
2] Weather
Click ☁️ Weather icon right next to the Time icon.
Selecting different weather conditions in the simulator changes the weather, along with corresponding visual and sound effects.
“CLOUDY” is set as a default.
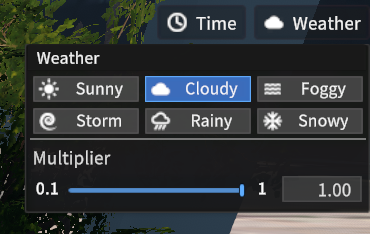
Multiplier option: This option is for adjusting road friction.
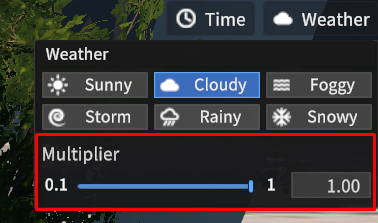
The Multiplier value is automatically changed based on the below weather options. Or, you can adjust the road friction by entering values (0~1) to match your user environment.
Sunny / Cloudy / Foggy: 1.0
Storm / Rainiy : 0.8
Snowy: 0.3
Effect Strength option: This option is for the Stormy, Rainy, and Snowy weather conditions.
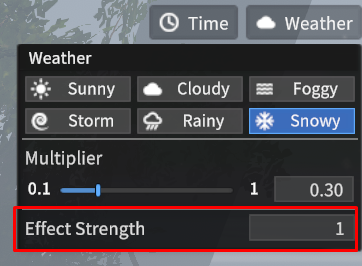
You can adjust the emission rate for the weather effect from 0 to 10.
Foggy Density, Foggy Distance: This option is for the Foggy weather condition.
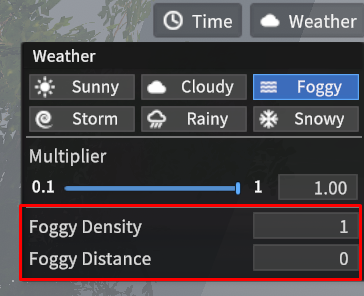
You can adjust the Foggy Density and Foggy Distance value from 0 to10.
No Rendering Mode
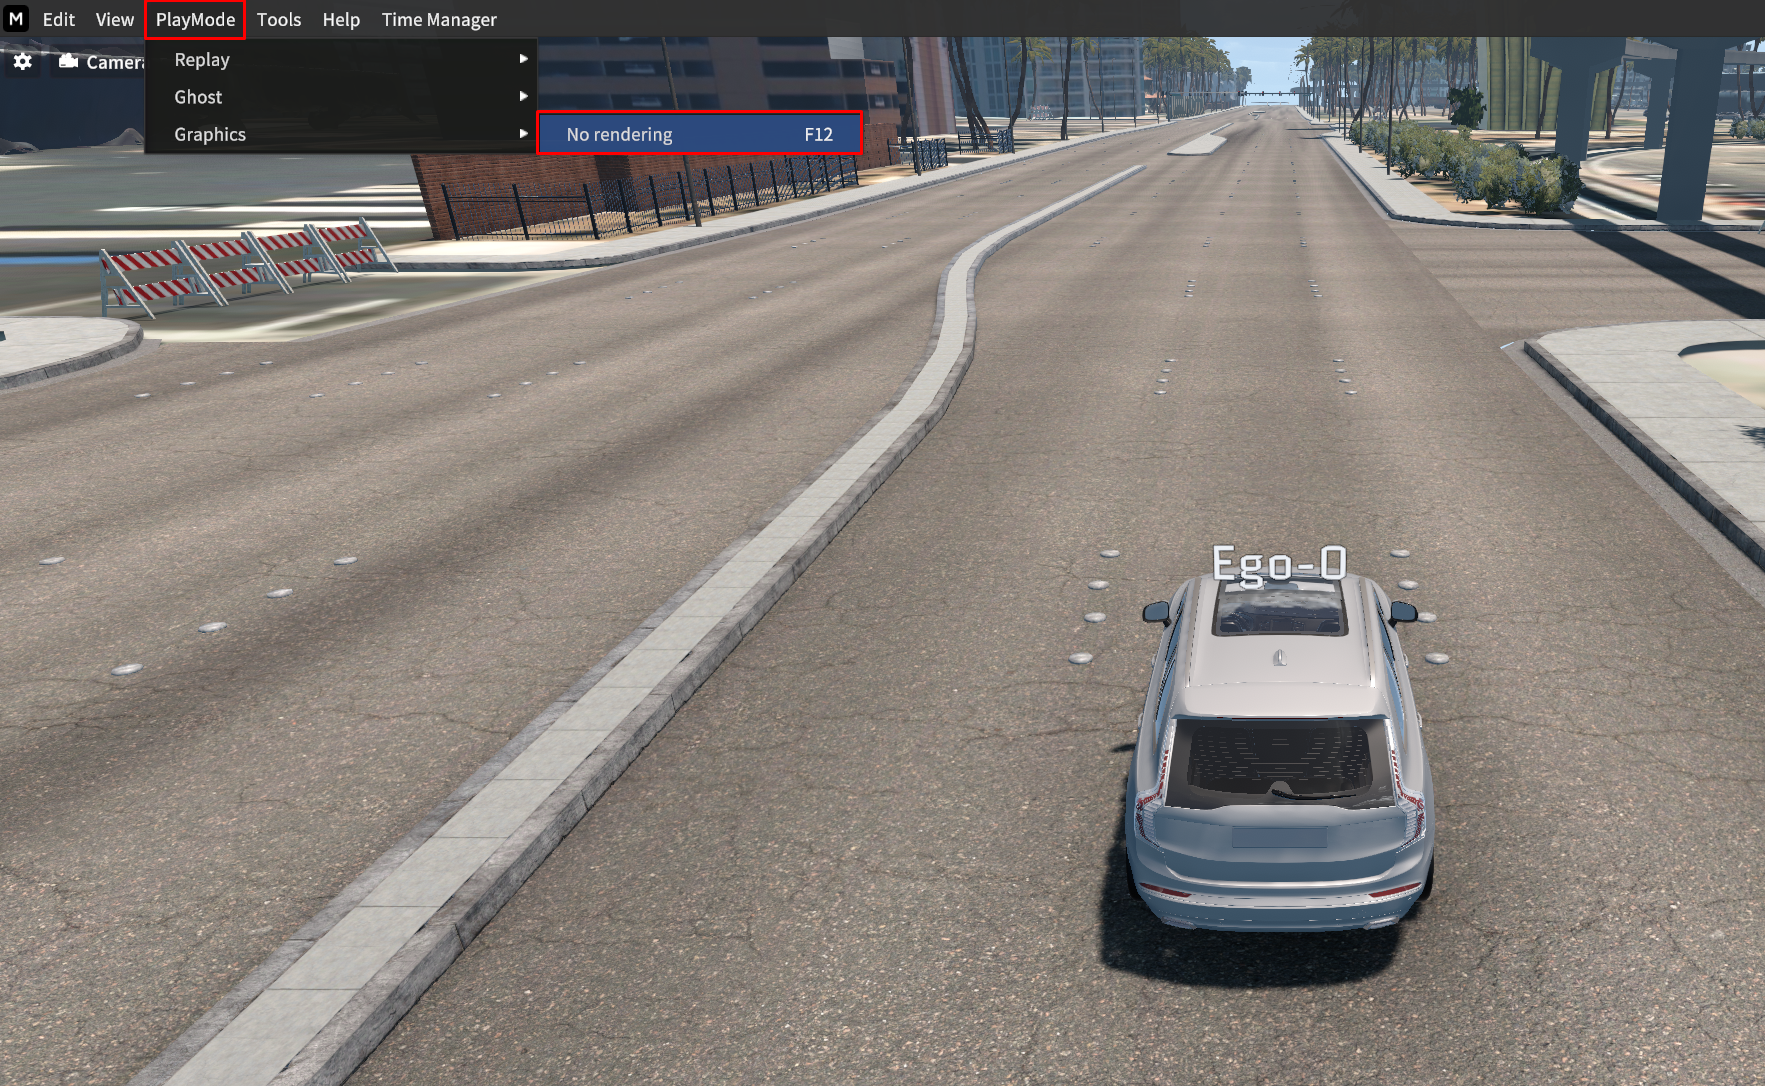
Go to PlayMode > Graphics > No rendering.
In this mode, you can display the main view of the camera in 2D.
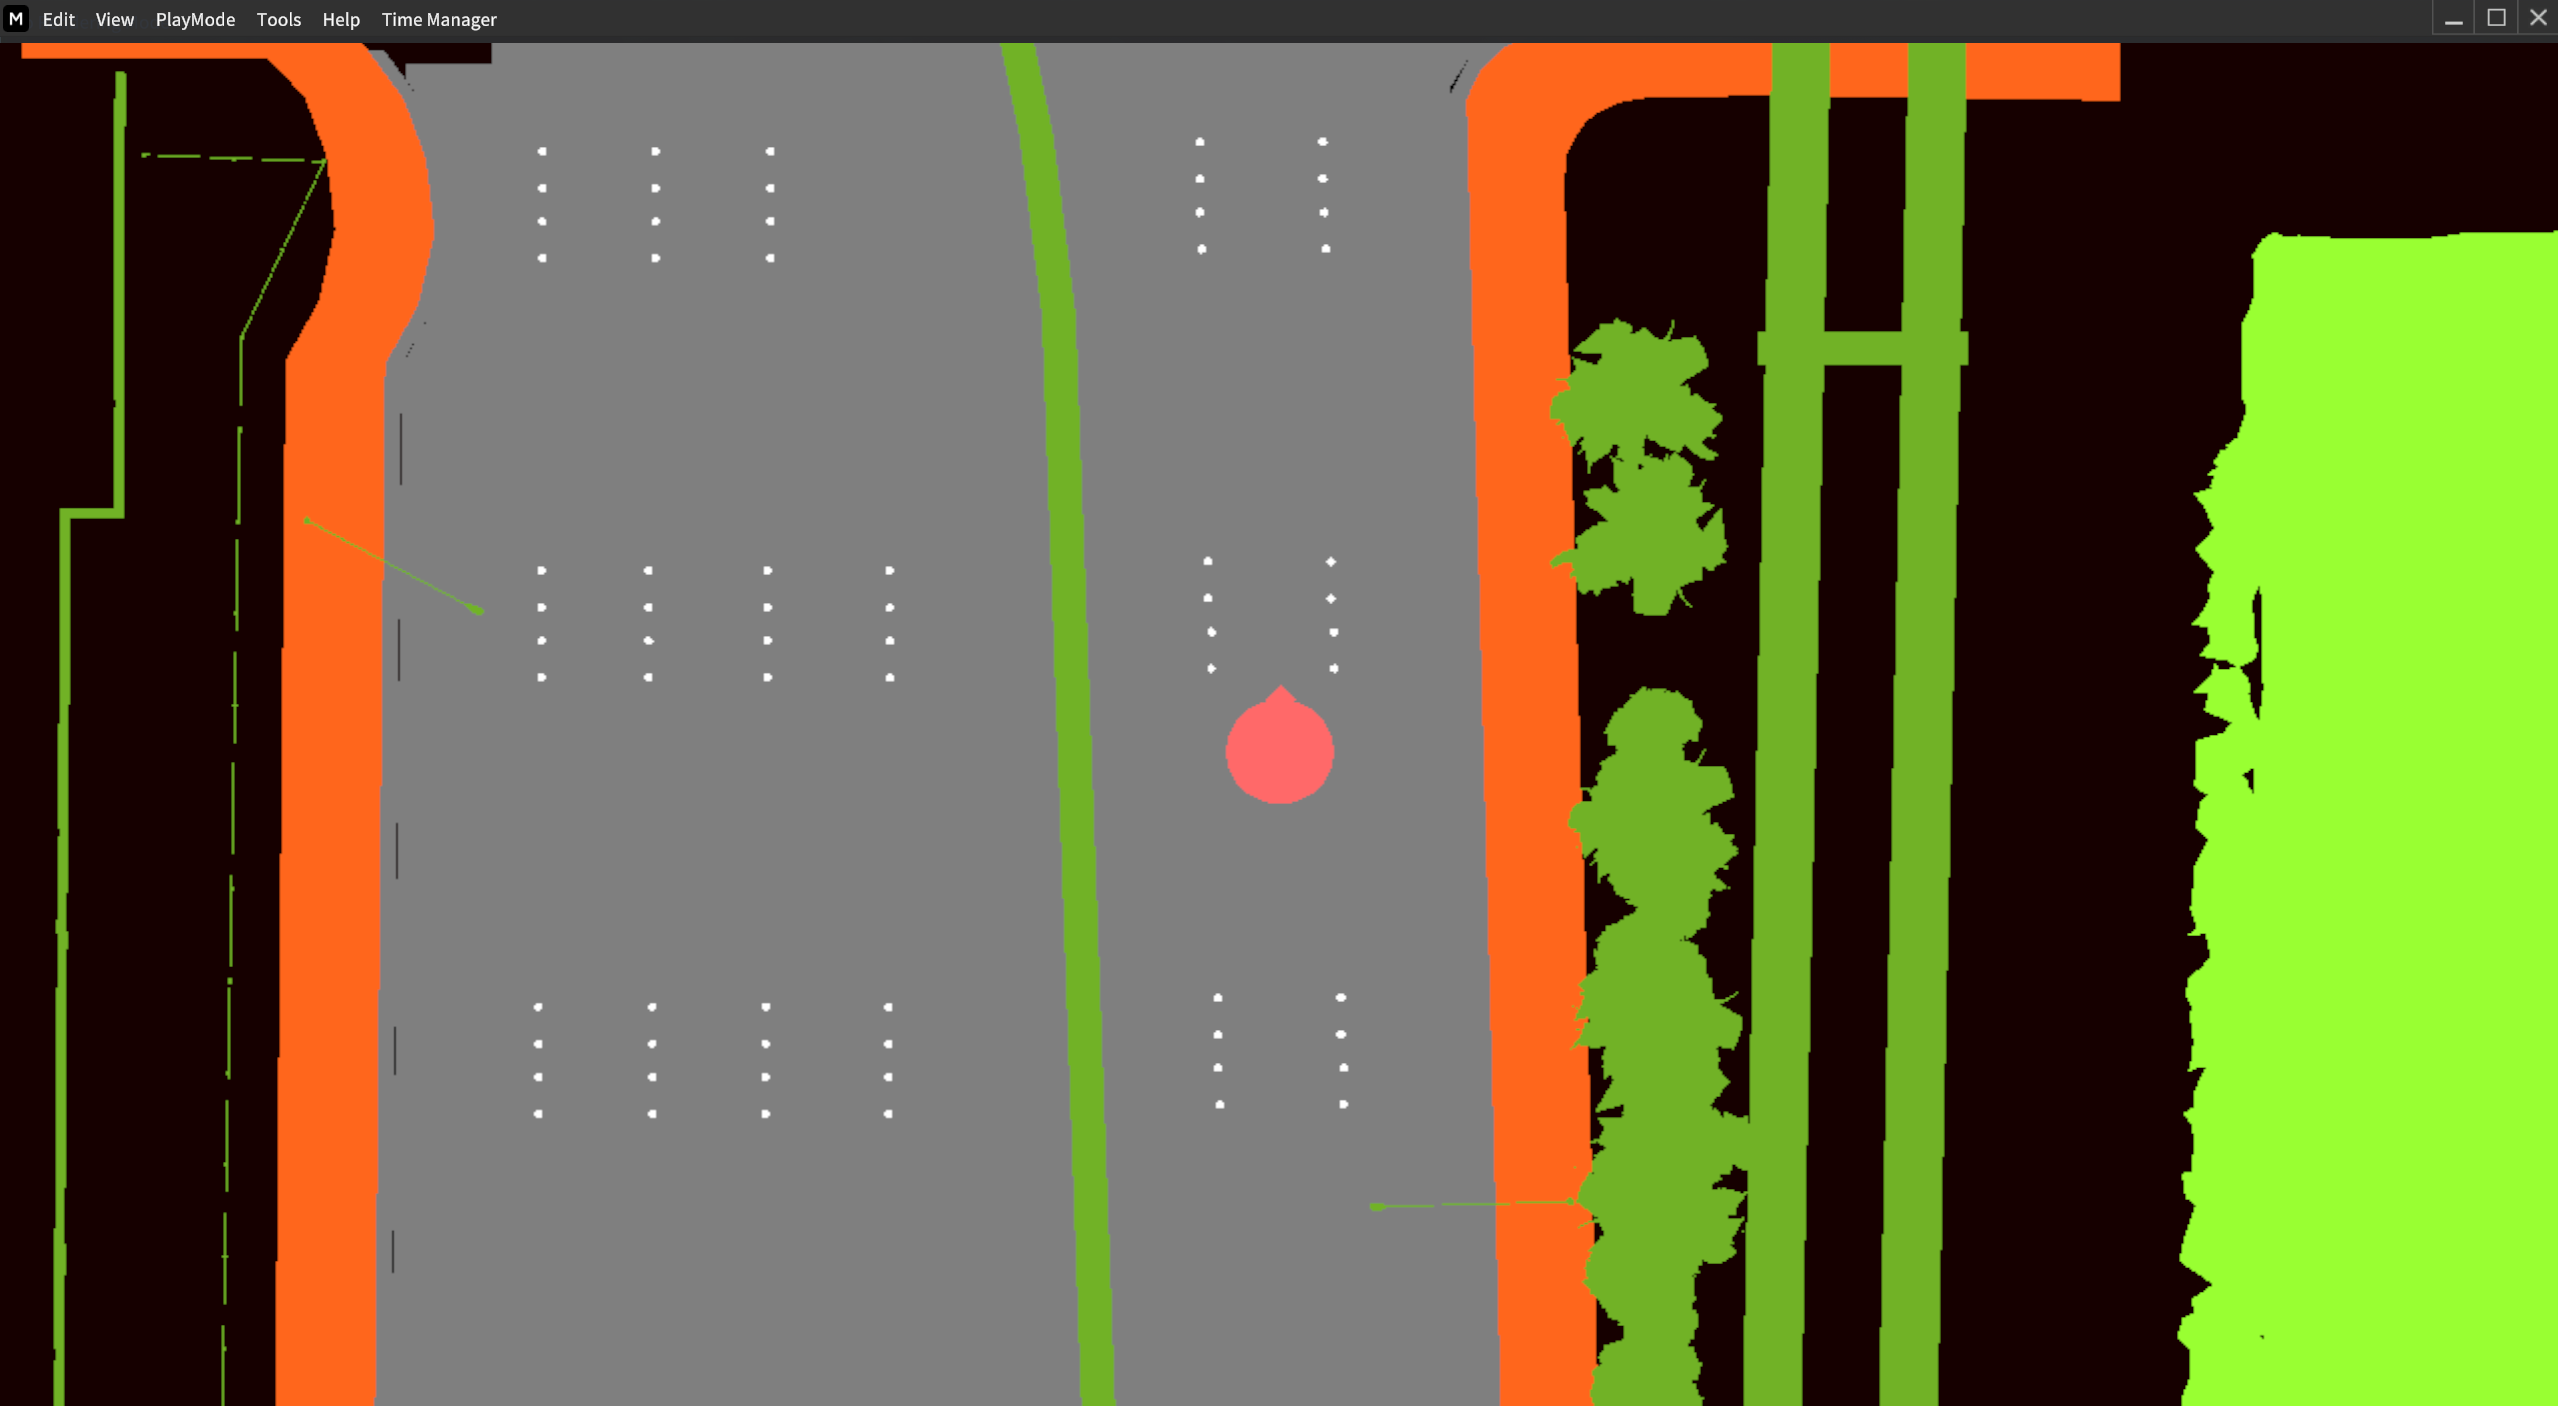
View via Local Mini Map
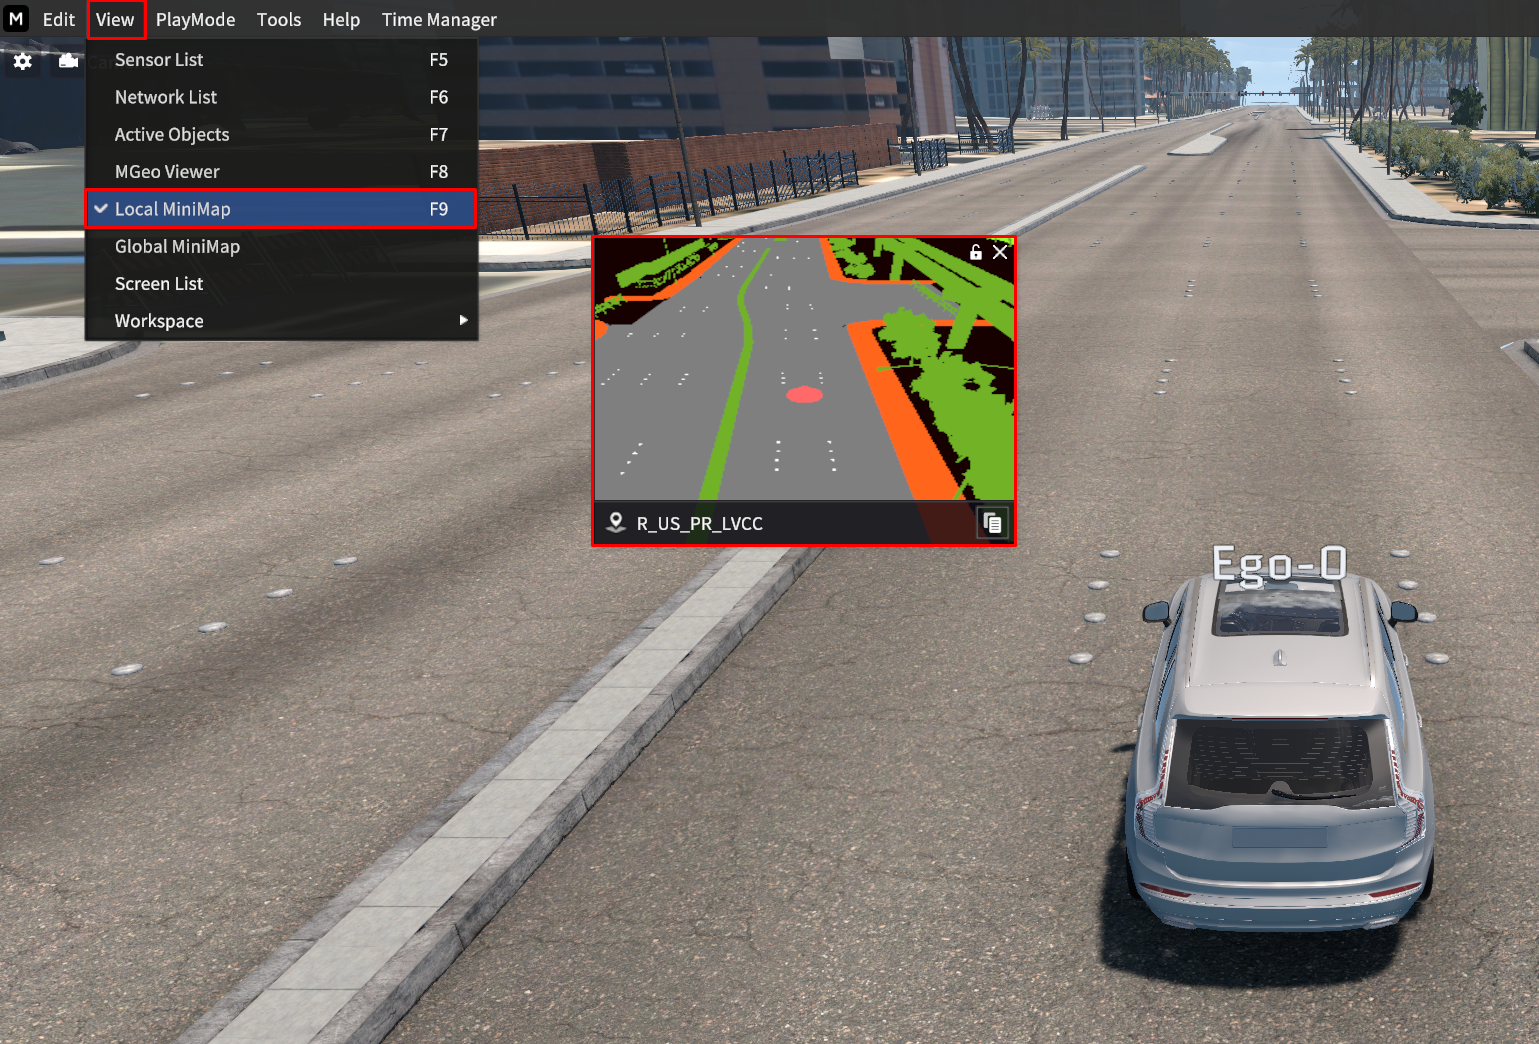
Go to View > Local MiniMap.
You will see the Local mini map is displayed as the red-colored box as above.
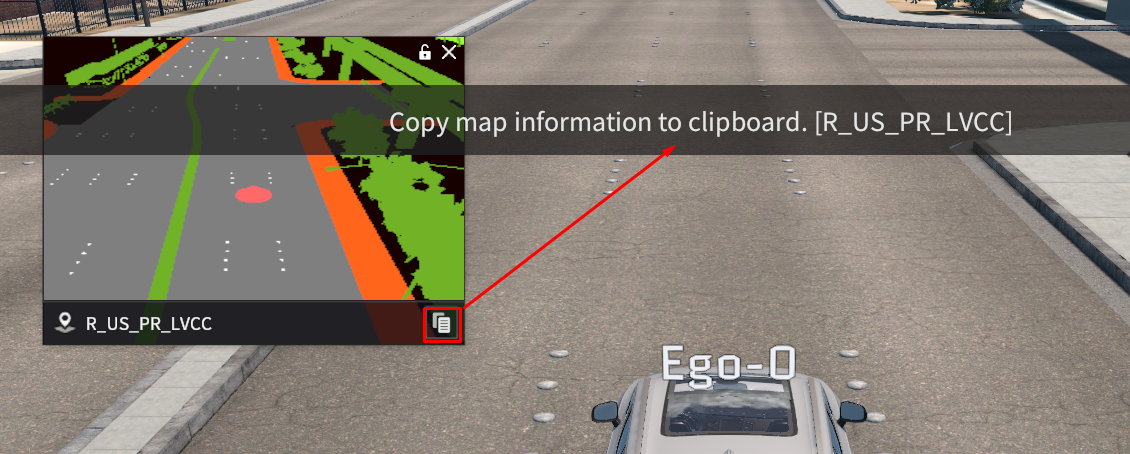
When clicked the
 button bottom-right of the local mini map, current map information is copied.
You can get the current map information (e.g., UTM, UTM Offset, etc.).
View via Global Mini Map
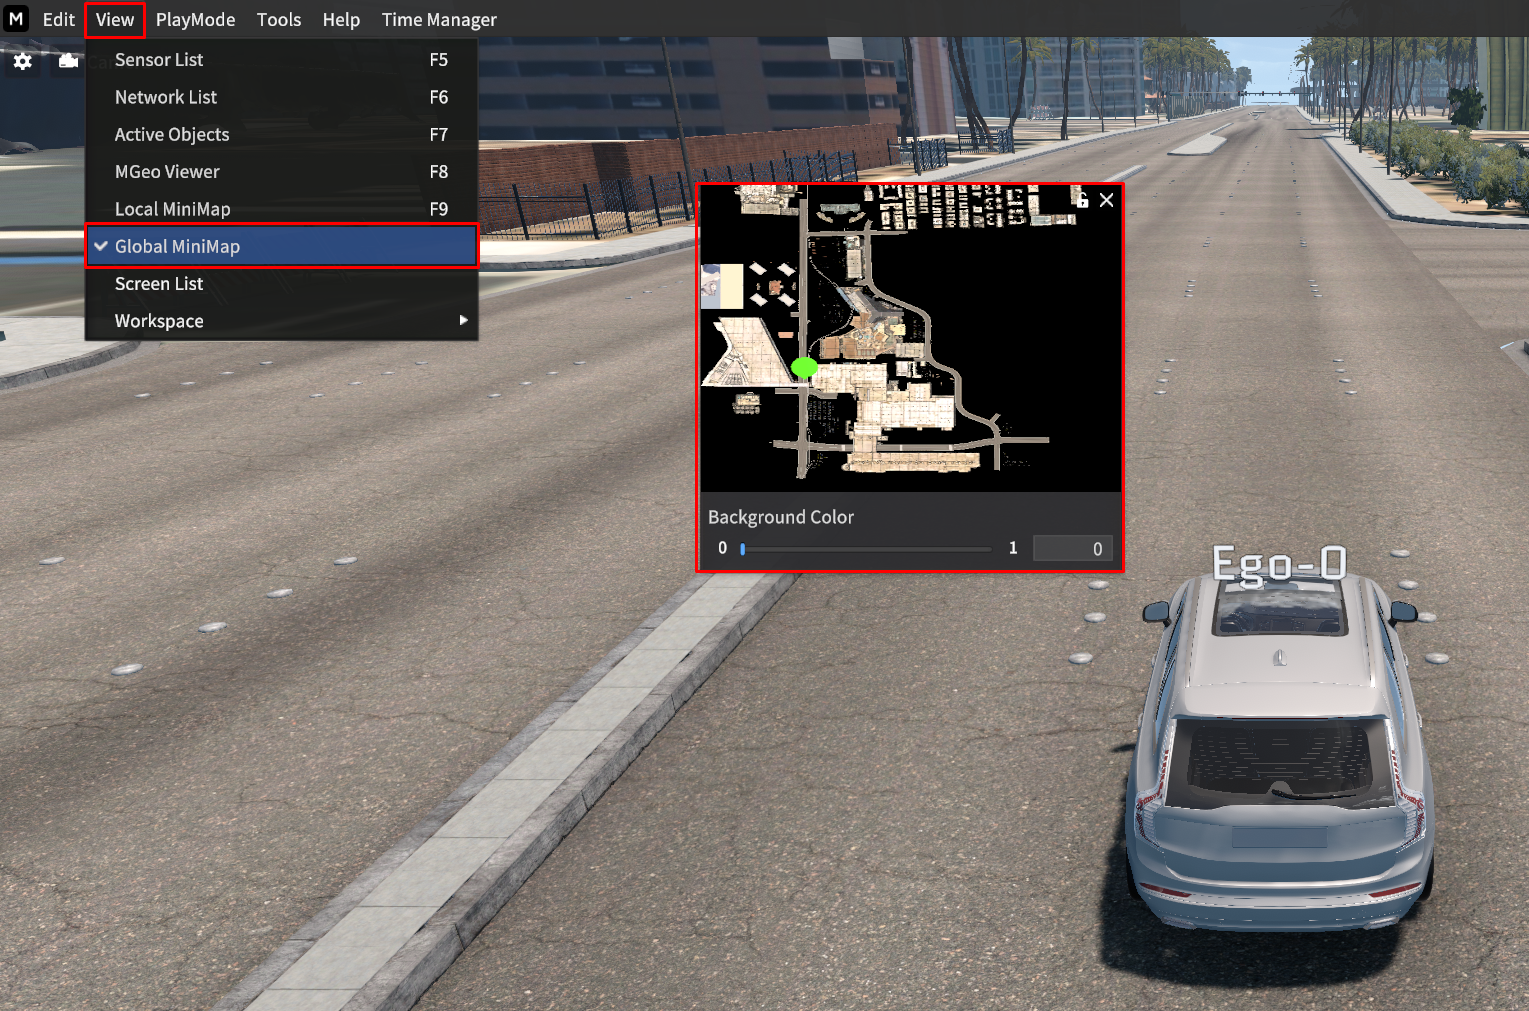
Go to View > Global MiniMap.
You will see the Global mini map is displayed as the red-colored box as above.
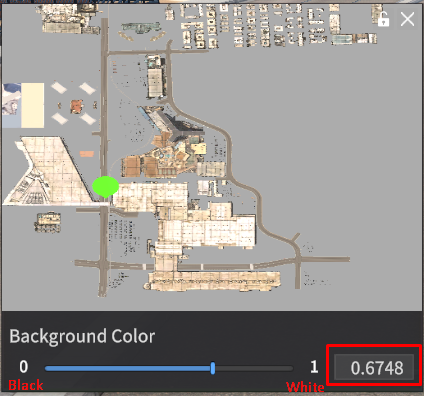
You can change the background color to black or white by entering the value in the red-colored box as above.
You can also adjust the background color by moving the slider next to the red-colored box.
Work Space
Save Display UI via WorkSpace
To save the current workplace you frequently use, go to View > Workspace > Save Workspace.
You can save up to 5 workspaces in the simulator.
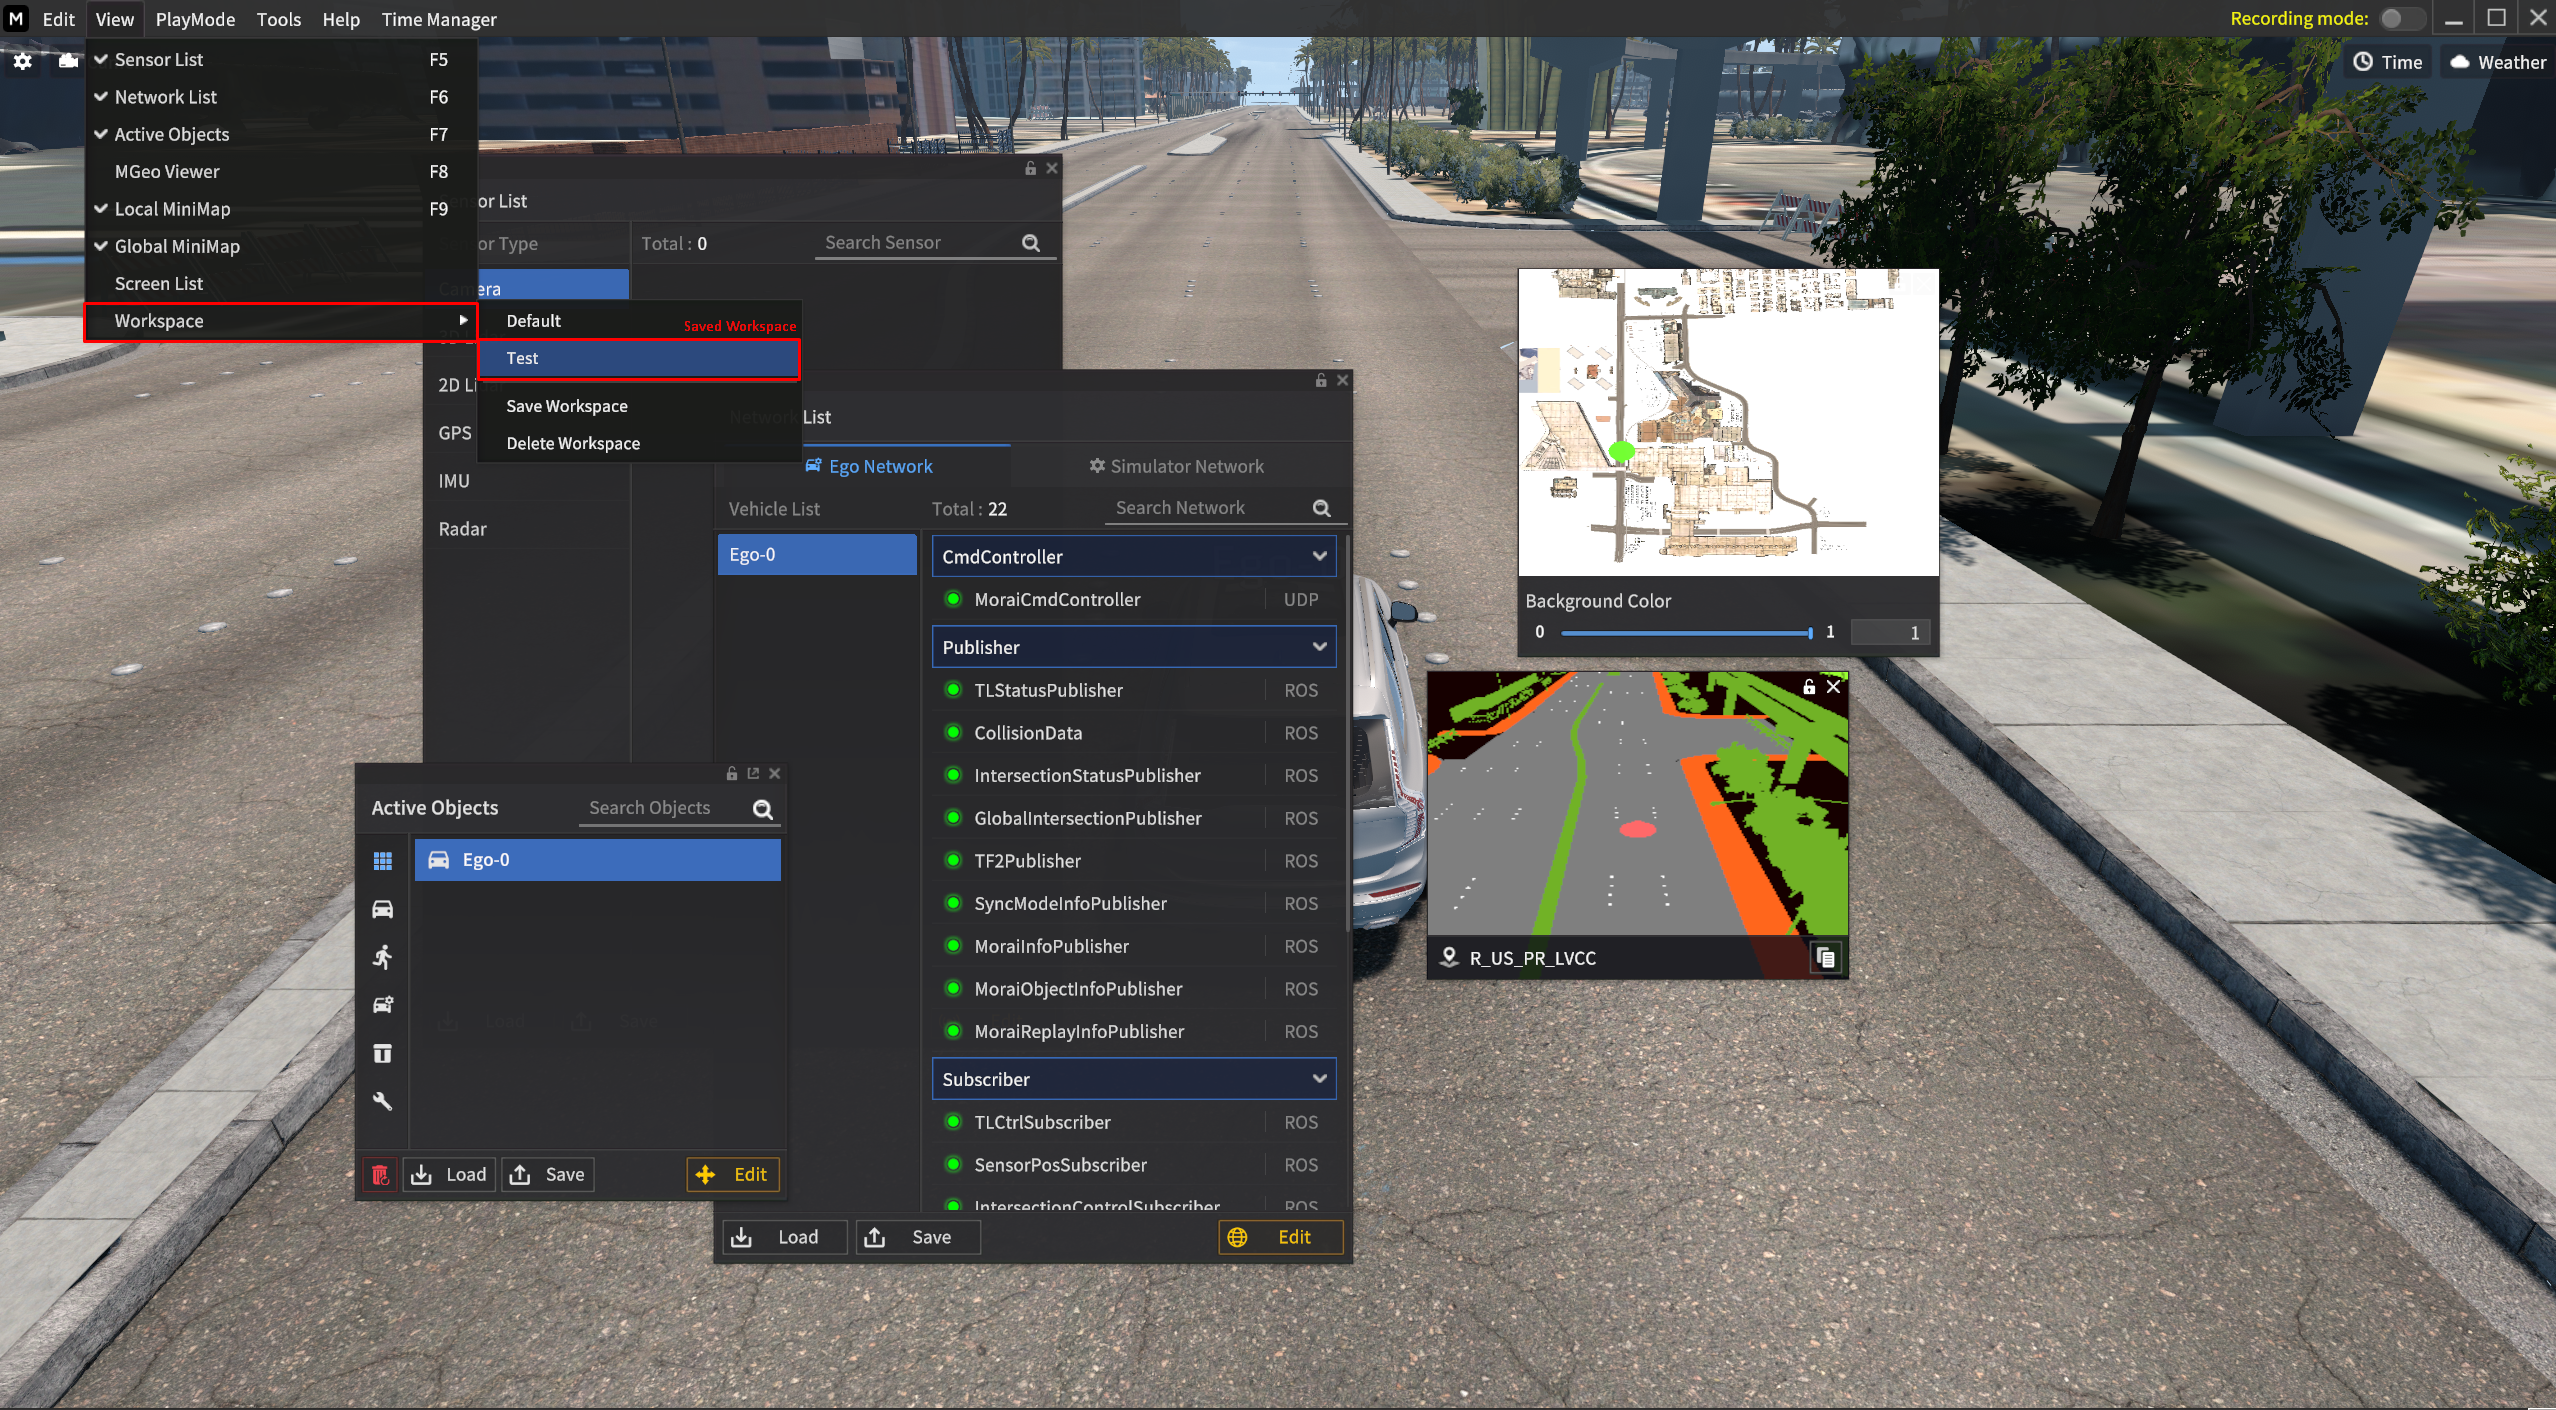
When you load the saved workspace
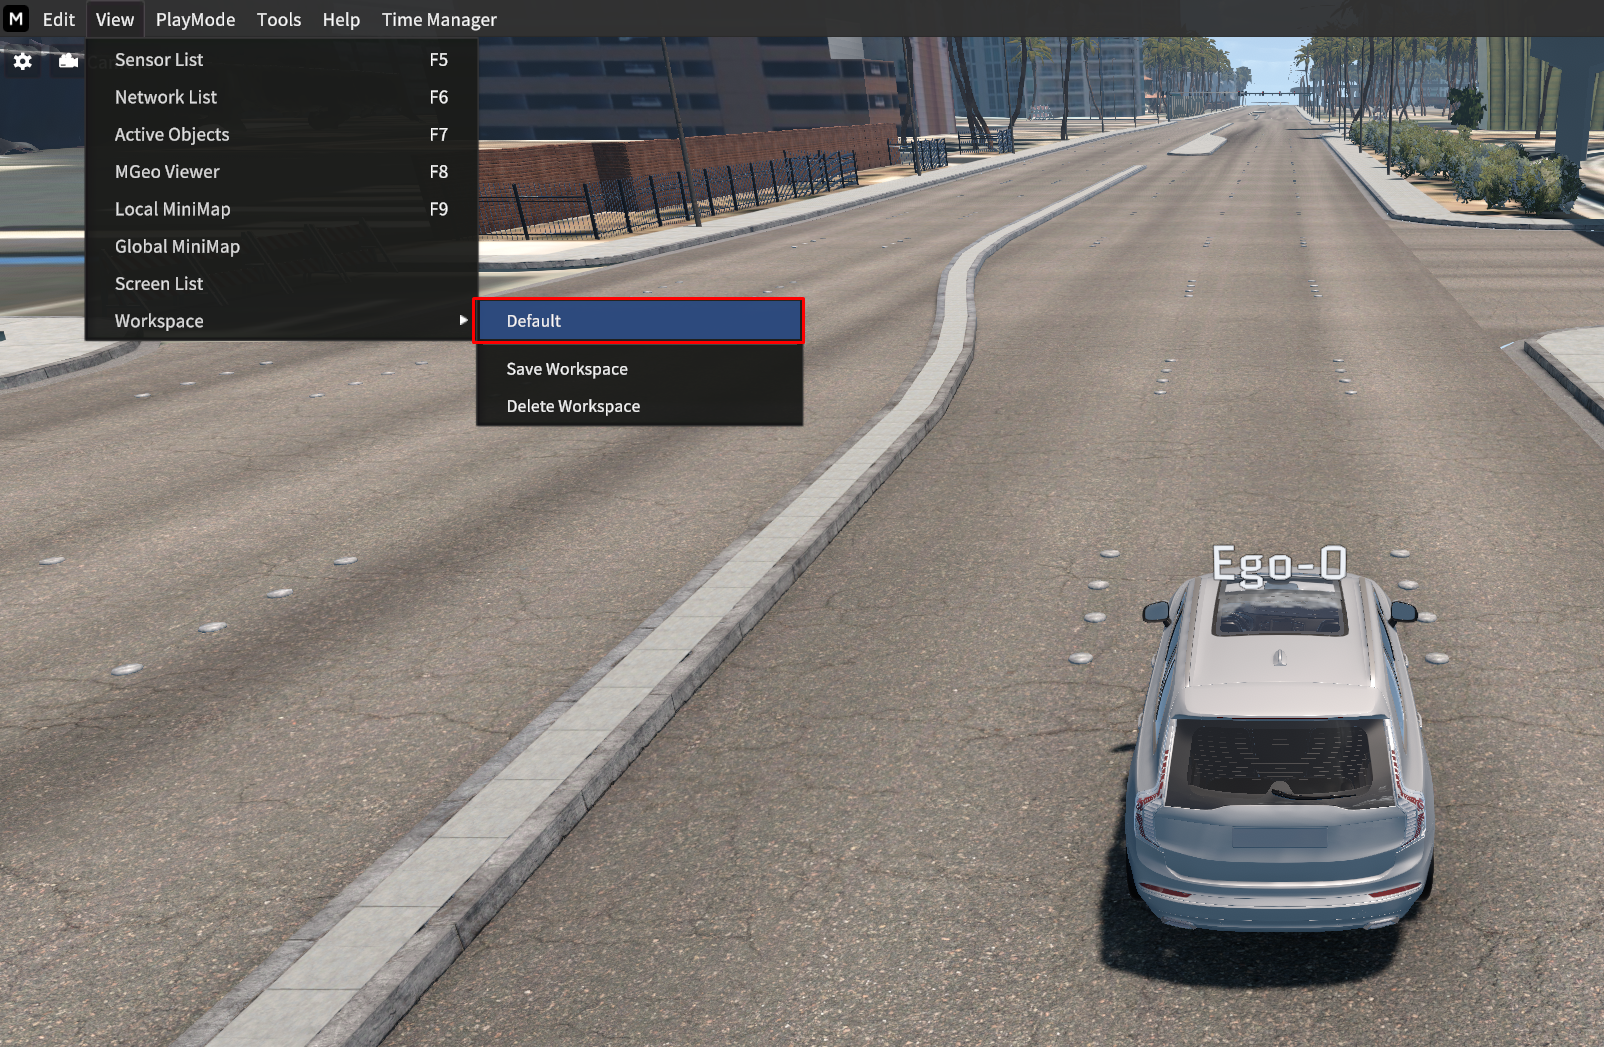
When access to the Default workspace
Viewport Setting
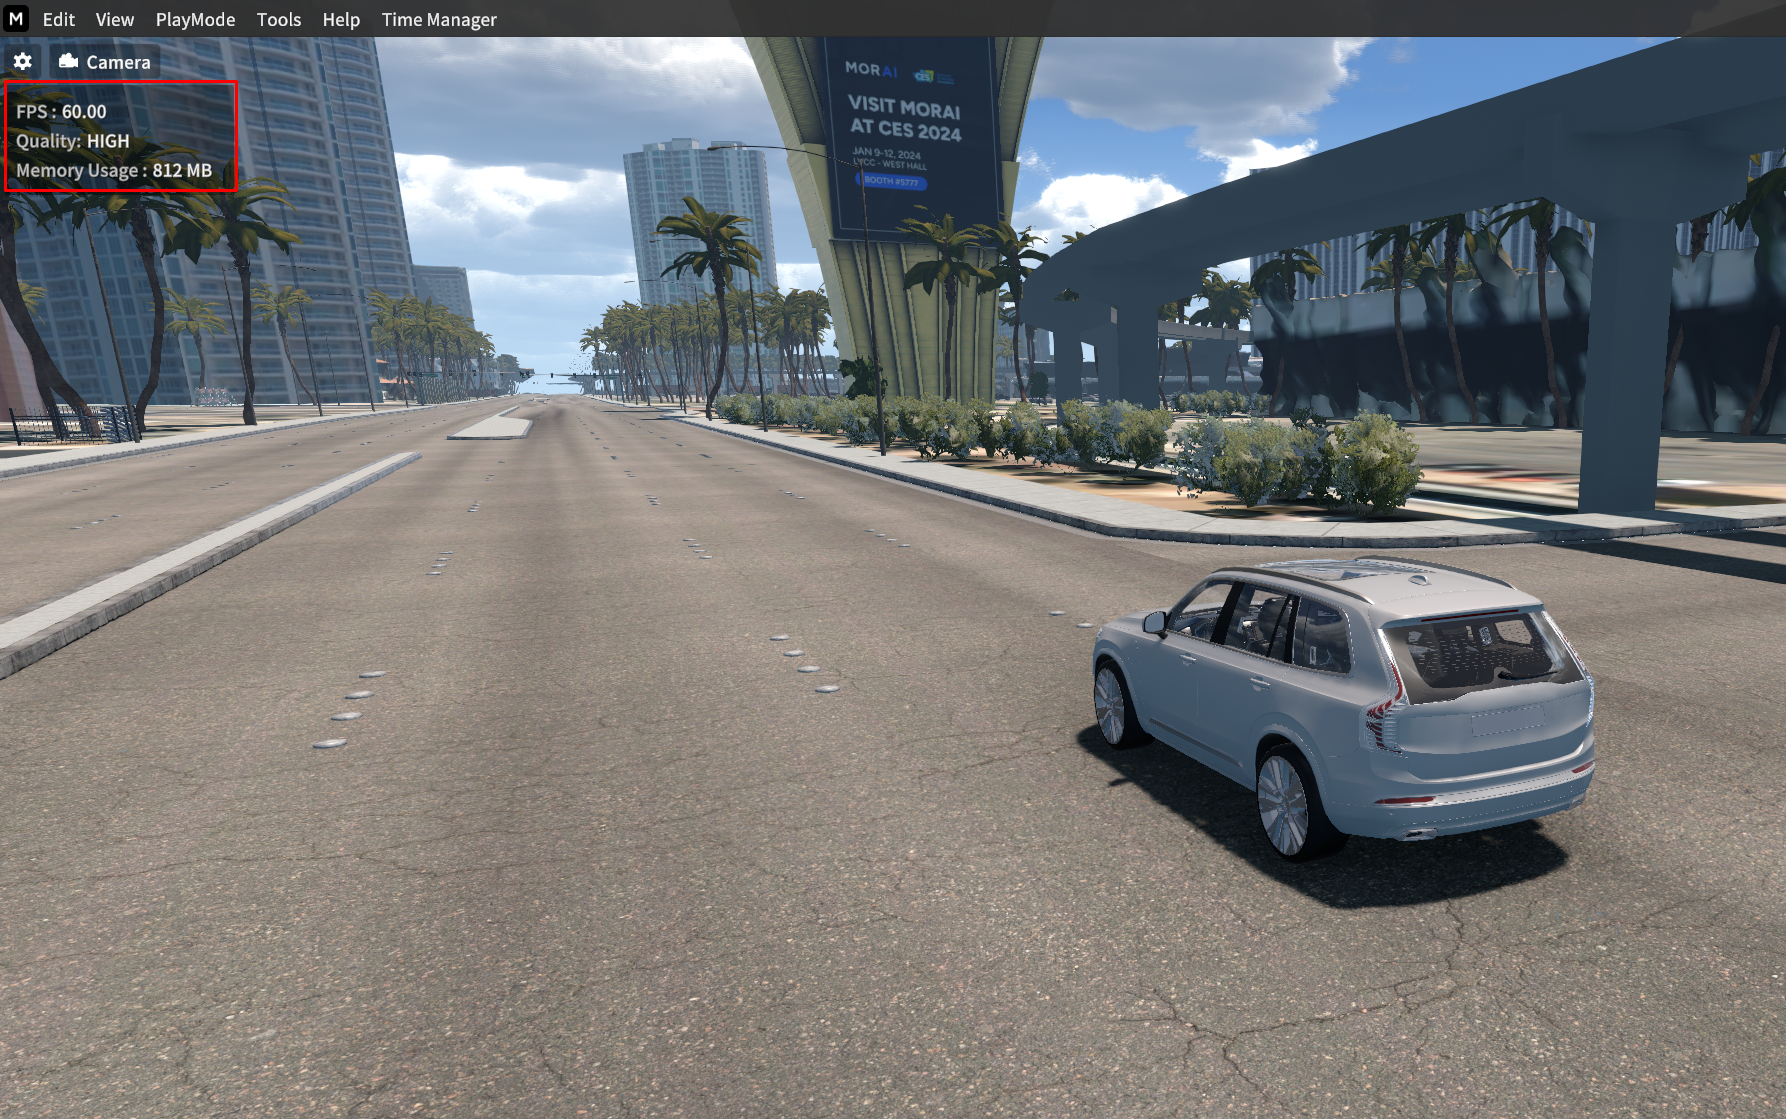
Show Performance
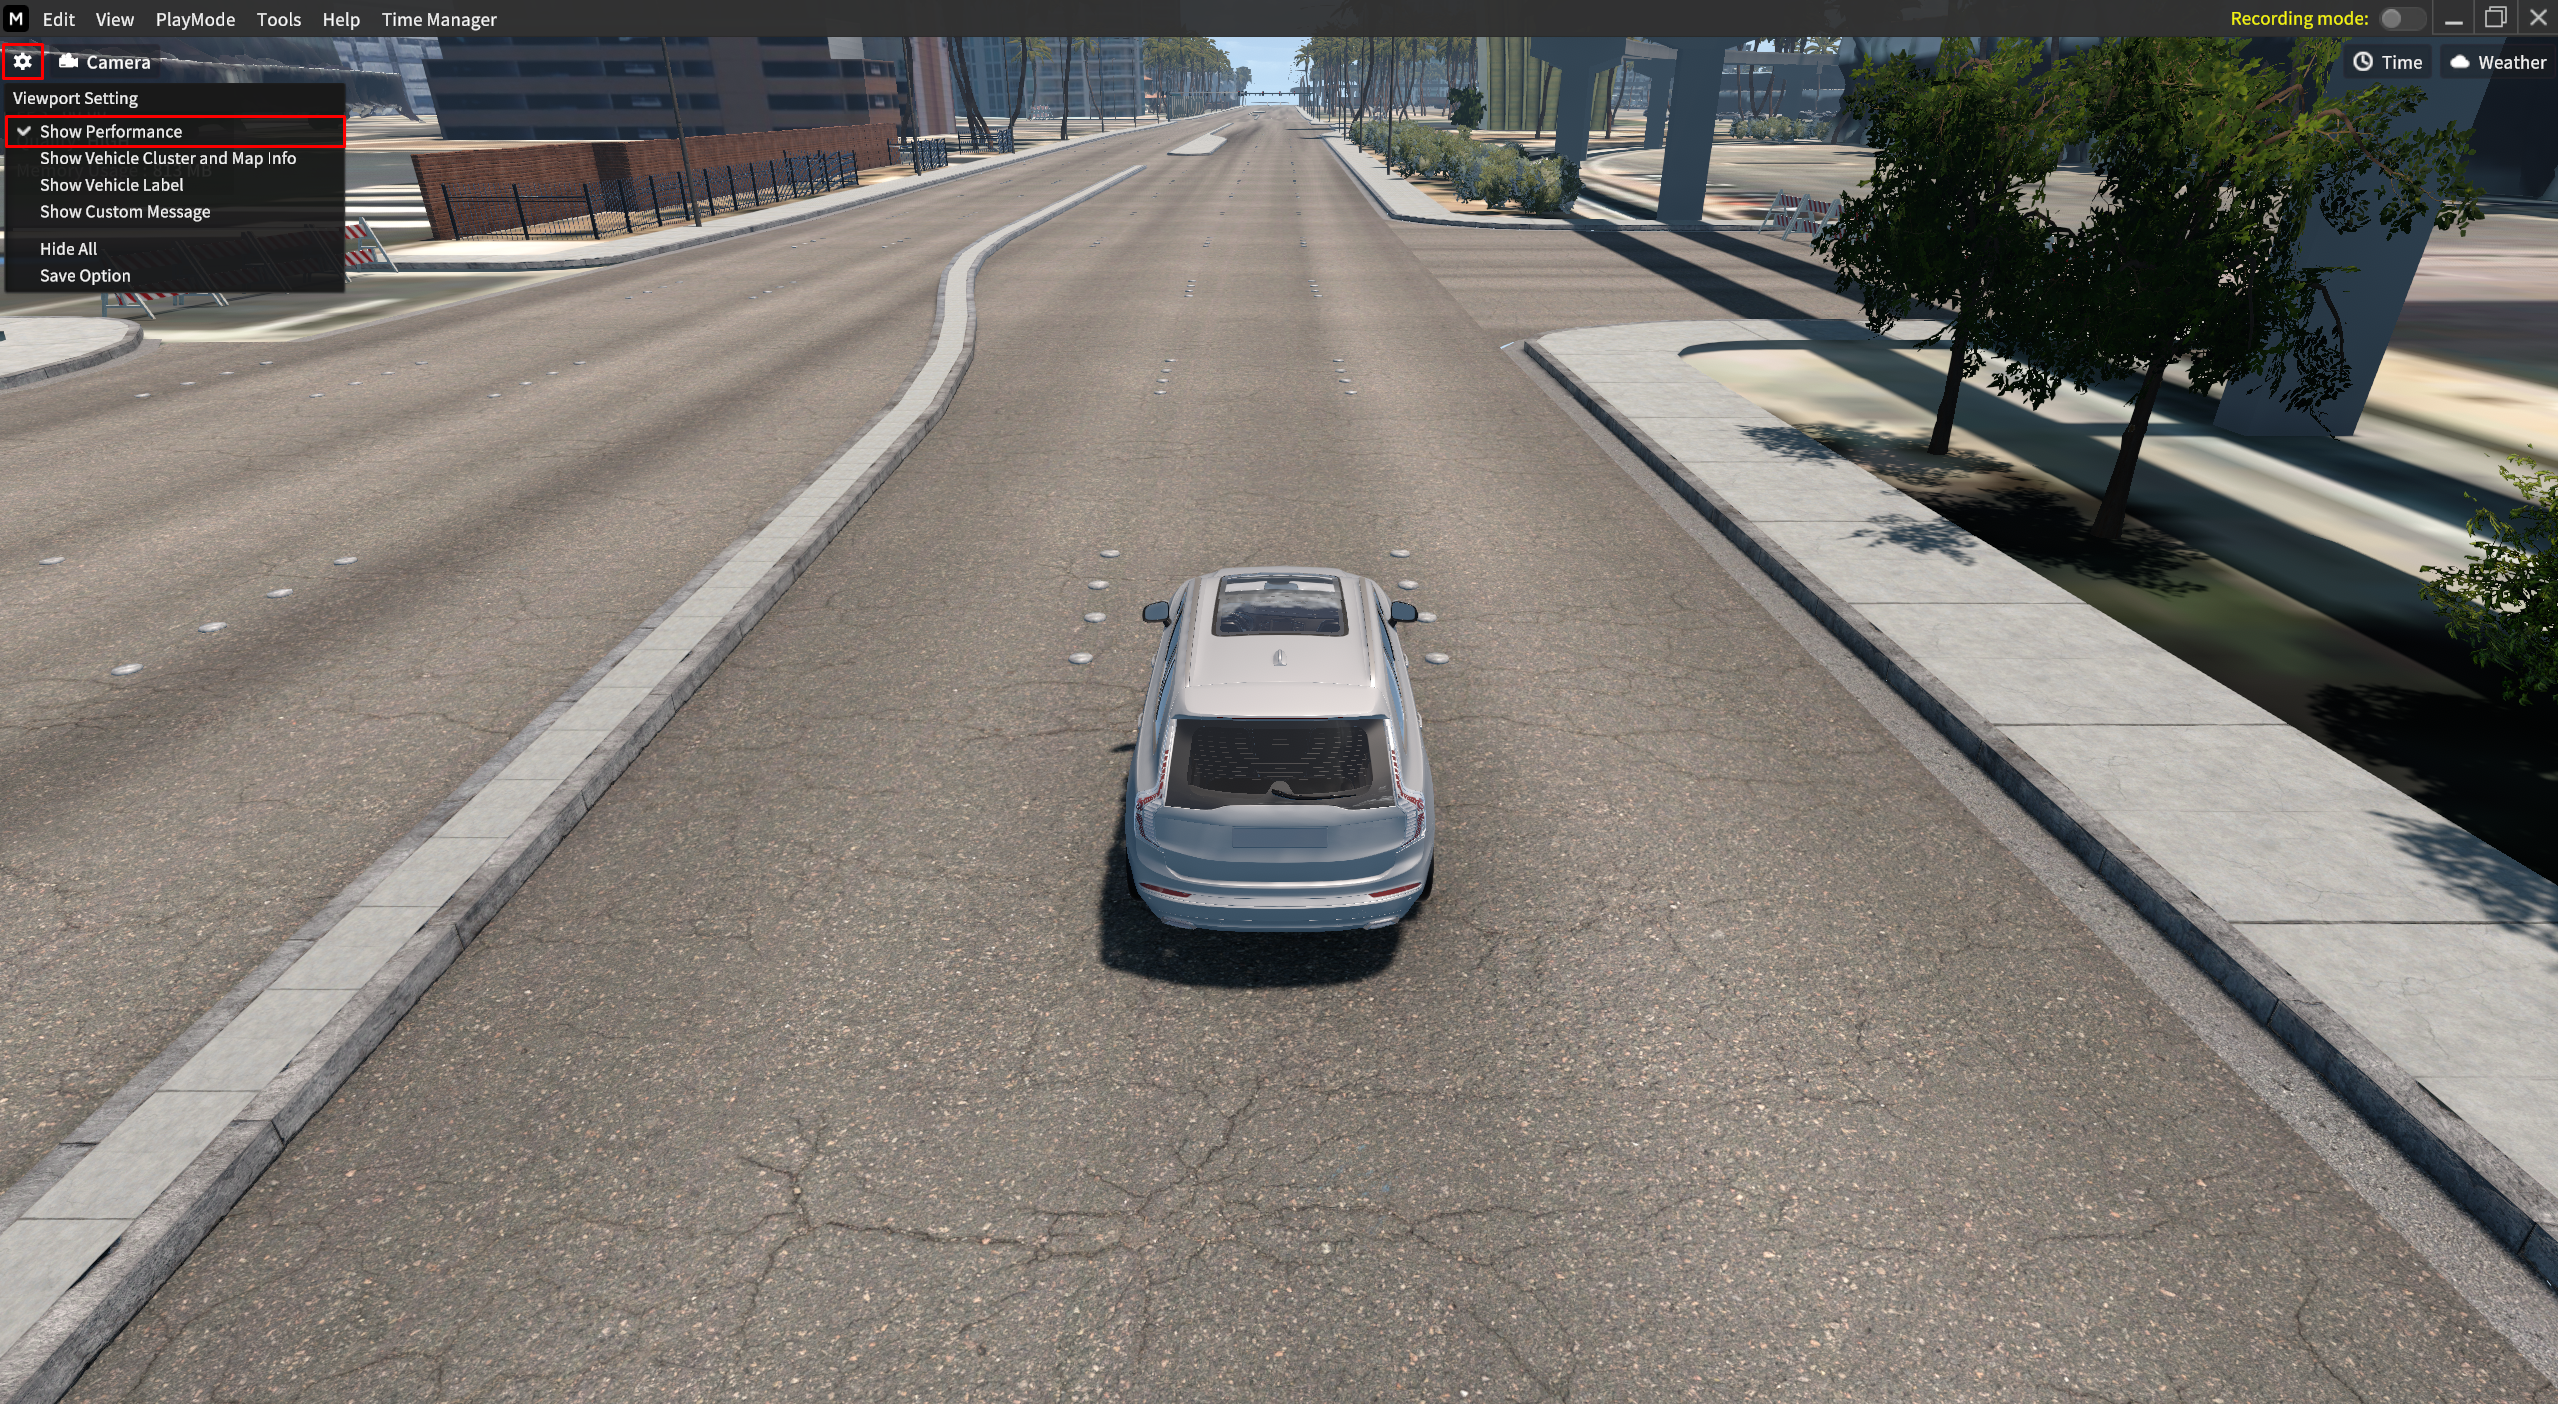
Go to
 icon > Show Performance to confirm the current simulator’s performance.
FPS : FPS currently measured on the simulator.
Quality : The Graphics Quality of the simulator.
Memory Usage : Memory usage while running the simulator.
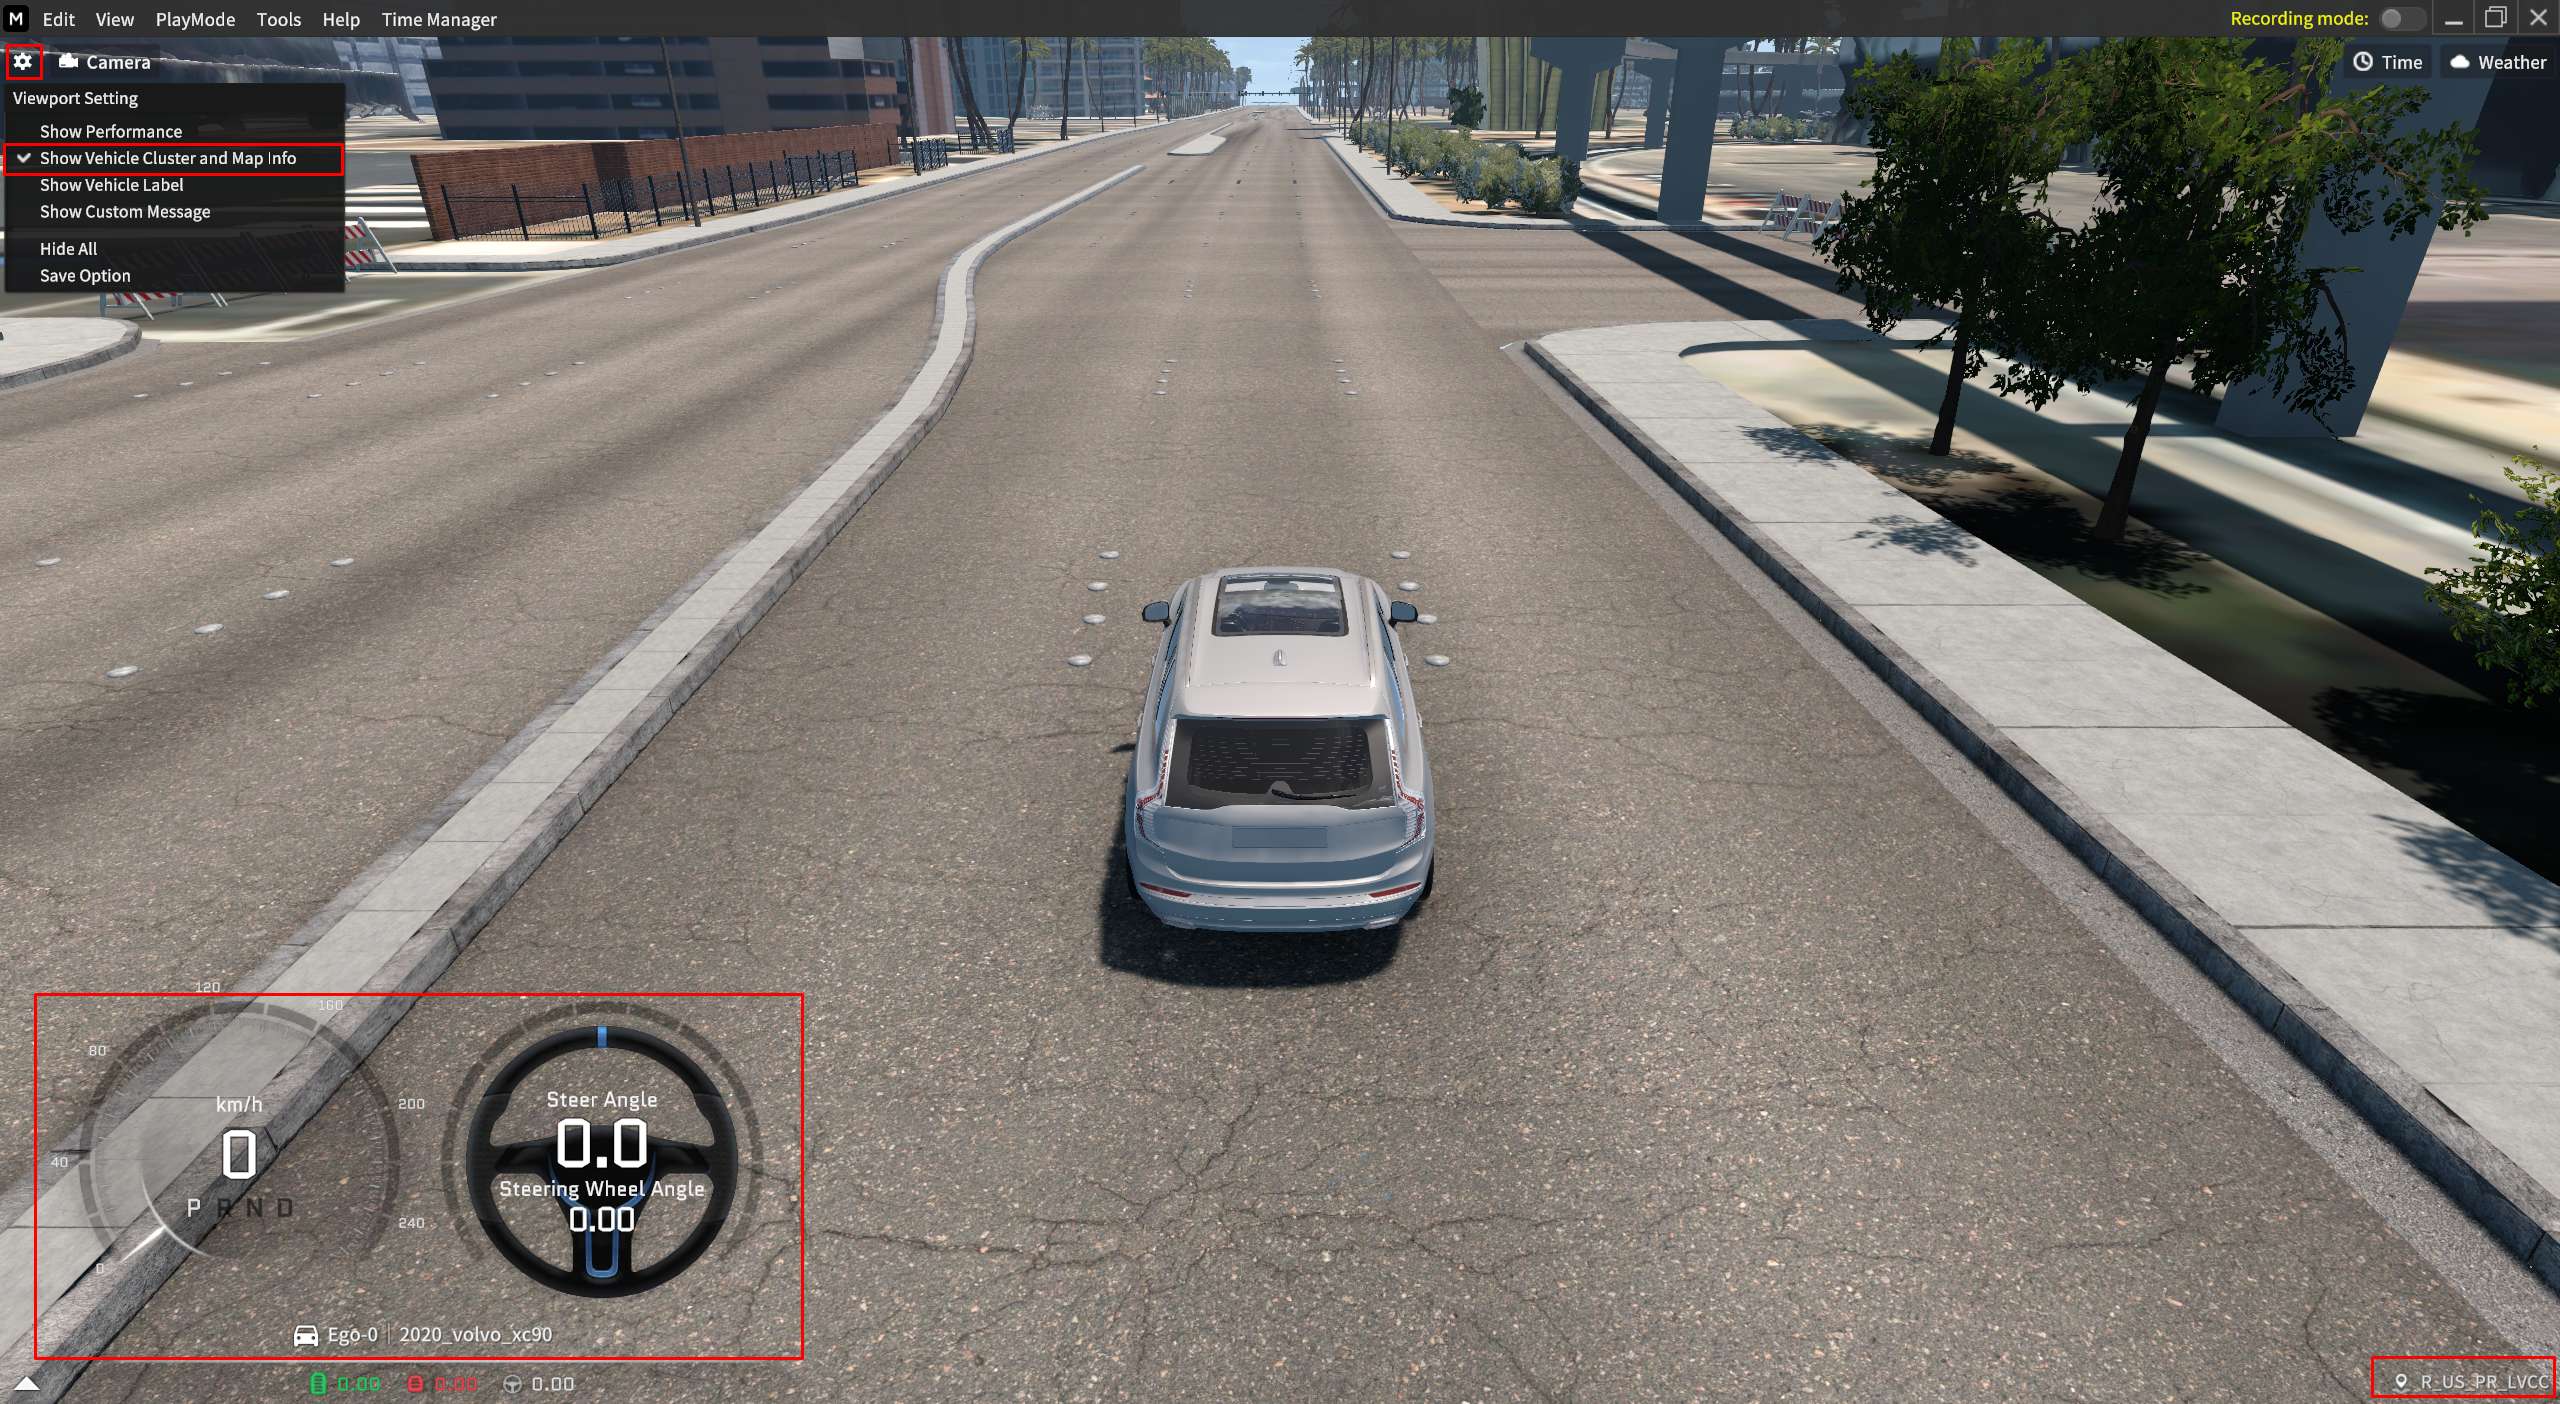
Show Vehicle Cluster and Map Info
Go to
 icon > Show Vehicle Cluster and Map Info to find out the information about Dashboard, Steering Wheel, Ego, Map, and etc.
Click to view the current vehicle's cluster information based on its steering.
When you click the Map name on the bottom-right, you can copy and paste the current map information.
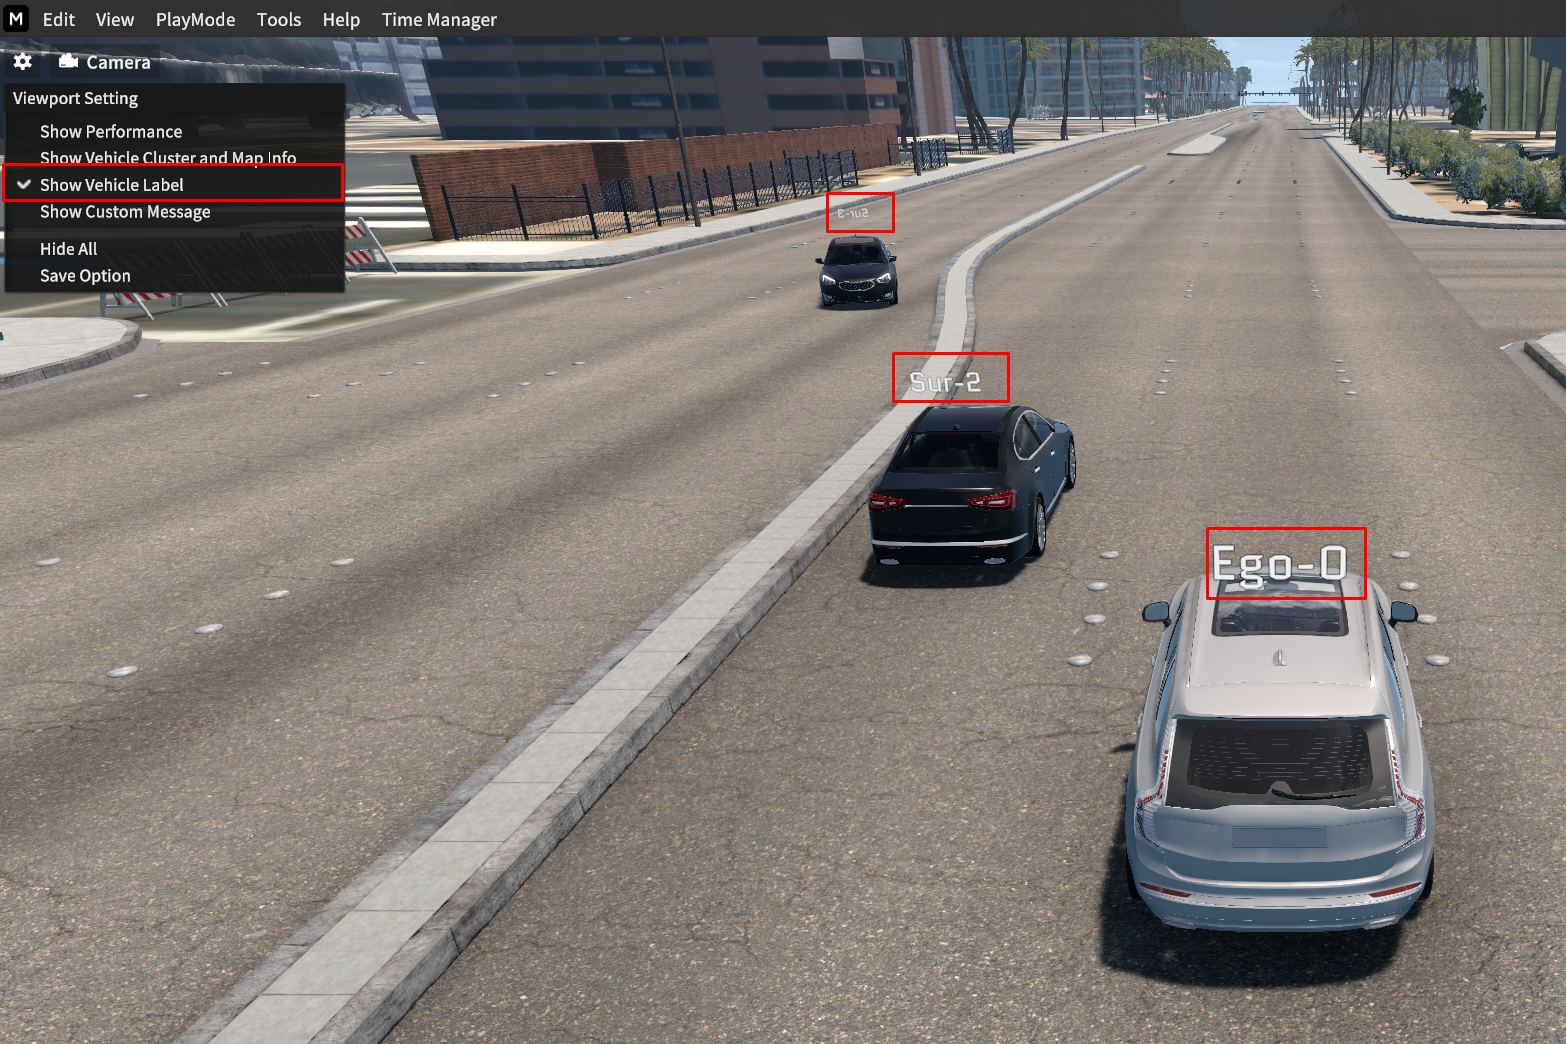
Show Vehicle Label
Go to
 icon > Show Vehicle label to display or hide the vehicle’s label. (both Ego-vehicle and Sur-vehicle).
Camera Look At Controller
Click the ![]() icon to open the Camera Setting.
icon to open the Camera Setting.
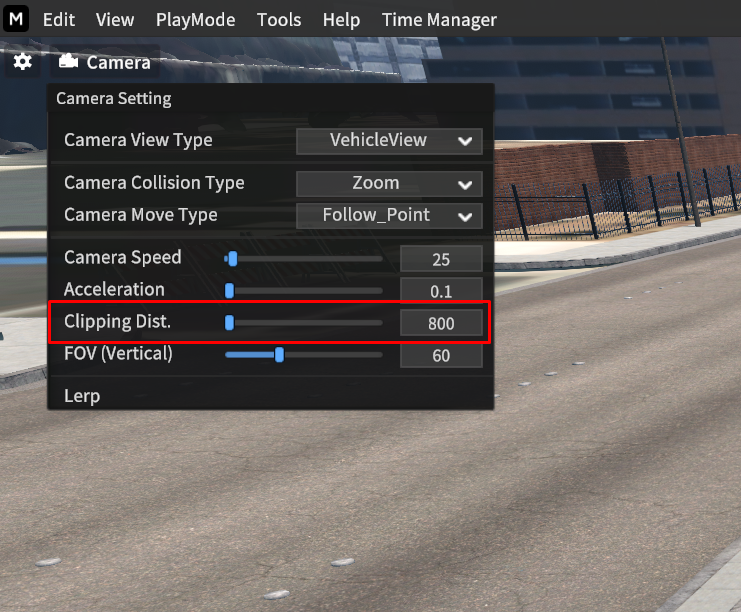
Camera Setting
Switch Camera View Type
Perspective View: In this mode, the camera moves independently of the vehicle, and you can control its view direction with
W,A,S, andDkeys.Top View: The camera switches to a top-down perspective.
Vehicle View: The camera follows and rotates around the main vehicle (Ego-0 vehicle) in focus.
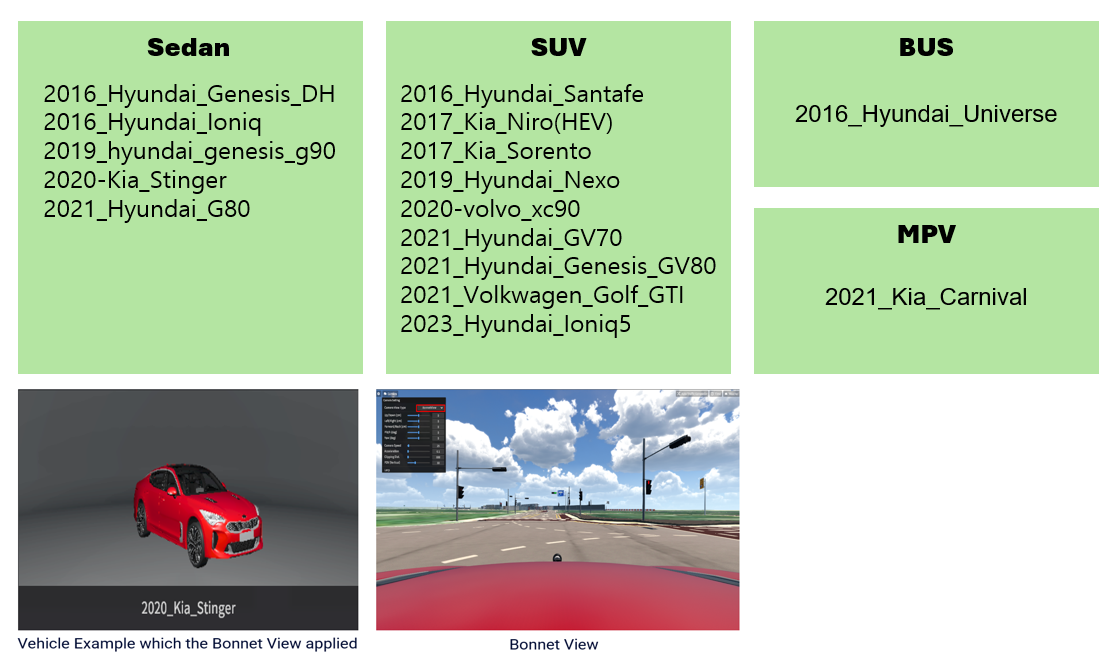
Bonnet View: The camera switches to a bonnet view, looking down from the front of the vehicle. (Check out the below vehicle list)
Camera Collision Type: This feature is for whether the camera perspective intersects with the surrounding terrain.
Zoom: If the camera perspective is zoomed-in and close to the surrounding terrain, the camera view does not penetrate it.
None: If the camera perspective is zoomed-in and close to the surrounding terrain, the camera view penetrates it.
Camera Speed: This features is to adjust the camera speed.
Acceleration: This features is to adjust the camera acceleration when the camera moves.
Clipping Dist.: This feature is for adjusting the main camera's viewing distance.
FOV (Vertical): This feature is for zooming-in and out the camera view based on the vertical FOV.
Lerp: Smooths the movement of the camera when using the mouse to change the POV of the camera.
Measure the Distance
You can specify start and end points to measure the distance in the simulator environment.
Create the start and end point
Press Left
Ctrl+ LeftAlt+Mouse left-clickto create the start and end point.After setting a start and end point on the road, the distance is displayed as a straight line, providing information about the measured distance.
Remove the distance
Press
ESCkey to delete it.

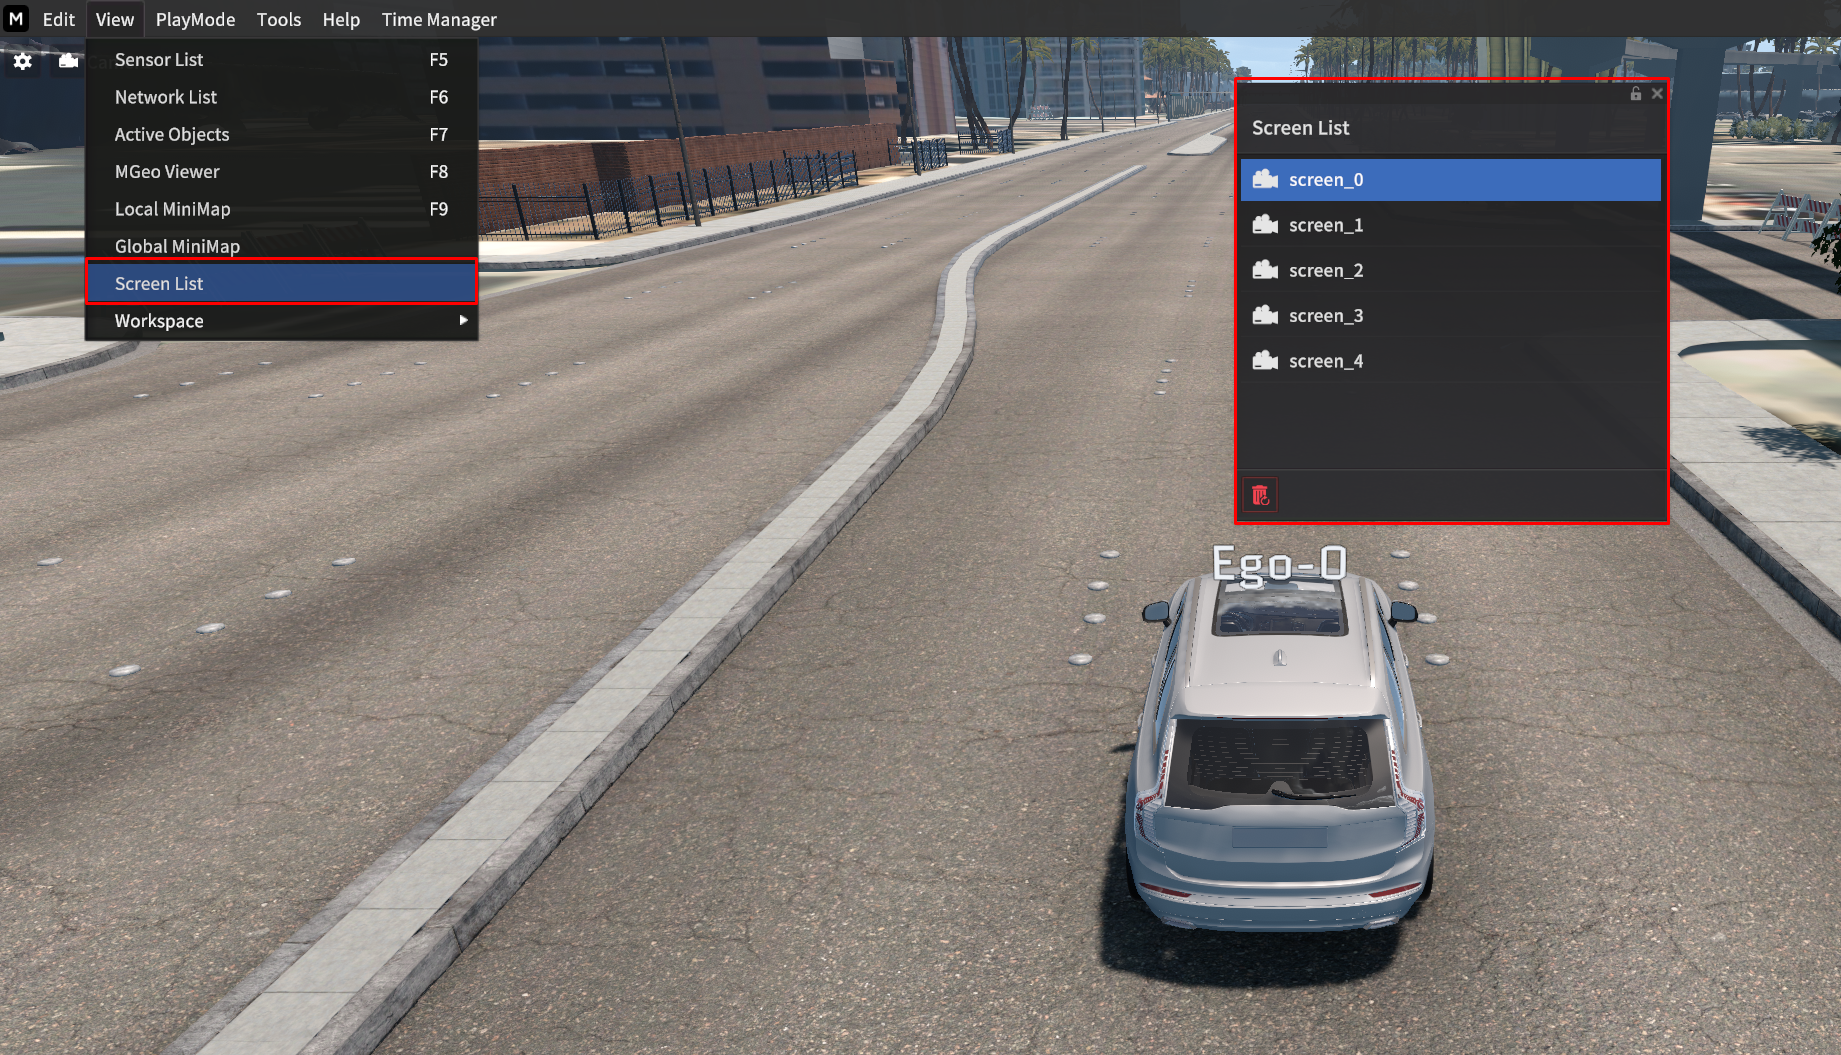
Save Screen
This feature allows you to save the current screen from the main camera.
How to save
Press
-key to save it.In this mode, you can save the Perspective View, Vehicle View, and Top View.
2 ways to switch the view when you saved more than 2 screens
Press
=Key to switch the view.Go to View > Screen List to view all the saved screens and click each of the screen to switch the view.
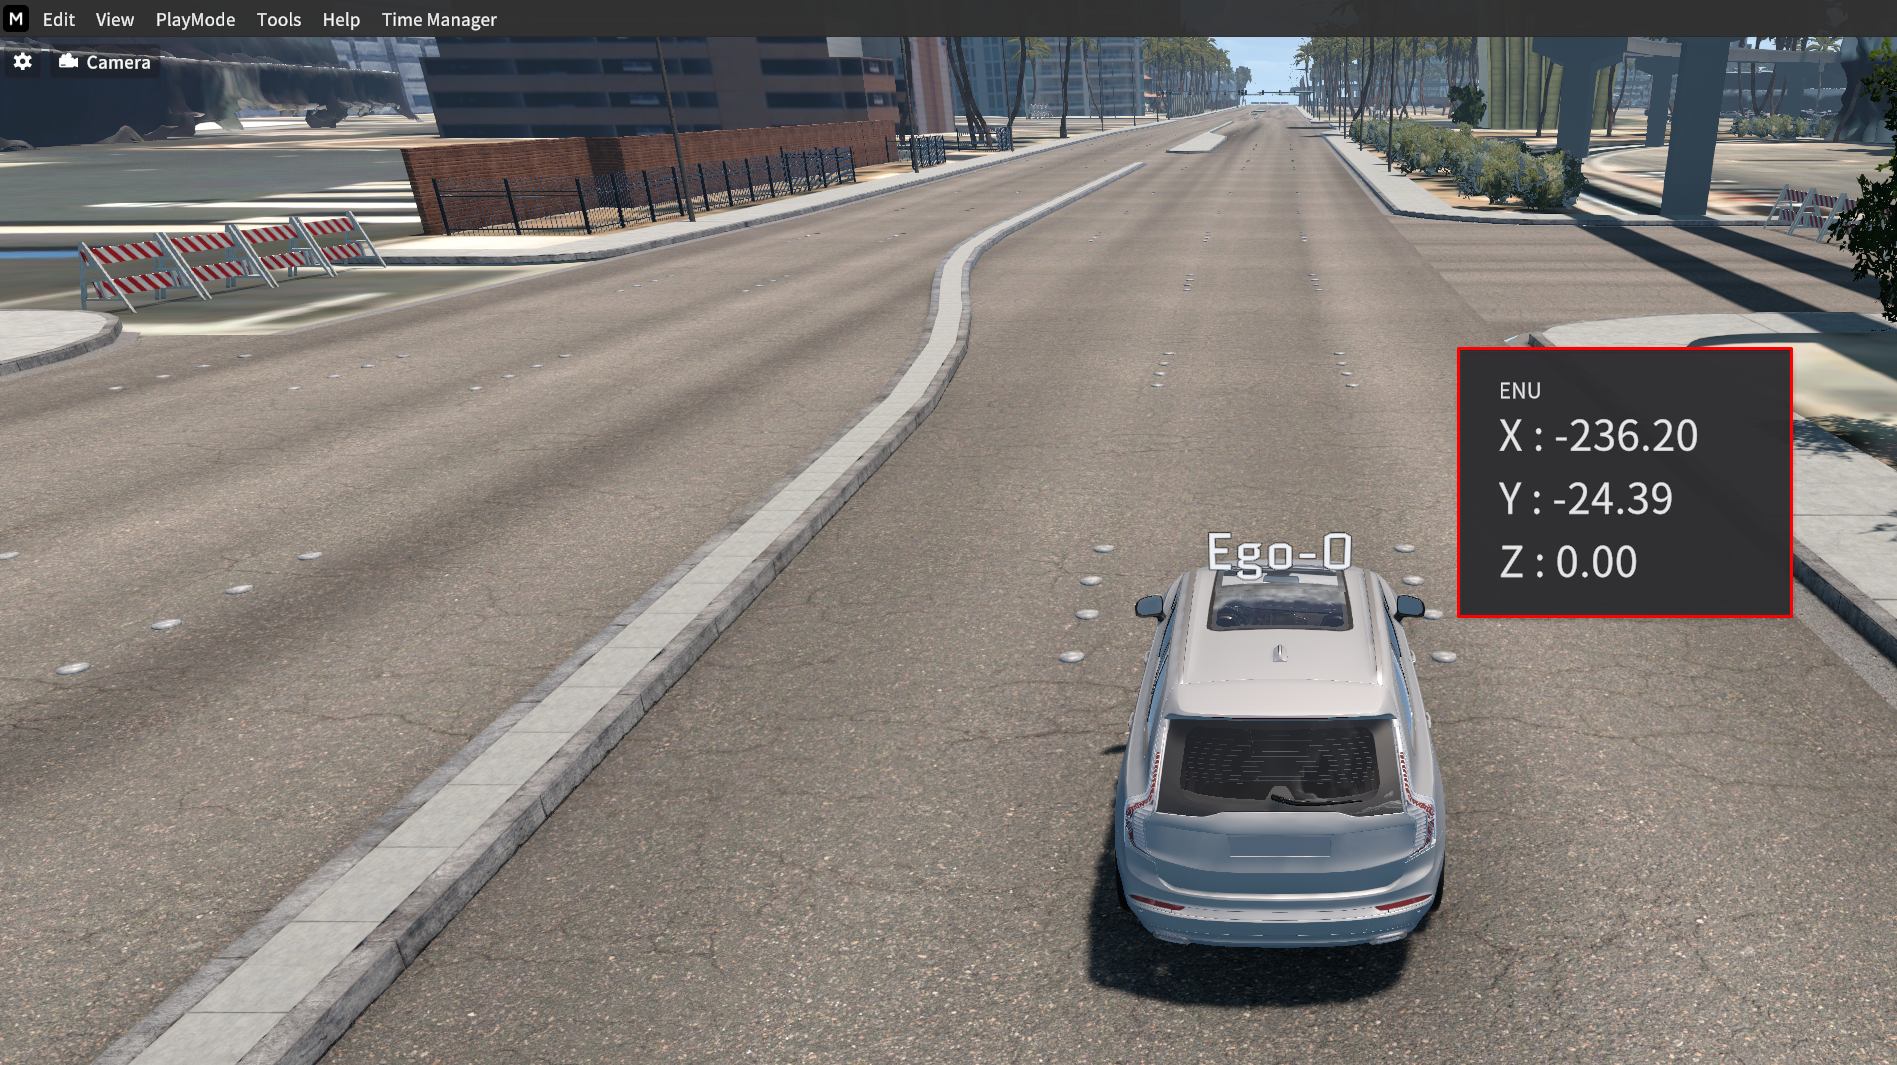
Coordinates Display
This feature allows you to view the position information (x, y, z) on the map.
The position information provided by MORAI is based on the ENU coordinate system.
To view and close the coordinates, click the mouse wheel (ON/OFF).
Clicking the mouse wheel displays the map coordinates where the cursor is located.