
UDP Data Sync Example
This page walks the user through a full step-by-step process to combine sensor models and network connection features in MORAI SIM to build a sensor stream to an external node.
Step 1: Setting up the test environment
In this example, we use UDP communication to connect MORAI SIM to the provided python sample visualizer.
The test environment can be on:
a single machine set to a local network connection (e.g., IP
127.0.01)on separate machines connected by an ethernet cable
on a virtual machine either located within the local machine or in the cloud
Step 2: Preparing the simulator
Follow the steps below to receive sensor data transmitted by the simulator via UDP. If successful, it will be possible to verify each sensor's output stream in a separate visualizer.
1. Place sensors onto the vehicle. To stream sensor data from the simulator to any external sources, we must first place said sensors onto the vehicle to instantiate them.
The following steps are the same as those found in the Get Started and Basic Controls chapters in this manual.
Press the F3 key (or select Edit >> Sensor >> Edit Sensor Mode from the main menu bar)
Select a sensor from the selection box that should appear in the top left corner.
Shift + click to place the sensor onto vehicle
The sensor model should auto-snap to the surface of the vehicle
Alt + click to remove sensors (if necessary)
For this example, place one of each sensor: camera, GPS, IMU, 3D lidar. Note that where you place sensors in this example is not important, but it is recommended to place them in reasonable locations (i.e. in front of or on top of the vehicle model)
2. Set up the sensor network in the simulator. Set up each sensor’s network connection settings in the Sensor Properties tab (see example in screenshot below) and click Connect.
For each of the four sensor models added to the vehicle, scroll down to their network settings window (in the lower left) (If you have already placed sensor models, you will be defaulted to the Active List tab. Simply click a sensor from the list, then click the Sensor Settings tab to open each sensors' property window)
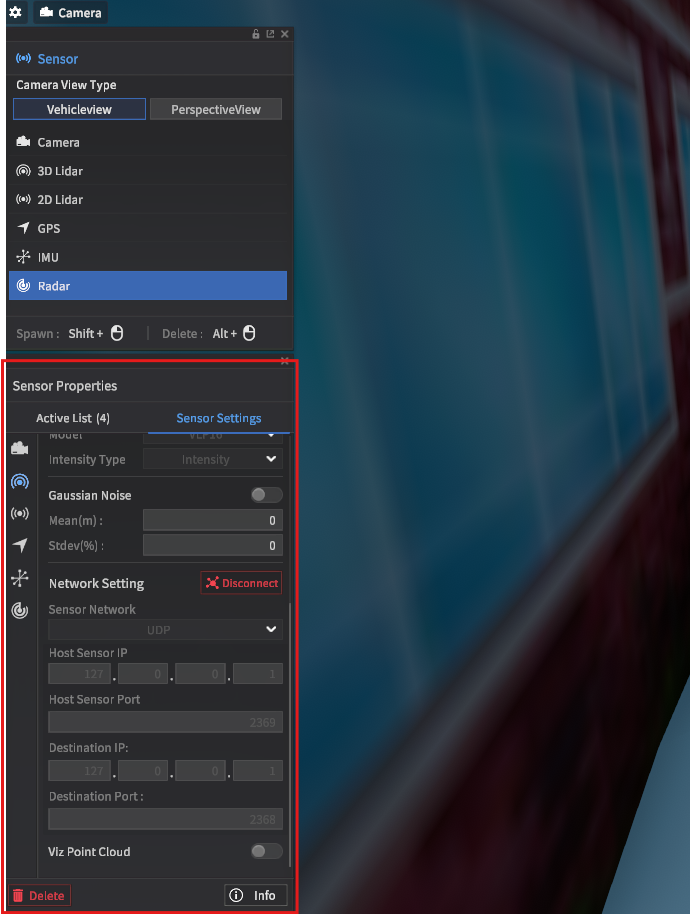
In sensor placement mode, network settings are located under the sensor settings tab
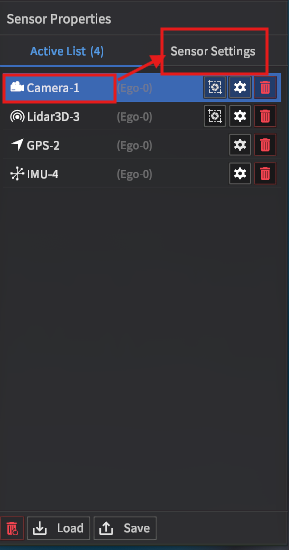
Click the Sensor Settings tab to navigate to sensor network settings
Configure the sensor network to UDP, and click Connect.
For single machine setups, make sure the IP and port settings are set as follows:
(for multi-machine or virtual machine setups, the Host and Destination IPs will be different)
Camera
Host IP:
127.0.0.1Host Port:
1231Destination IP:
127.0.0.1Destination Port:
1232
GPS
Host IP:
127.0.0.1Host Port:
1233Destination IP:
127.0.0.1Destination Port:
1234
IMU
Host IP:
127.0.0.1Host Port:
1235Destination IP:
127.0.0.1Destination Port:
1236
3D Lidar
Host IP:
127.0.0.1Host Port:
2369Destination IP:
127.0.0.1Destination Port:
2368
Step 3: Verification using an external visualizer
1. Set up the external visualizer. Download our python-based test visualizer UI from GitHub.
Follow the instructions in the readme to set up the visualizer - you may need prior experience in python.
We recommend using anaconda, poetry, uv or similar python development environment management systems to keep python libraries from clashing. A recent addition, uv, is recommended for its simple user workflow and speed.
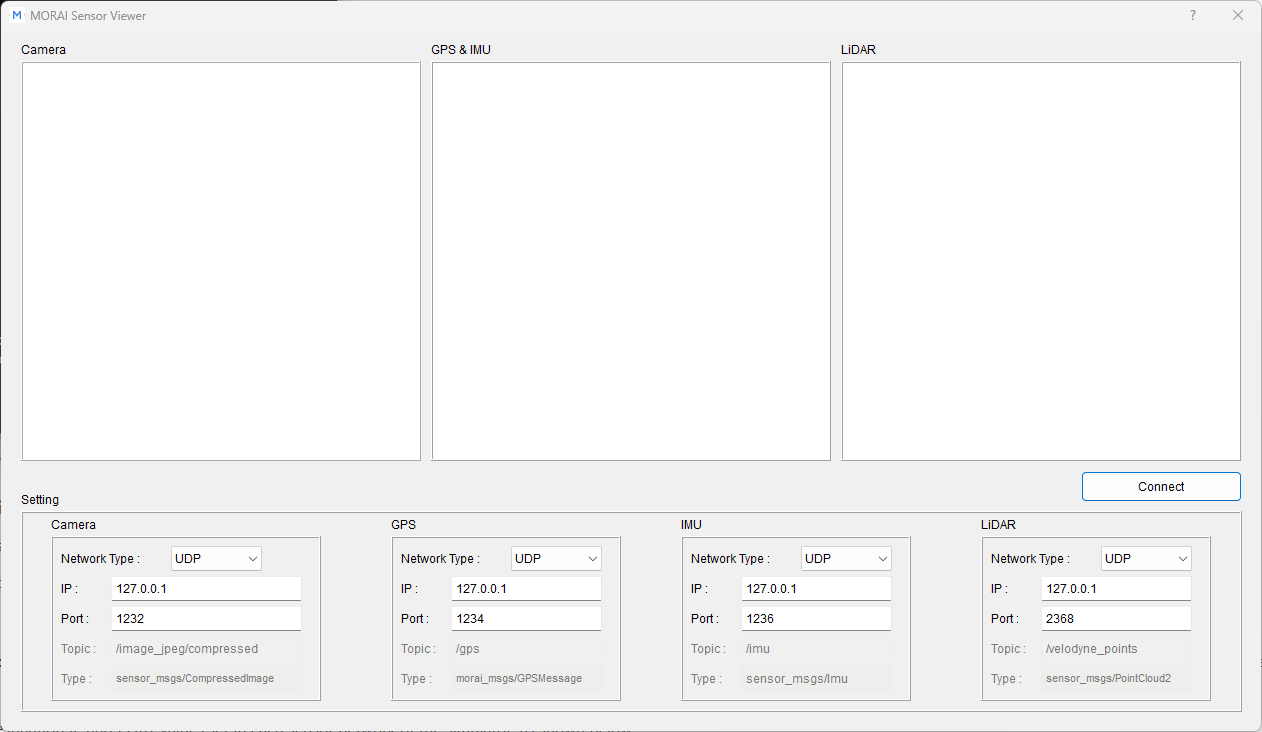
Our external visualizer for this example
2. Confirm the sensor data can stream to the visualizer. Upon clicking the Connect button in the visualizer, each of the sensor screens should stream data from the simulator. Try moving around the scene with your vehicle - the sensor data streams should update accordingly.
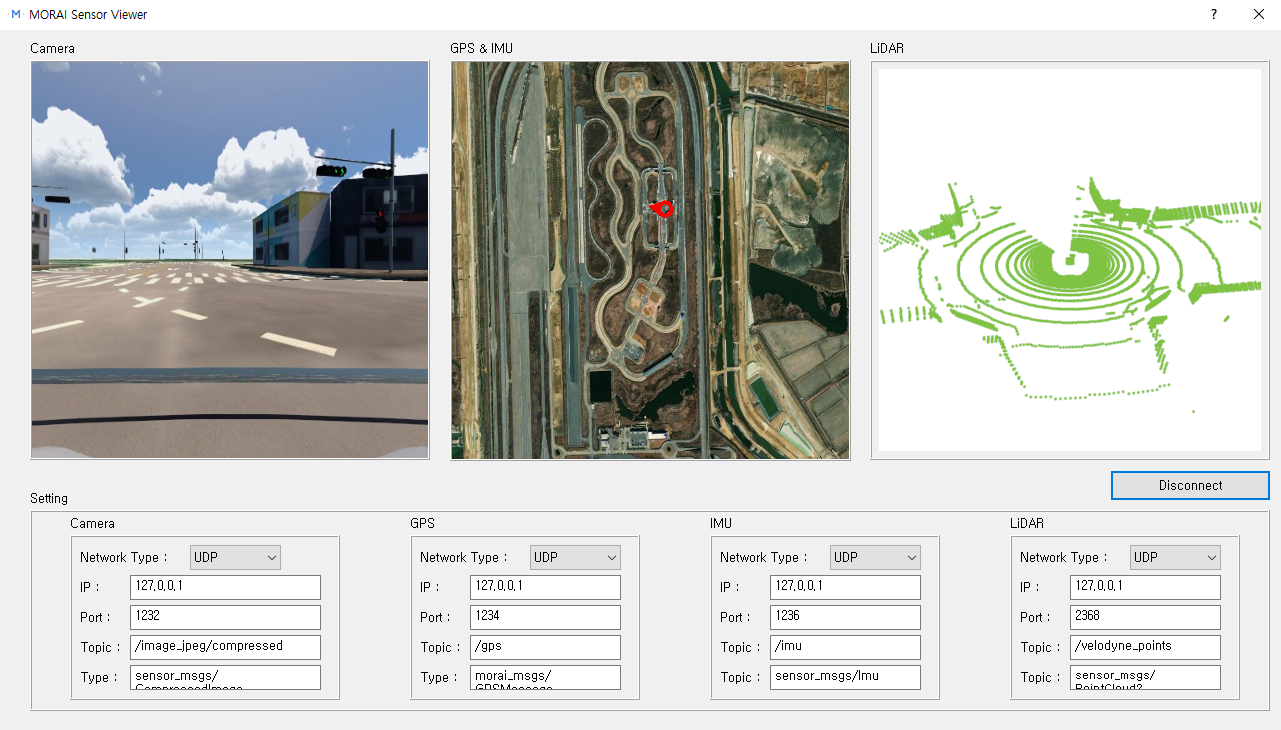
Congratulations, you have finished this UDP networking example.