
Custom Map
This section provides a guide on how users can create and load the custom maps provided by MORAI SIM: Drive.
Get Started
This step explains the procedures and required programs for creating and loading a custom map into the simulator.
Procedure
A custom map is composed of assets in the Unity environment, a 2D/3D graphic development engine. Therefore, the process is needed as below to generate and build the assets that make up the map and create a custom map before loading the map into the simulator.
1] Create a OpenDRIVE file in the RoadRunner.
2] Convert the file to the Obejct (Road Mesh) and MGEO (Vehicle's Driving Path) files in OpenDRIVE Support.
3] Build an asset in Unity's AssetBundle Editor and create it as a Custom Map File.
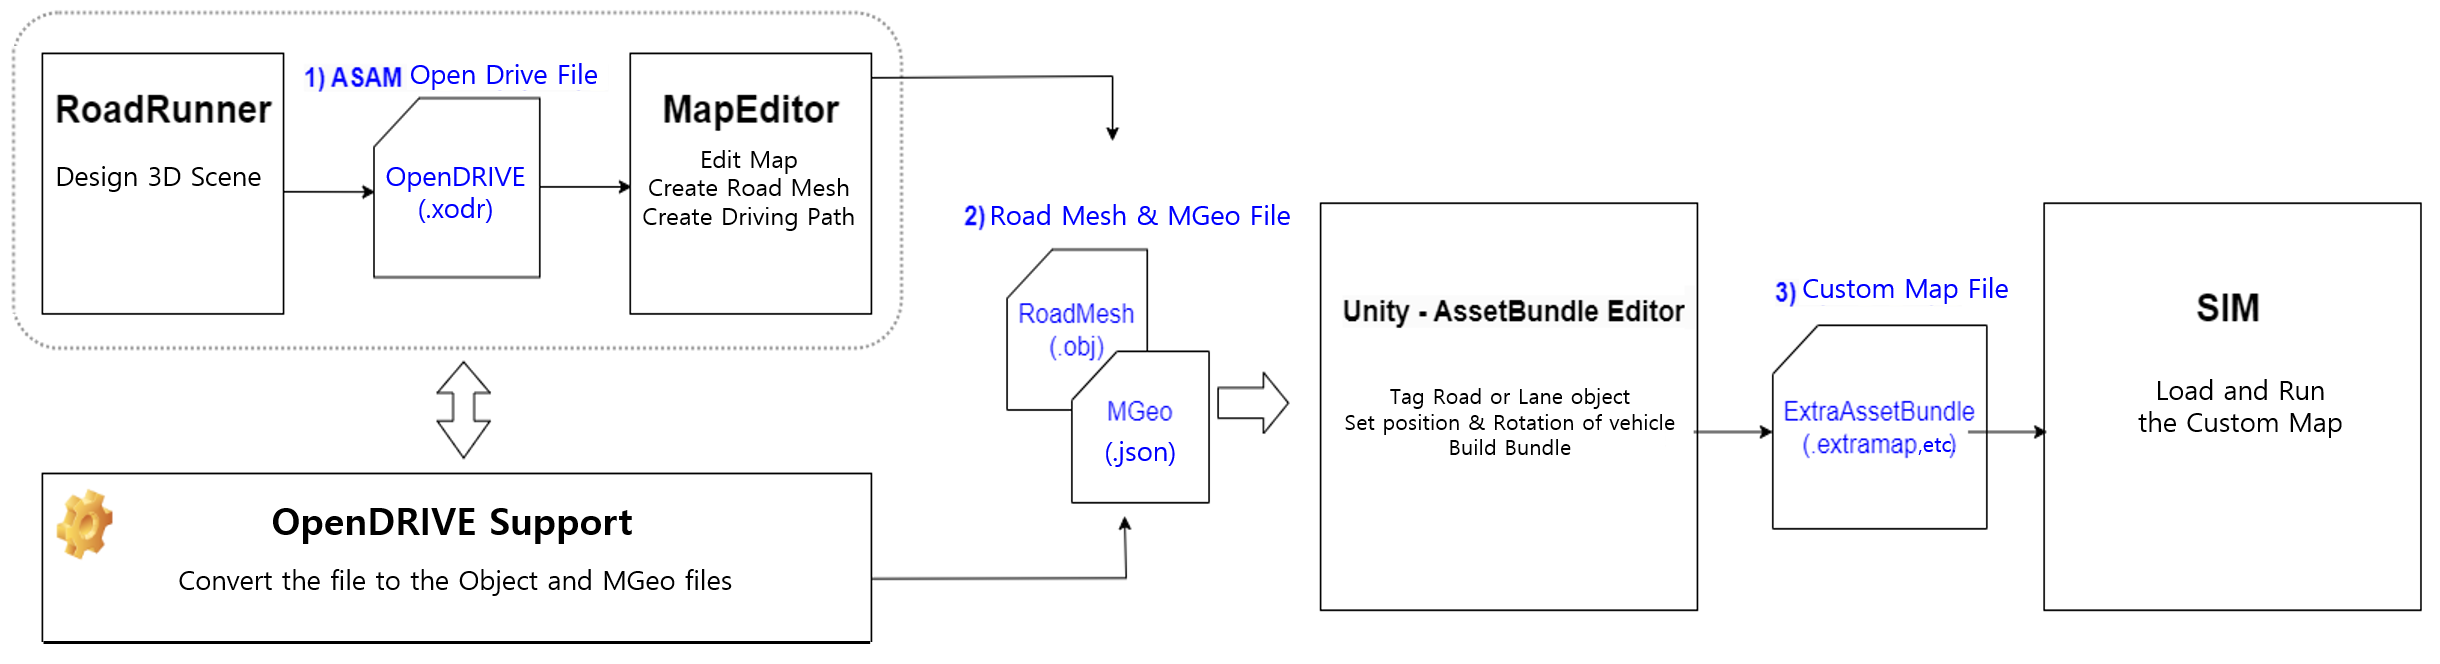
Figure 1. Procedure for a custom map
This guide covers the process of converting an OpenDRIVE file, provided as a sample in OpenDRIVE Support, into Road Mesh and MGEO files. It does not include generating OpenDRIVE files in RoadRunner or editing maps in MapEditor.
RoadRunner
: Road Runner is an interactive editor designed for autonomous driving system simulation and testing.
It allows users to design and export 3D scenes in the ASAM OpenDRIVE format.
Map Editor ADD-ON SERVICE
: Map Editor is an add-on feature of Scenario Runner, a tool used for executing scenarios in sync with the Simulator.
It not only automatically generates road meshes from OpenDRIVE files but also allows users to edit and control the mesh generation process.
For viewing the Map editor User guide, please contact our MORAI Help Desk.
Required Programs
After generating the custom map completes, the required programs for loading in the simulator are as follows:
OpenDRIVE Support: Convert the OpenDRIVE file to the Obejct (Road Mesh) and MGEO (Vehicle's Driving Path) files → Download the OpenDRIVE Support
Unity Hub/ Untiy Editor Pro ver. 2020.3.6 → Download the Unity Hub
When using Unity Editor, make sure to activate the Unity Pro license in order to install ProBuilder and run the AssetBundle Editor.
After insallation the Unity Hub completes, enter the following download link in the browser address bar to install version 2020.3.6: unityhub://2020.3.6f1/338bb68529b2.
MORAI SIM: should be official release version. (Example: R22.4.2)
1. OpenDRIVE Support - Create Map Data
In this step, map data (Road Mesh and MGEO files) required for asset creation in the Unity environment is generated.
Additionally, the OpenDRIVE Support program provided by MORAI is used to convert the OpenDRIVE file (.xodr) directly into Road Mesh (.obj) and MGEO (.json) files without any further editing.
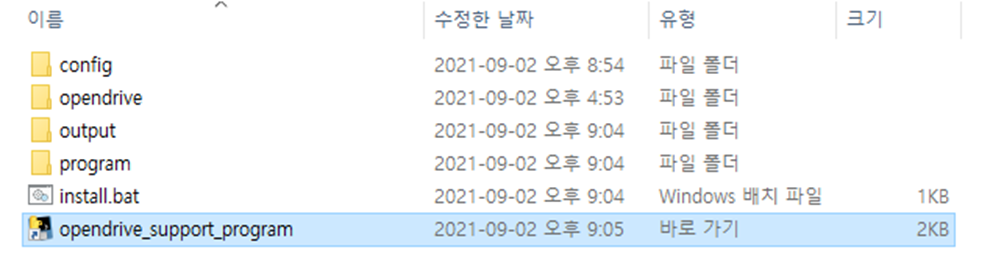
Step 1: Run the OpenDRIVE Support program
Run the OpenDRIVE Support program as below.
Unzip the installer and run install.bat by double-clicking the file.

Create the opendrive_support_program shortcut file.
Step 2: Convert the OpenDRIVE file
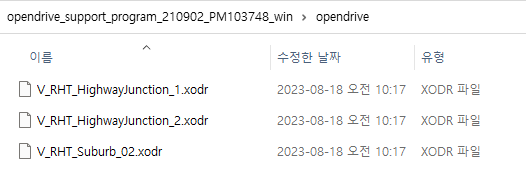
The process of converting the sample OpenDRIVE file to a Road Mesh and MGEO file is described below.
Check the OpenDRIVE sample file below in the OpenDRIVE folder under the OpenDRIVE Support program you installed.
Run a command prompt window and move to where the opendrive_support_program shortcut file exists.
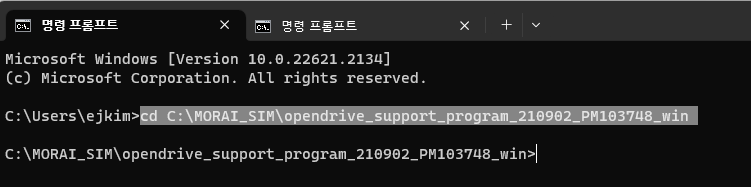
Enter the file convert command as below.
opendrive_support_program.lnk -c config/{config File Name} -x opendrive/{OpenDRIVE File Name} -o output/{Output file path to save}
# Example
opendrive_support_program.lnk -c config/config.json -x opendrive/V_RHT_HighwayJunction_1.xodr -o output/V_RHT_HighwayJunction_1
Enter ID/PW for demo.
For the MORAI SIM Custom Map Demo account, please contact our MORAI Help Desk as the Custom Map is an Add-on Service.
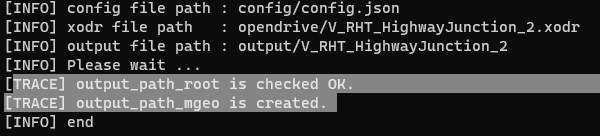
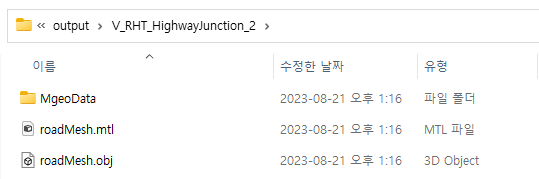
If the file conversion is successful, a normal command like below is displayed, and you can see the file created in the output file path.
2. AssetBundle Editor - Create Custom Map
This page describes the process of creating a Road Mesh and a MGEO file as assets in the AssetBundle Editor and building them into a custom map.
To access to the Asset Bundle editor, go to Unity > AssetBundle Editor.
Step 1: Configure your Unity project environment
To run the AssetBundle Editor in Unity, configure your project environment in the following order.
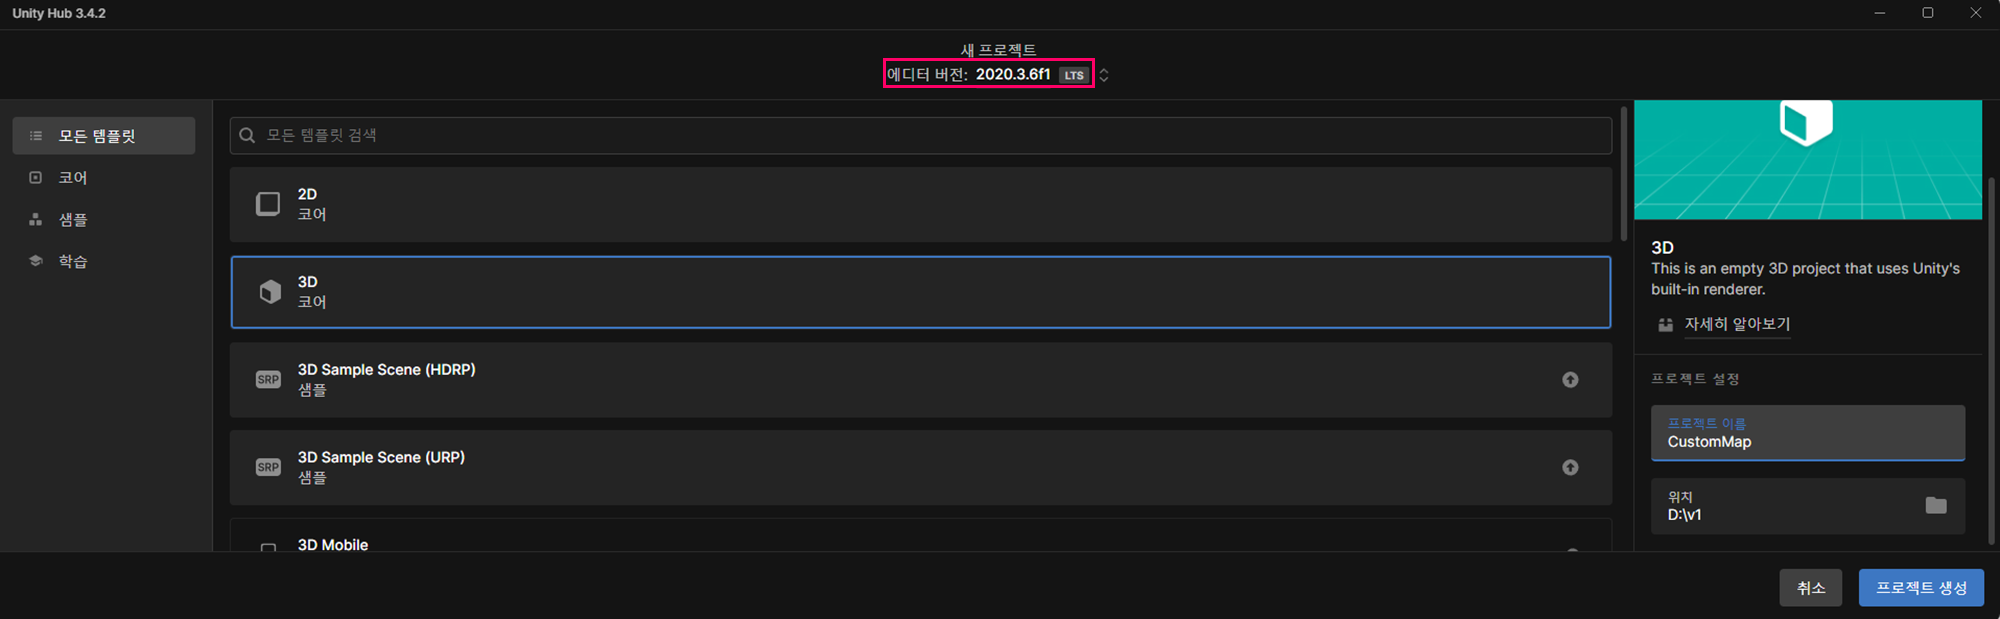
In the Unity Hub, click New Project to create an empty project with the options below.
Editor version: 2020.3.6f1
Template: 3D core
Download the package file for creating Asset Bundle.
Click here to download
Drag and drop the downloaded package file into the path below.
: Project > Assets folder.

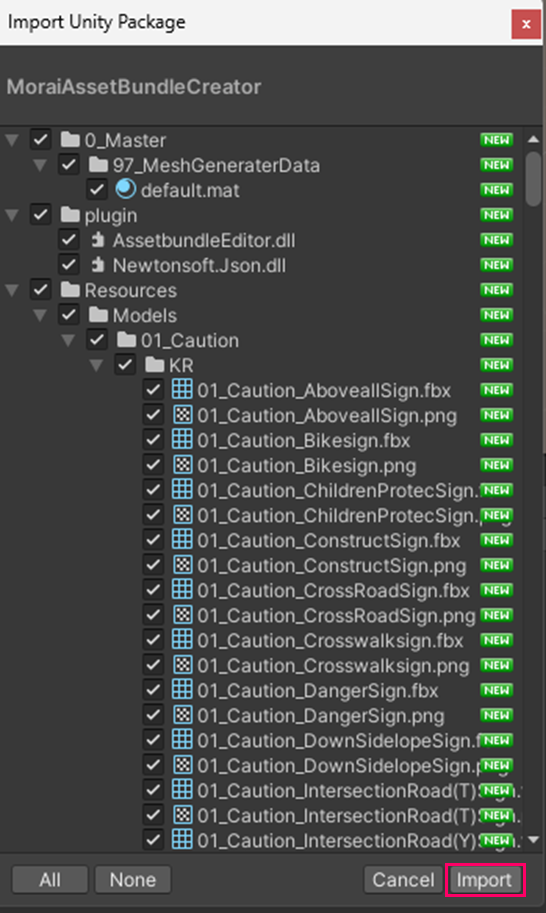
In the Import Unity Package window that pops up, check the MoraiAssetBundleCreator package file and click Import at the bottom.
Step 2: Run AssetBundle Editor
To run the AssetBundle Editor, install ProBuilder package as below.
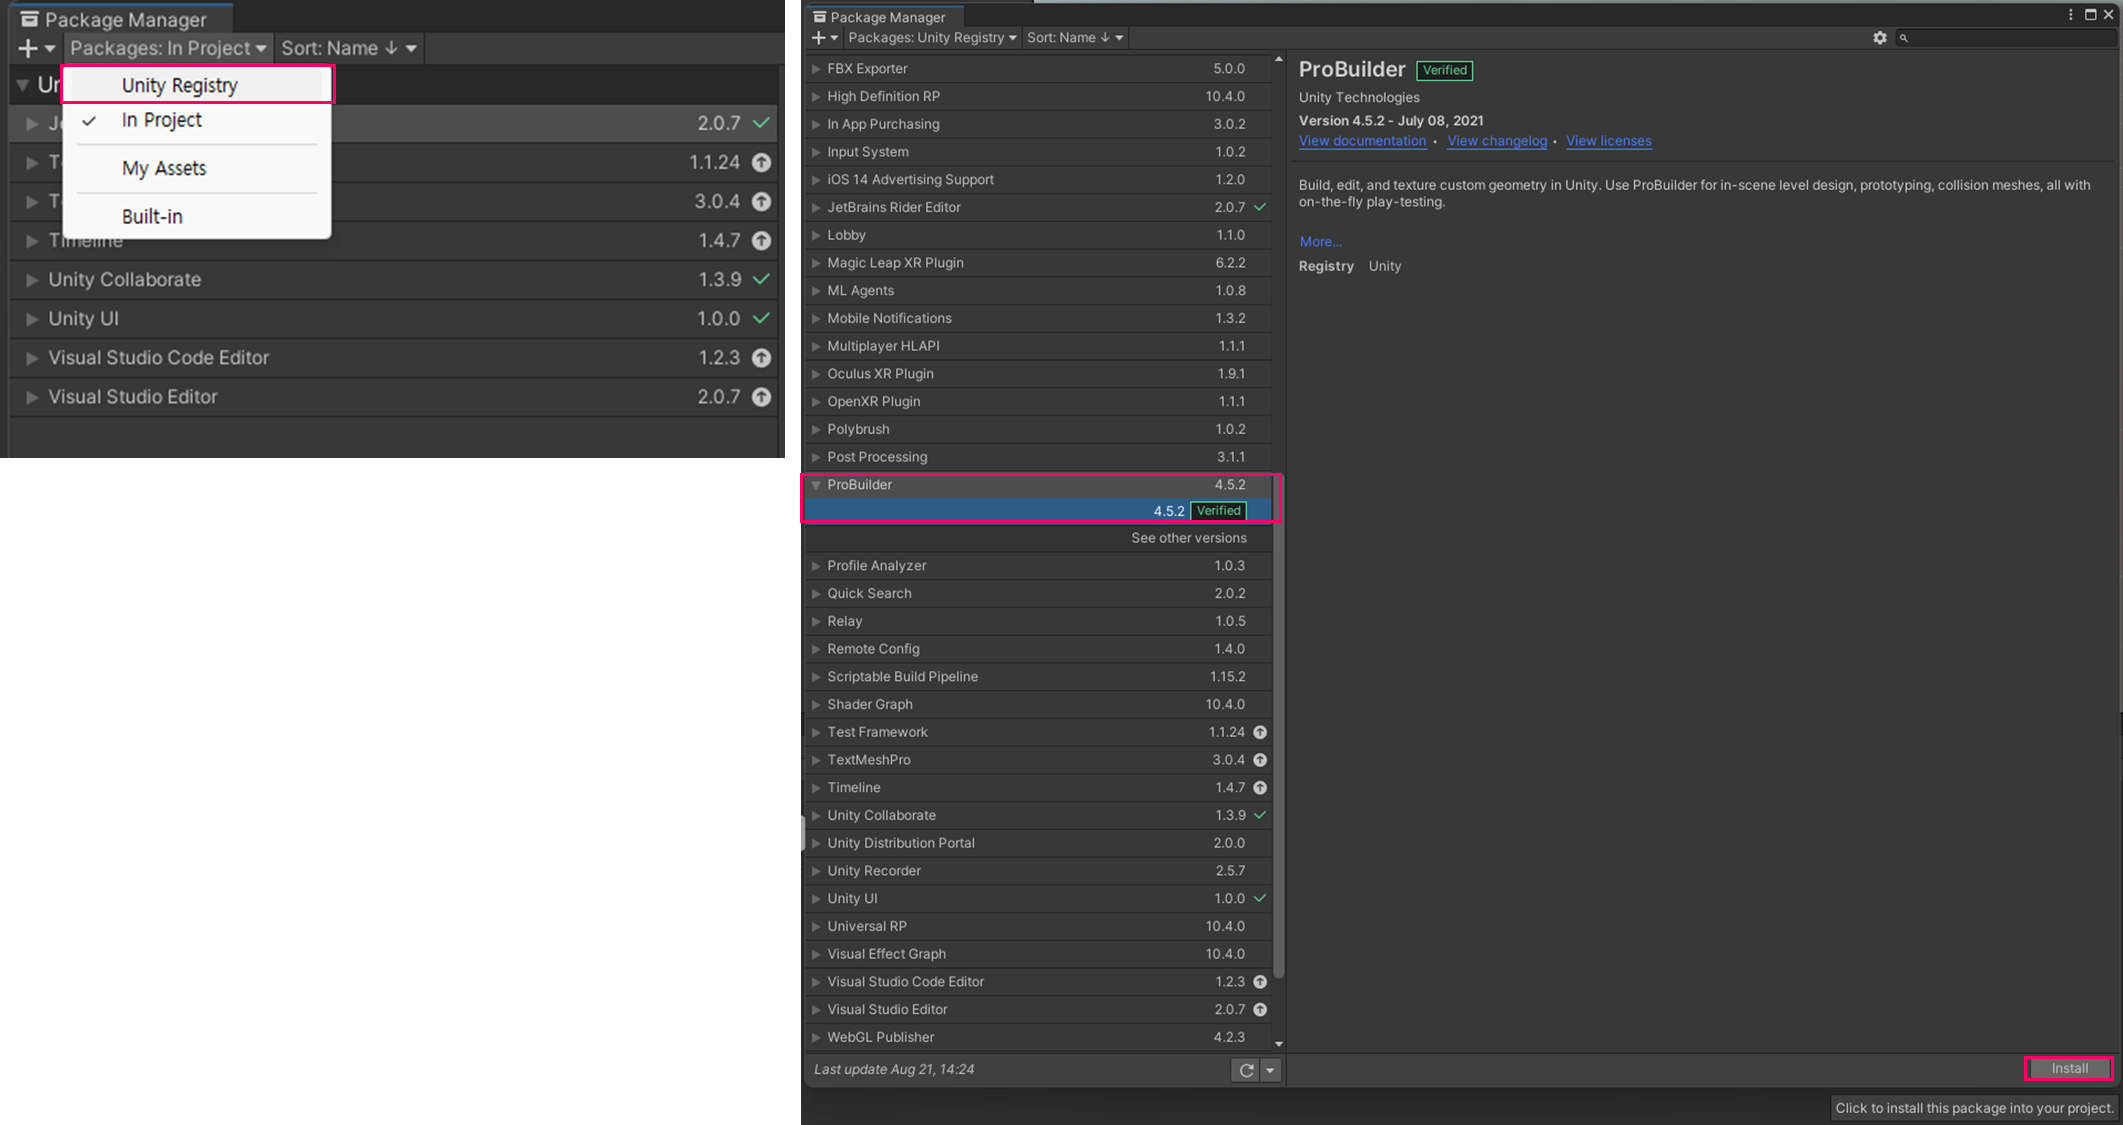
Go to Window > Package Manager, then install the ProBuilder package.

In the Package Manager window, change the Packages option to Unity Registry and click Install the ProBuilder 4.5.2 where it is detected.
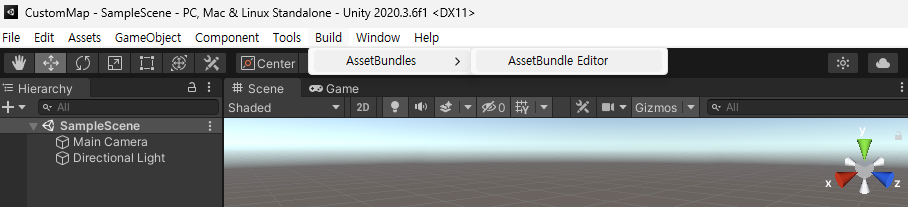
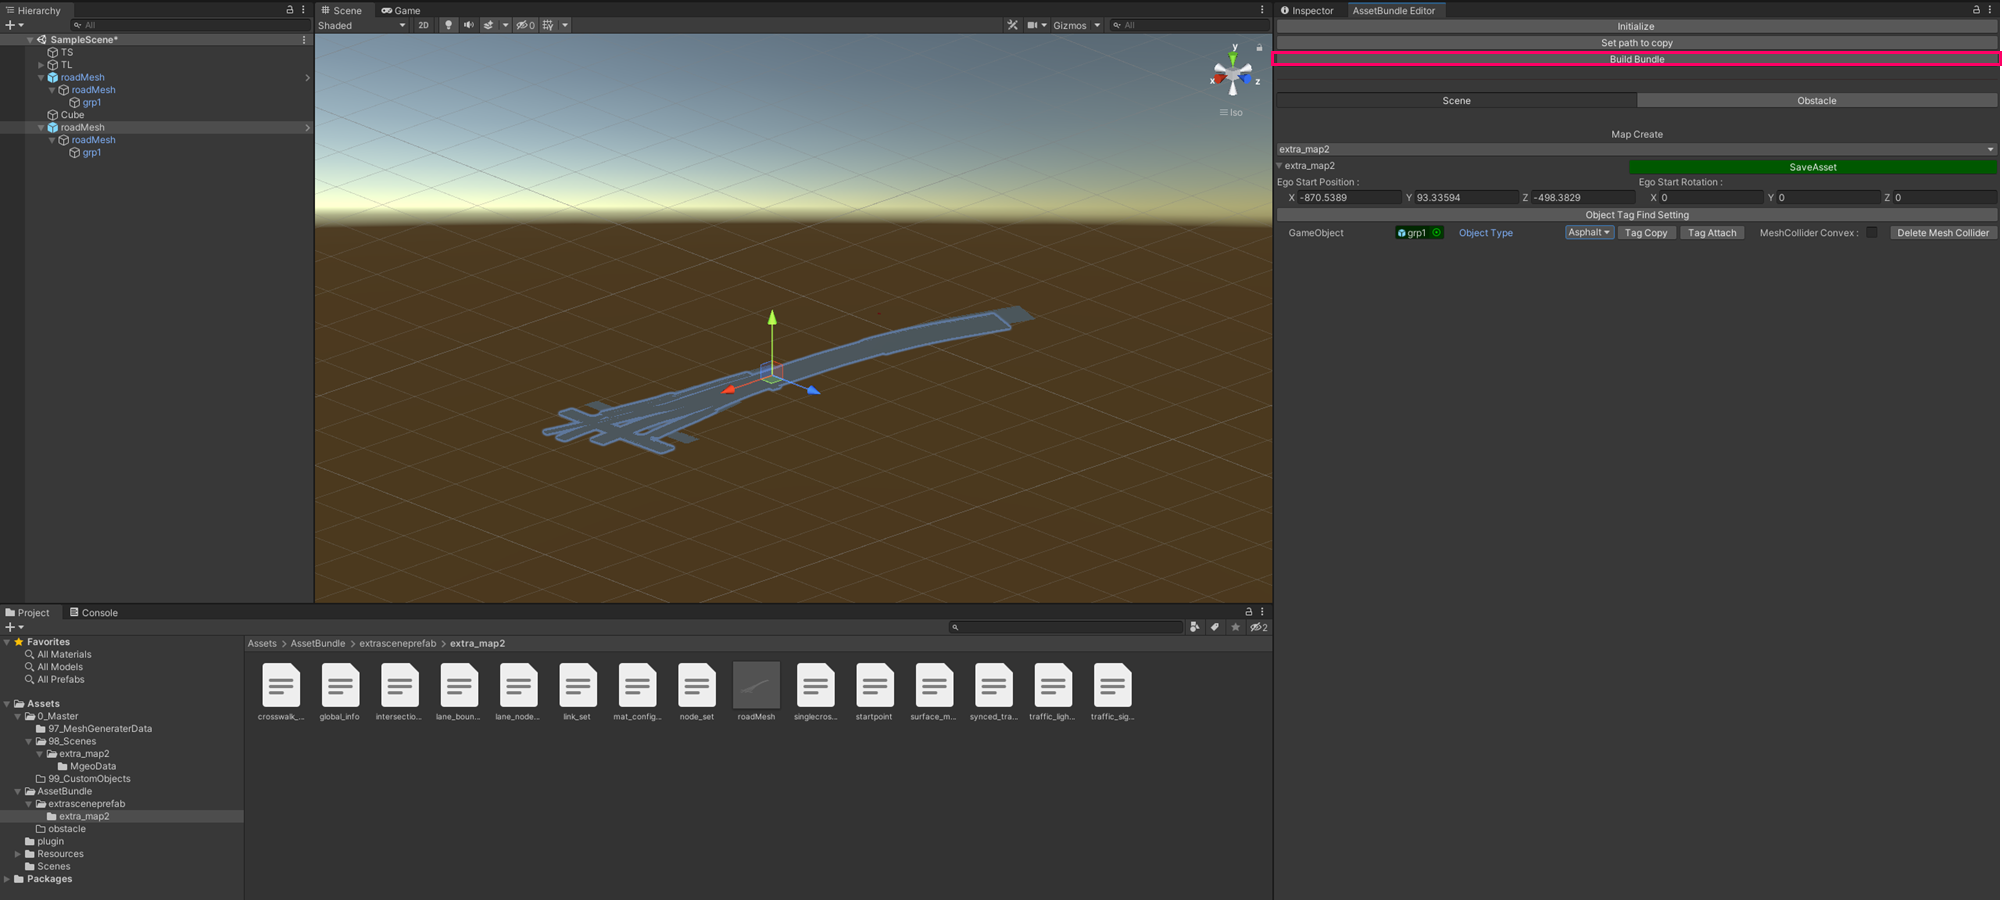
Go to Build > AssetBundles > AssetBundle Editor on the top of the menu bar.
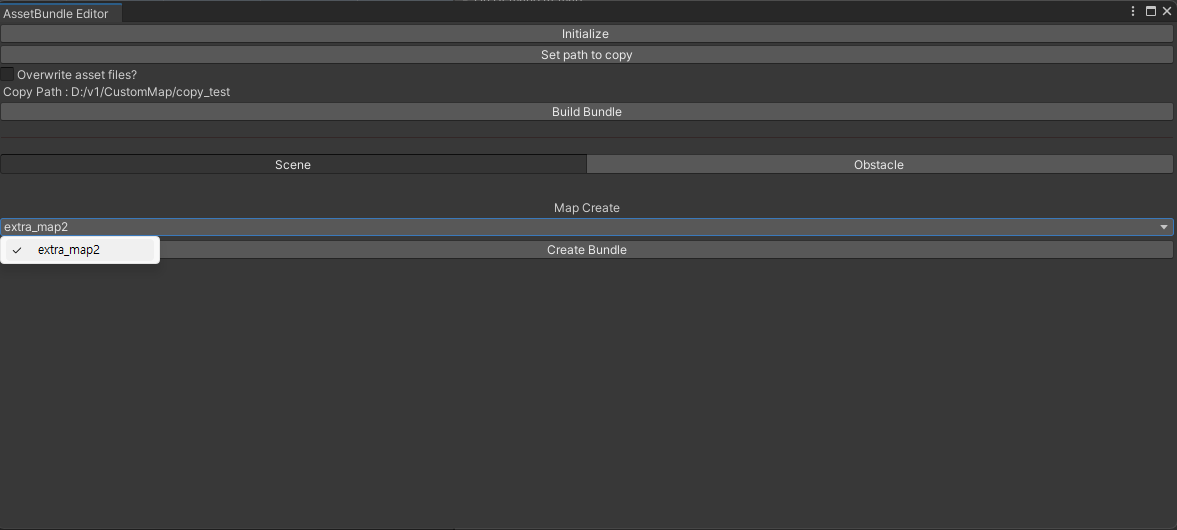
Confirm the AssetBundle Editor window as below figure.
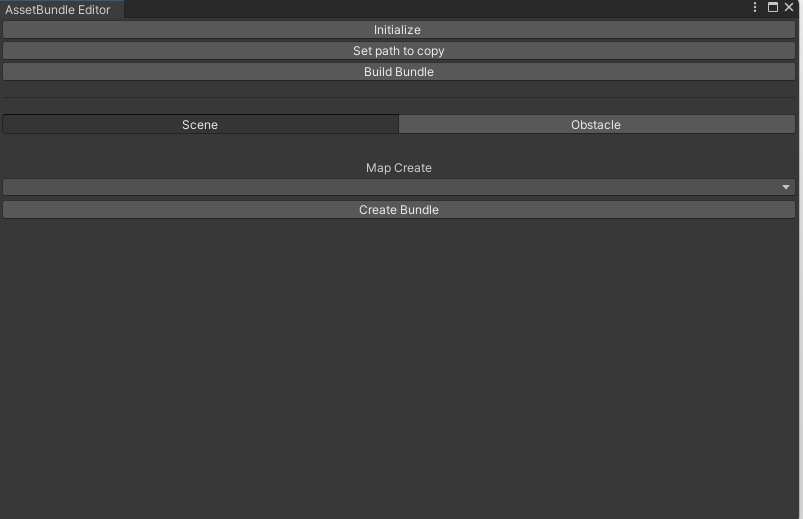
Initialize: Initialize the editor. The AssetBundle Editor is automatically initialized when running.
If you add data while the editor is running, click Initialize to reset once more.Set Path to Copy: Copy the Asset Bundle File to the assigned path.
Overwrite asset files: If the same Asset file exists in the specified path, the file is overwritten when copying if ticked. If unchecked, the file is not copied with an error.
Build Bundle: The last step after creating a bundle.
Scene: A Tab to create the Scene assets that make up your map.
Obstacle: A Tab to create the Obstacle assets that make up your map.
Create Bundle: Create Bundle for maps to be created after reset.
Step 3: Configure the Scene Asset File
Before creating your custom map, set up the Extra Scene asset files required for your custom map in the following order.
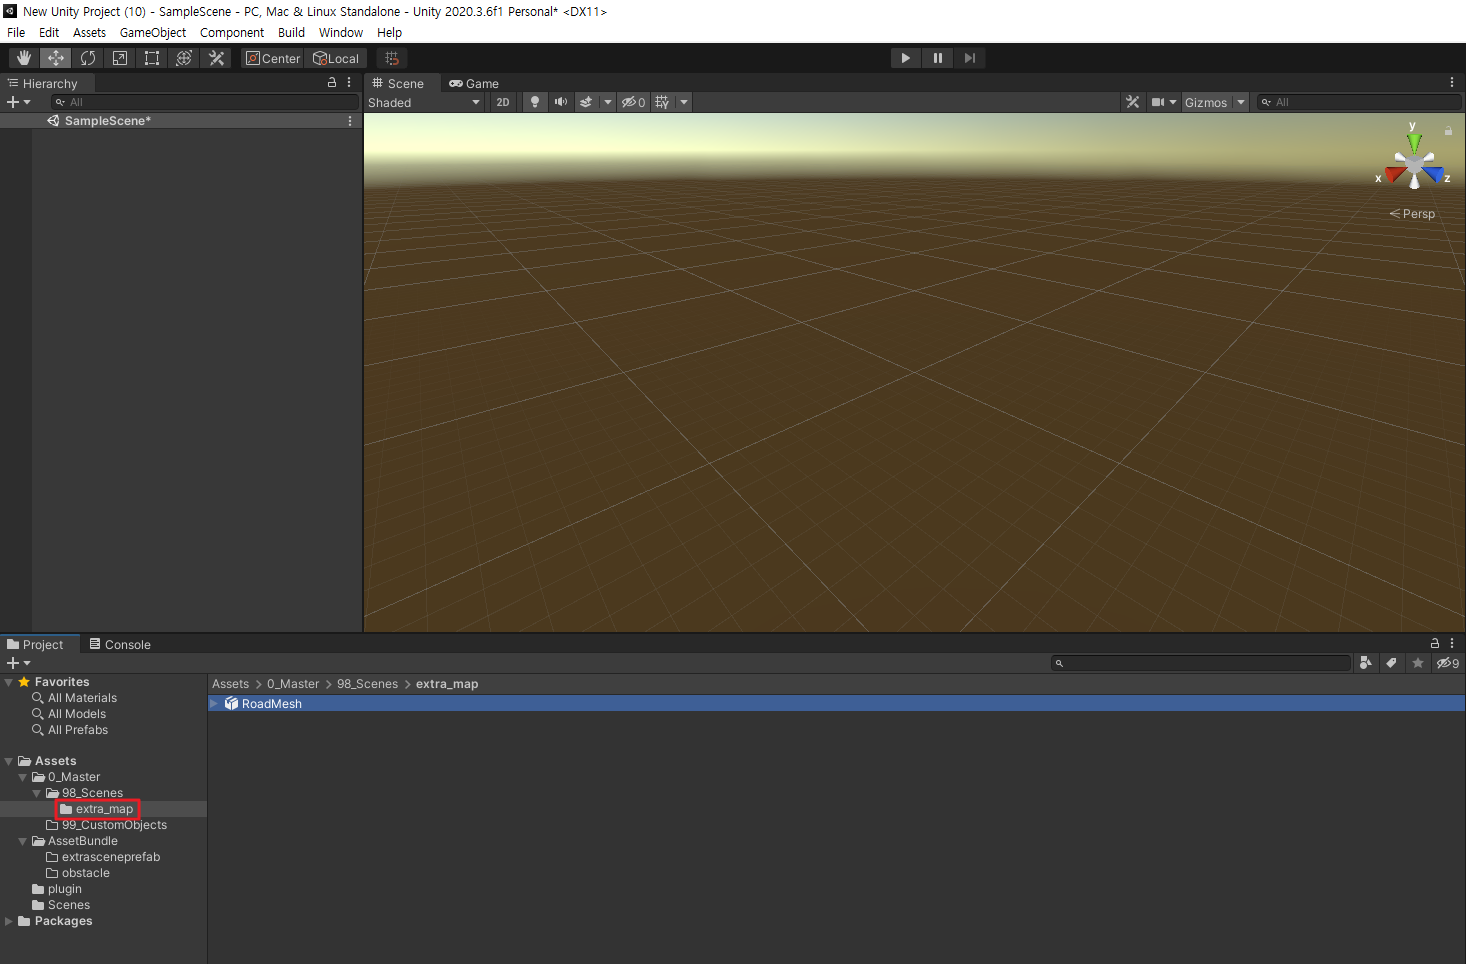
In the project below, create a folder with the name of the map you want to create (Example: extra_map) under 98_Scene, and include the road mesh (.obj) created by OpenDRIVE Support.
Create an additional MgeoData folder under the map folder you created and include the MGEO file (.json) created for the road mesh.
Add the mat_config.json file as below to specify the material type of the road mesh you want to include.
{
  "Lane_White": [
    "lm_white.obj"
  ],
  "Lane_Blue": [
    "lm_blue.obj"
  ],
  "Asphalt": [
    "road.obj"
  ]
}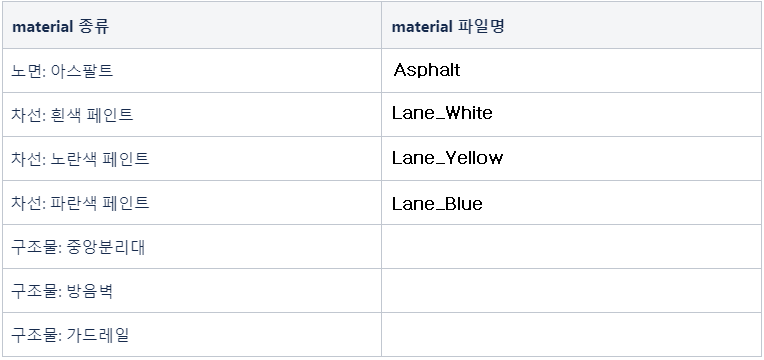
Depending on the development condition, supporting material types may be added or file names may be changed.
Step 4: Create and Build the Scene Asset
With the set asset files, create and build the Scene assets in the AssetBundle Editor as follows.
Go to Build > AssetBundles and run the AssetBundle Editor, then click Initialize to reset.

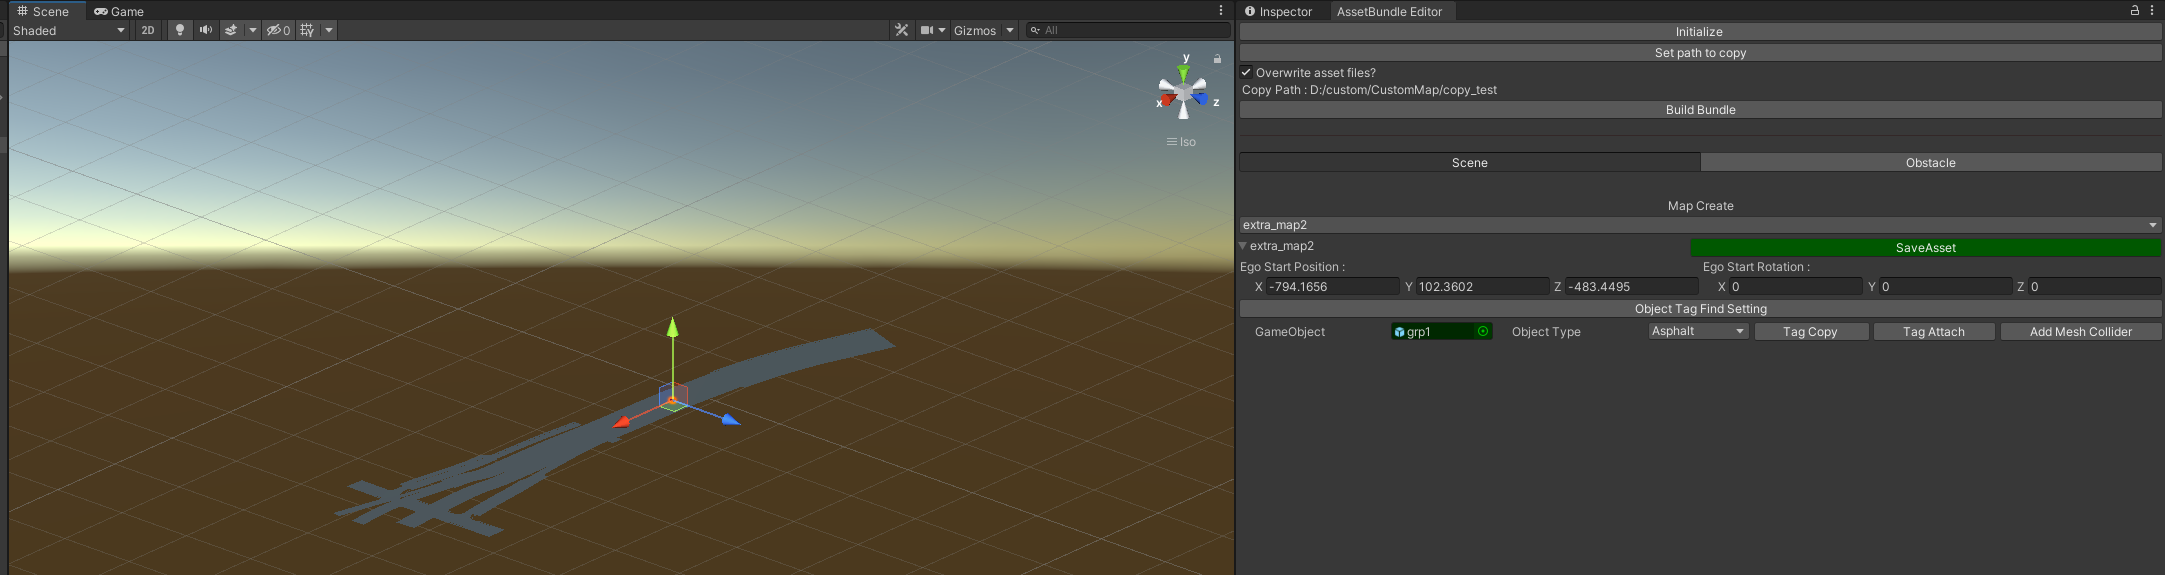
Go to AssetBundle Editor > Map Create and select the map you want to create in the sub list, then click Create Bundle.
Click the selected map (Example: extra_map2) to see that a GameObject has been created under the Object Tag Find Setting.
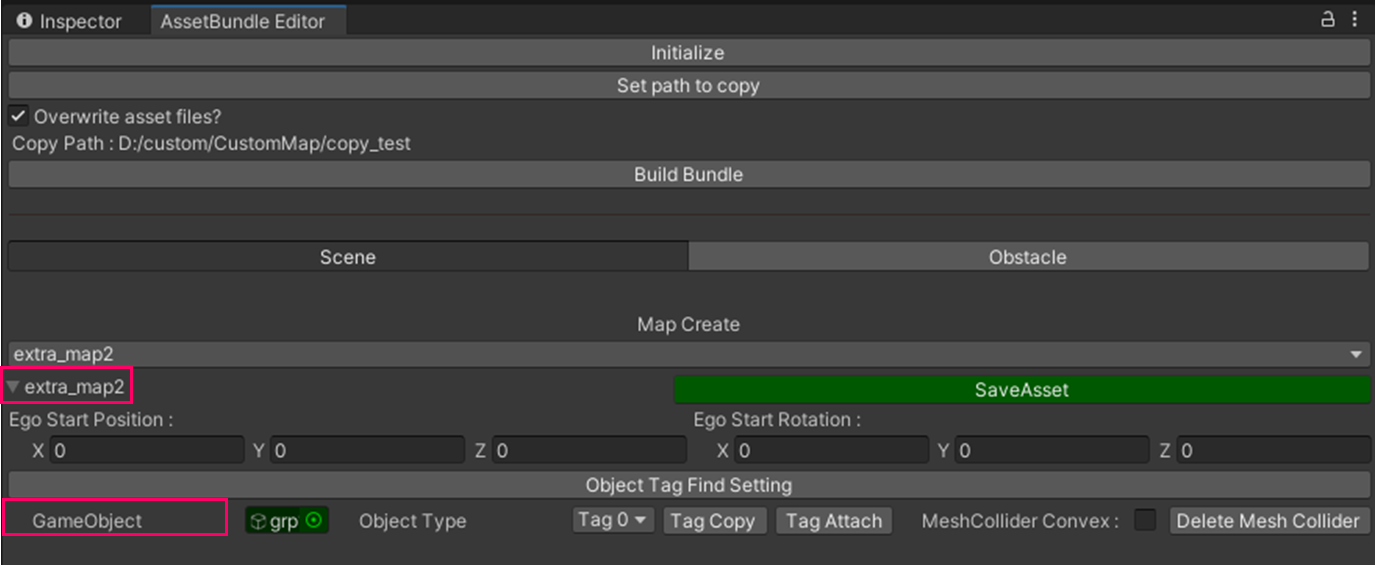
4, Click the Tag0 drop-down list of GameObject to select a tag value that corresponds to the material of the road mesh (.obj) you added.
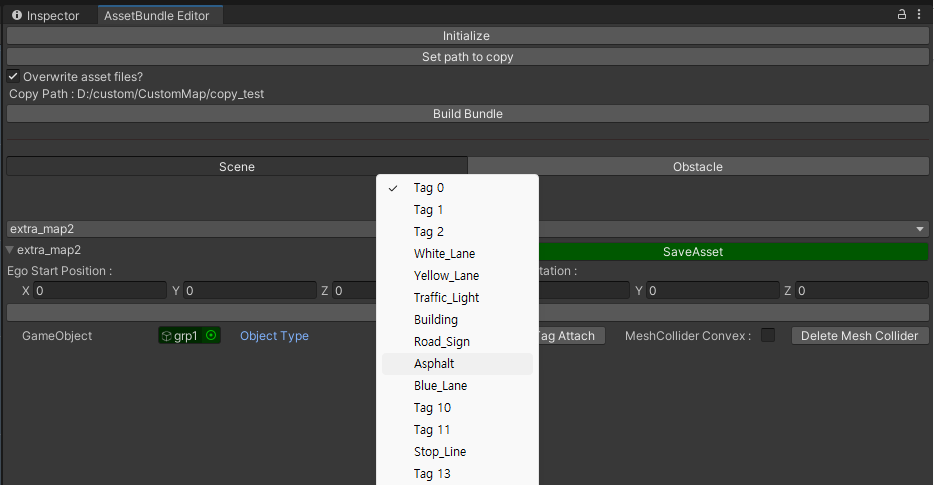
Select a tag based on the type of object you added.
Road Object → Asphalt
Lane Object → Road_Sign
Clicking on the road mesh in the Scene on the left side of the editor creates an Ego-Vehicle Gizmo.
By adjusting the position and direction of this Gizmo, you can set the initial position and rotation value of the Ego-Vehicle on the custom map loaded into the simulator.
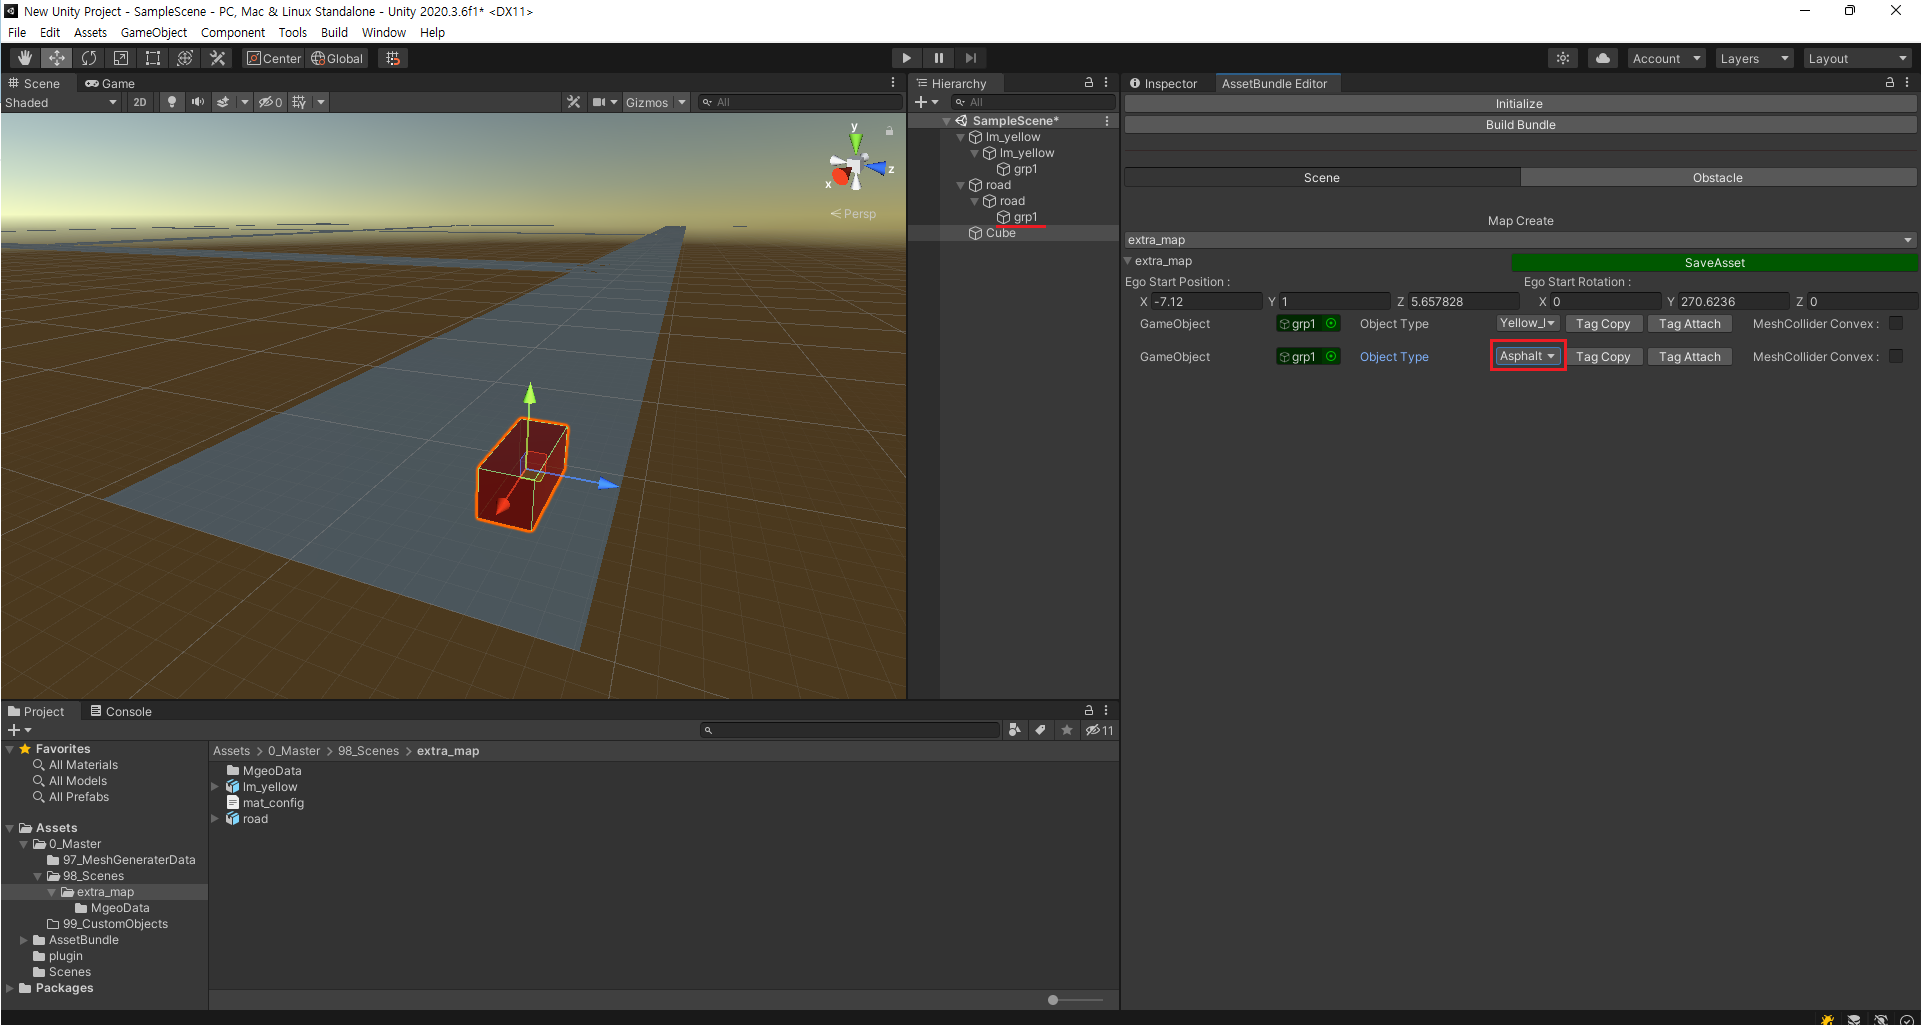
Double-click the desired Road location to set the Ego StartPoint and Ego StartRotation and click Save Asset.
StartPoint: The start point of the Ego-vehicle in the simulator.
StartRotation: The Start Rotation value of the Ego-vehicle in the SIM map.
If the Start Point is not specified,
the Ego vehicle continues to fall down the road after loading the Custom Map in the SIM.
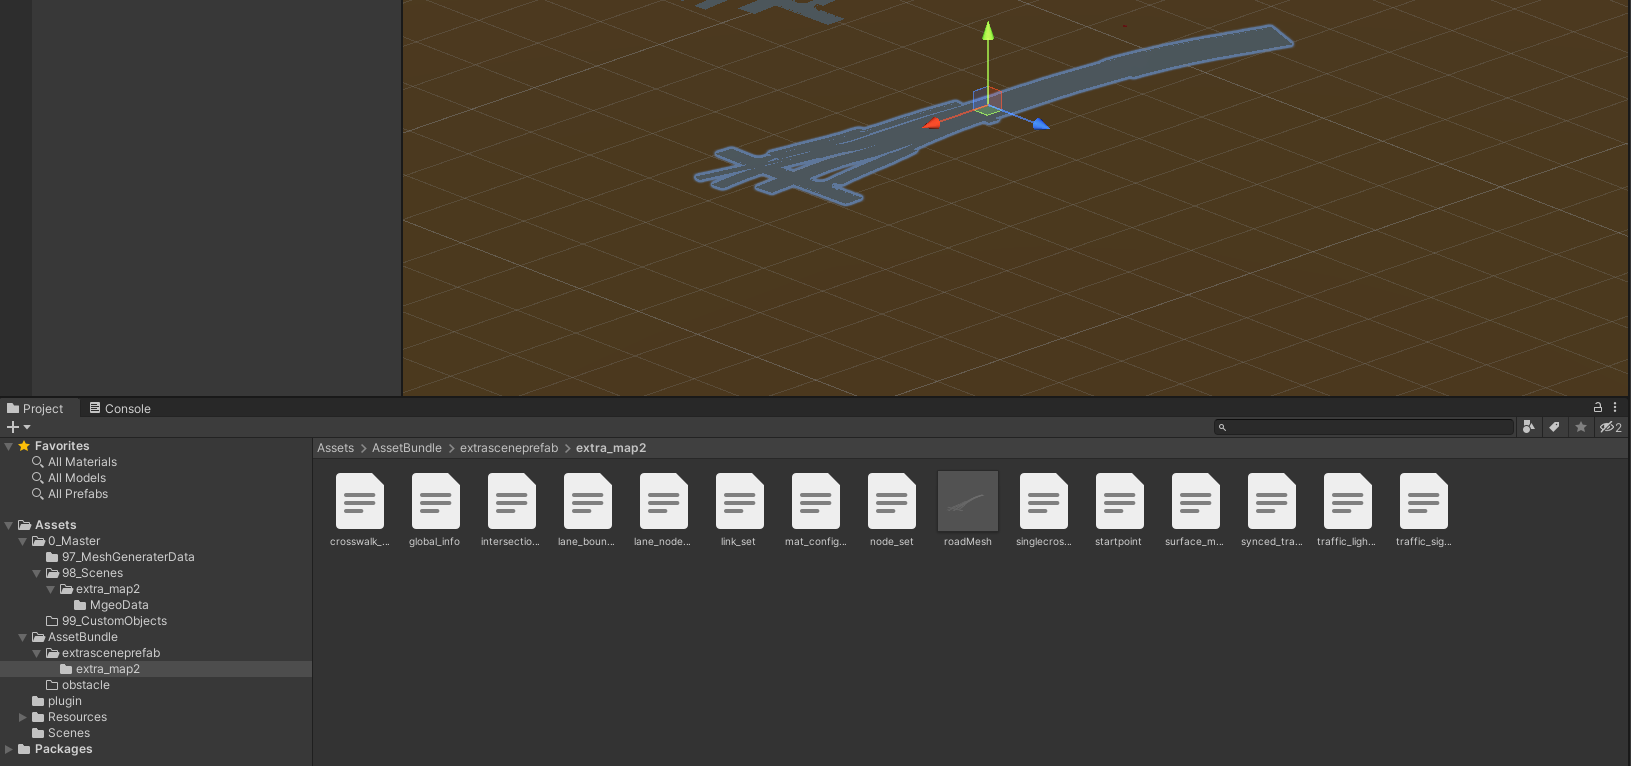
Check that the Prefab Asset and MGEO data for the road mesh are created properly in the AssetBundle/extrasceneprefab path in your project.
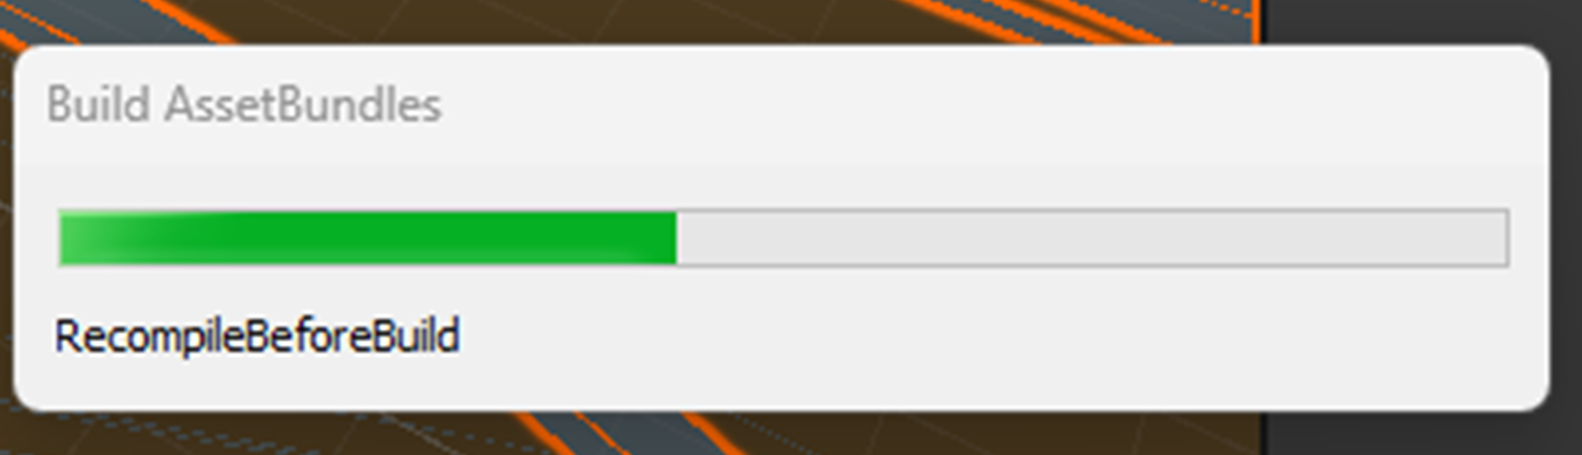
Click the Build Bundle and build the Scene Asset Bundle.
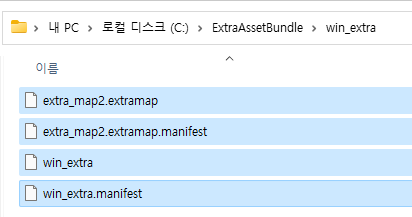
After building the Asset Bundle, confirm that the files that make up your custom map have been well created under the path
C:/ExtraAssetBundle/win_extra.
3. SIM - Load the Custom Map
This section describes the process of loading the generated custom map file into the SIM after building the AssetBundle Editor.
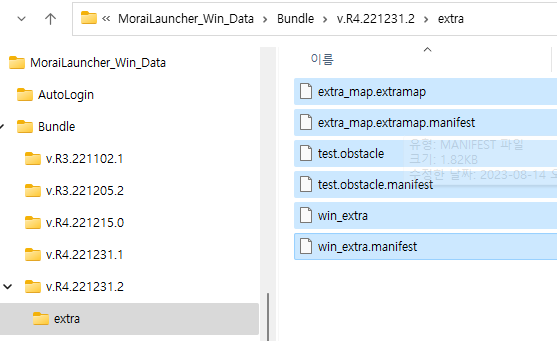
Copy the generated custom map file to the path below.
{SIM Launcher Installation Path} \MoraiLauncher_Win_data\Bundle\(Version)\extra
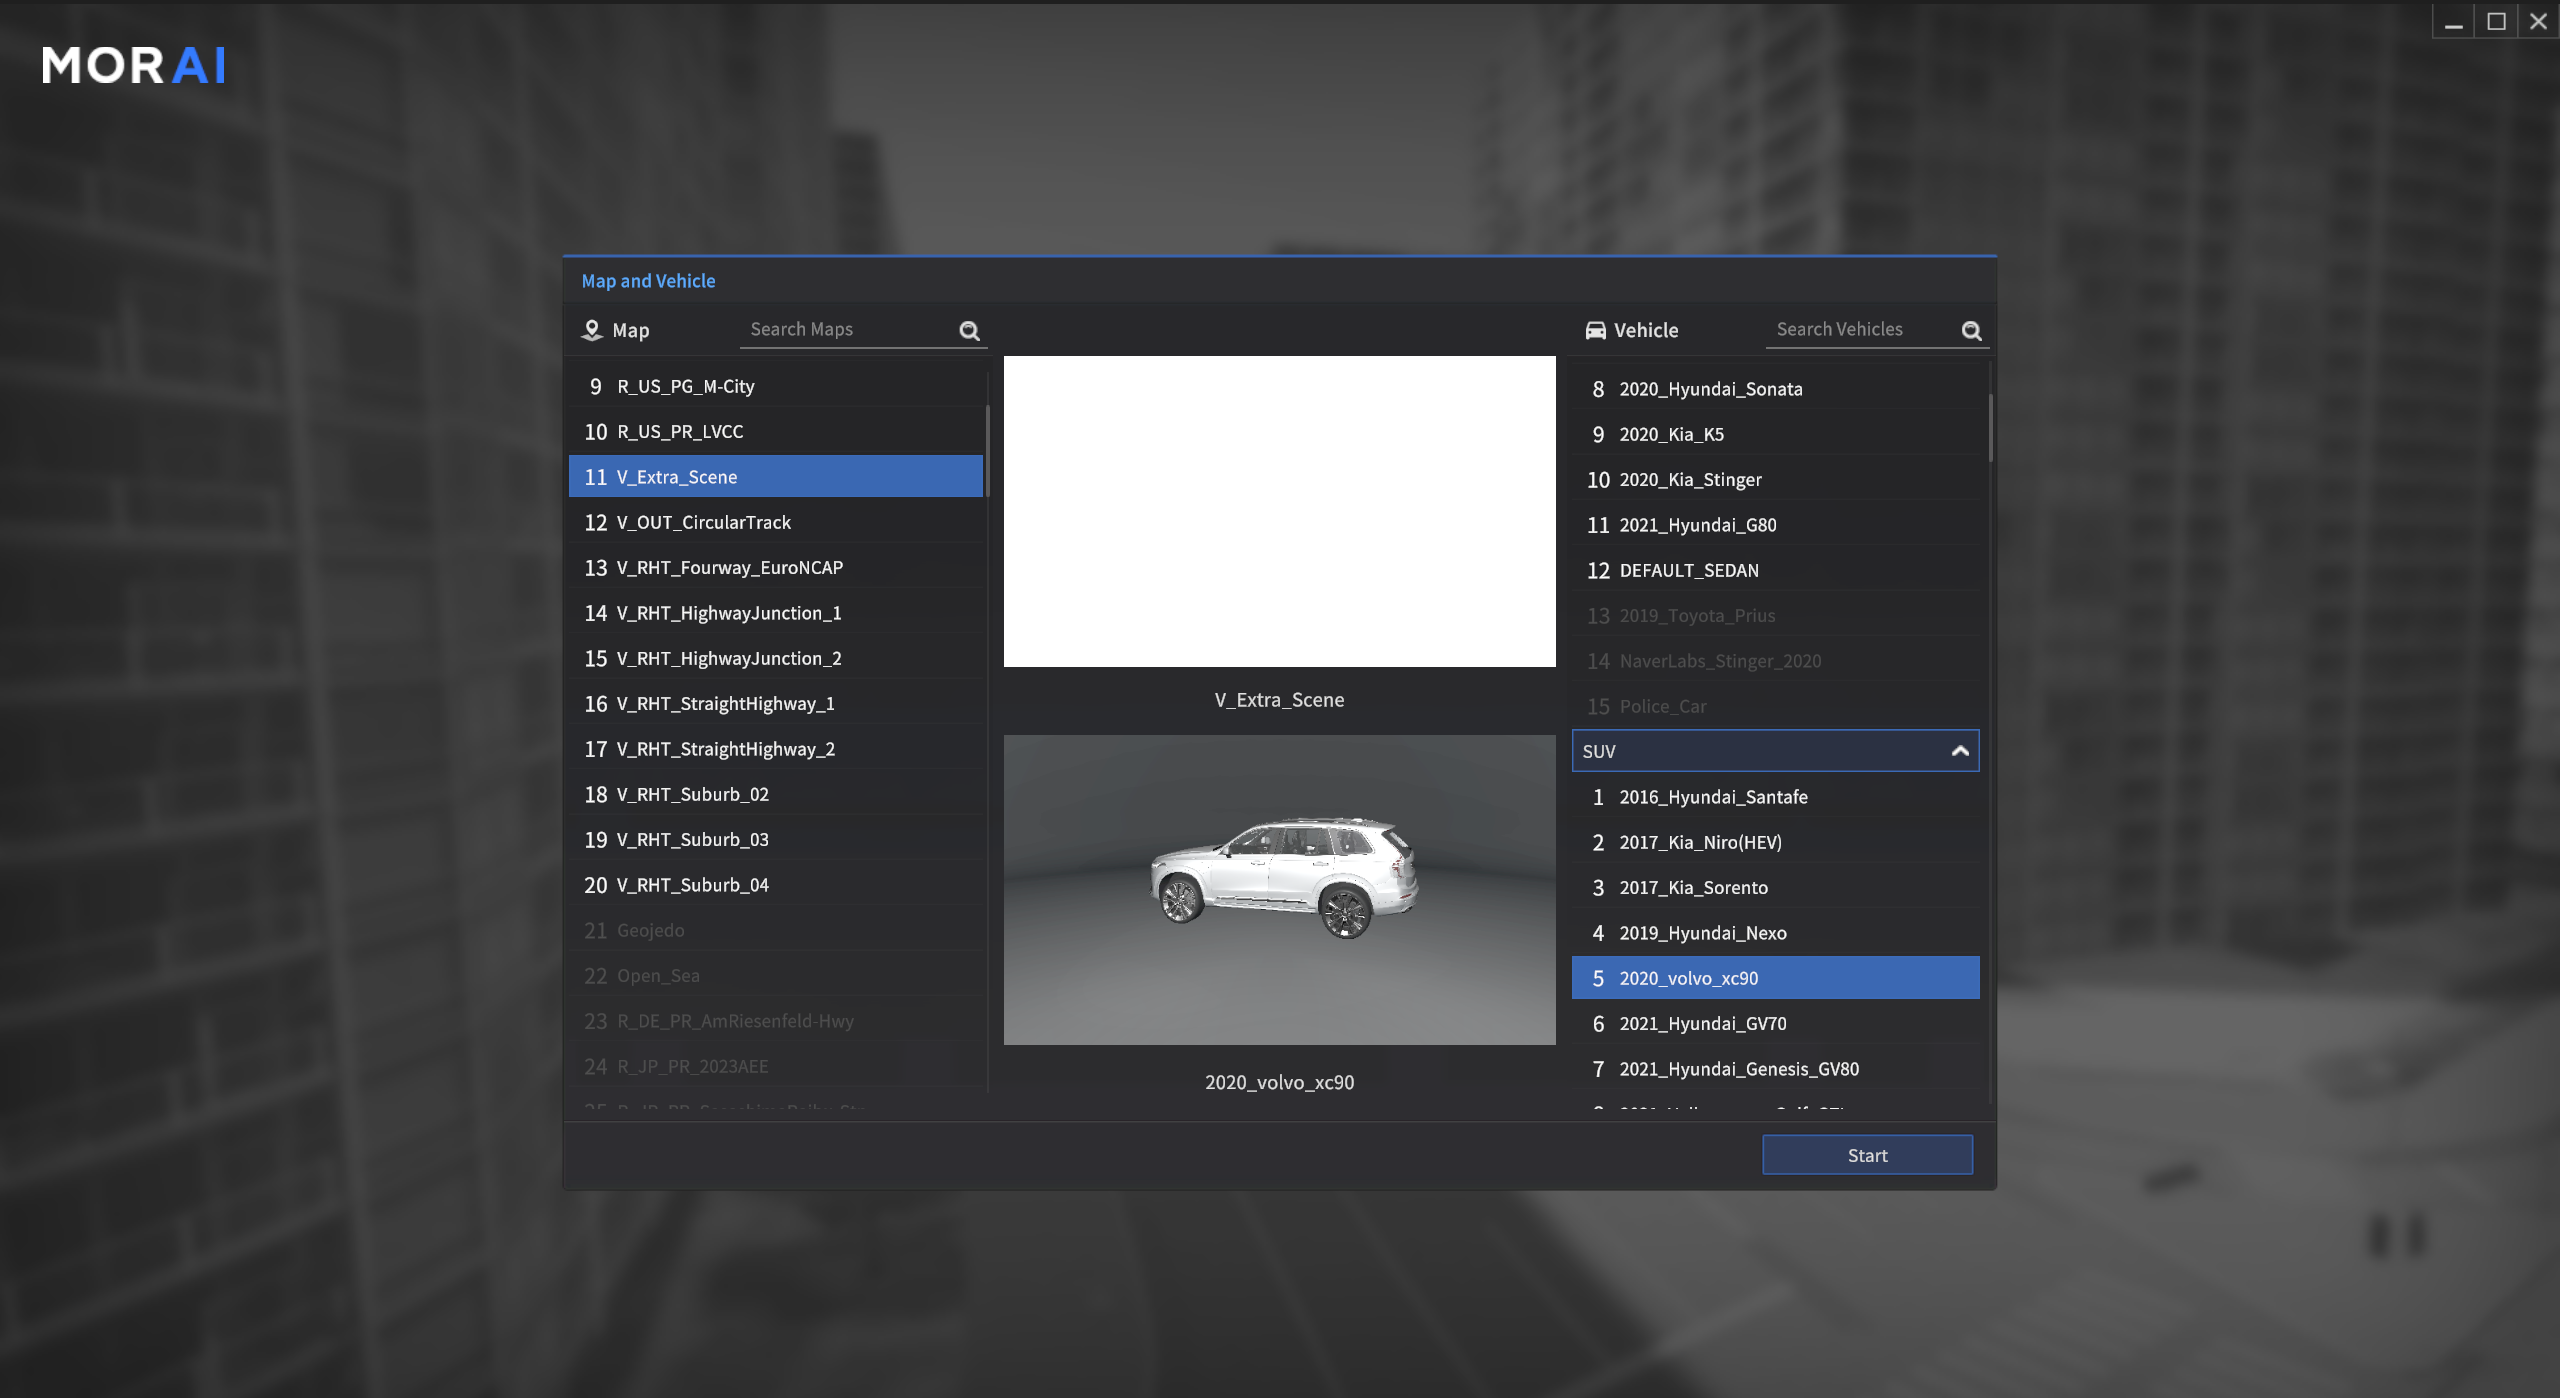
Select V_Extra_Scene Vehicle in the Map List and select the vehicle. Click Start to access the simulator start page.
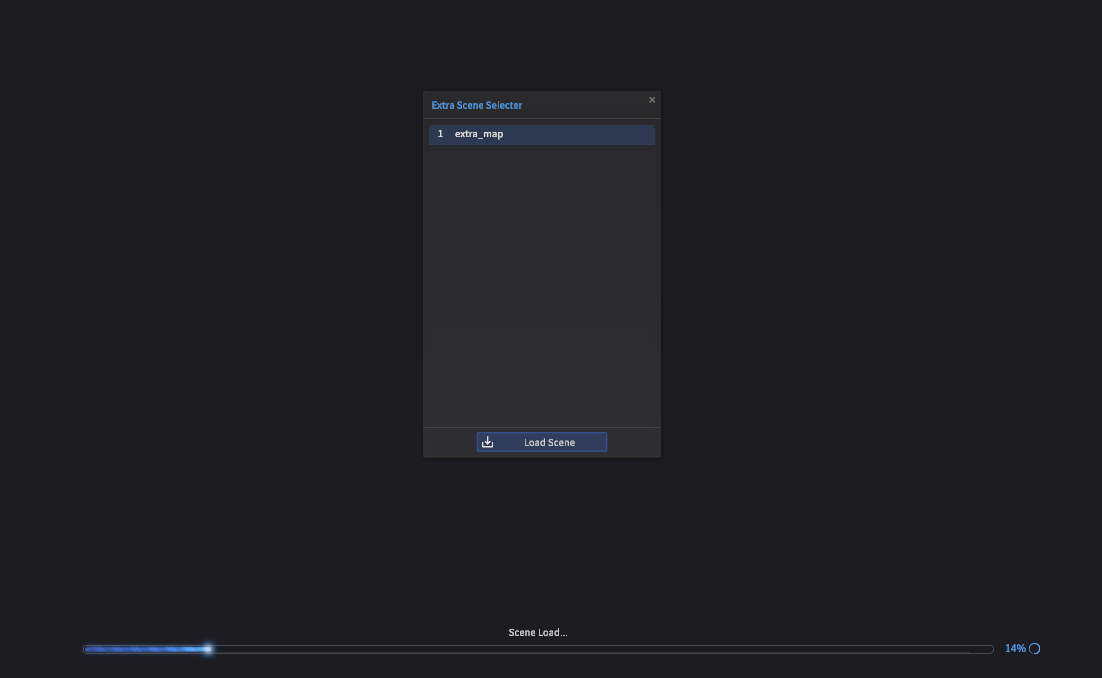
The Extra Scene Selector window appears on the simulator loading screen, as shown below. Select the custom map you created (Example: extra_map) and click Load Scene.
After running the simulator, you can see the Custom Map is loaded properly as shown below.

Copyright © MORAI Inc. 2023 All rights reserved.